
Would you like to know when your Windows system was installed for maintenance purposes or just out of curiosity? Knowing when Windows was installed can help you better plan updates, assess the life of your system or simply check technical information about your computer.
As a computer technician, knowing the installation date of the Windows operating system can be useful for diagnosing certain problems, assessing system stability or checking device compliance. Here’s how to obtain this and other useful data from Windows Terminal.
How can I find out the installation date of a Windows PC?
- Recover installation date from command prompt
- Find the Windows installation date with PowerShell
- Why know the Windows installation date?
Recover installation date from command prompt
- Click on the Start menu, type cmd, then press Enter.
Enter the following command at the command prompt:
systeminfo
Wait a few seconds for the command to generate a full report containing system information.
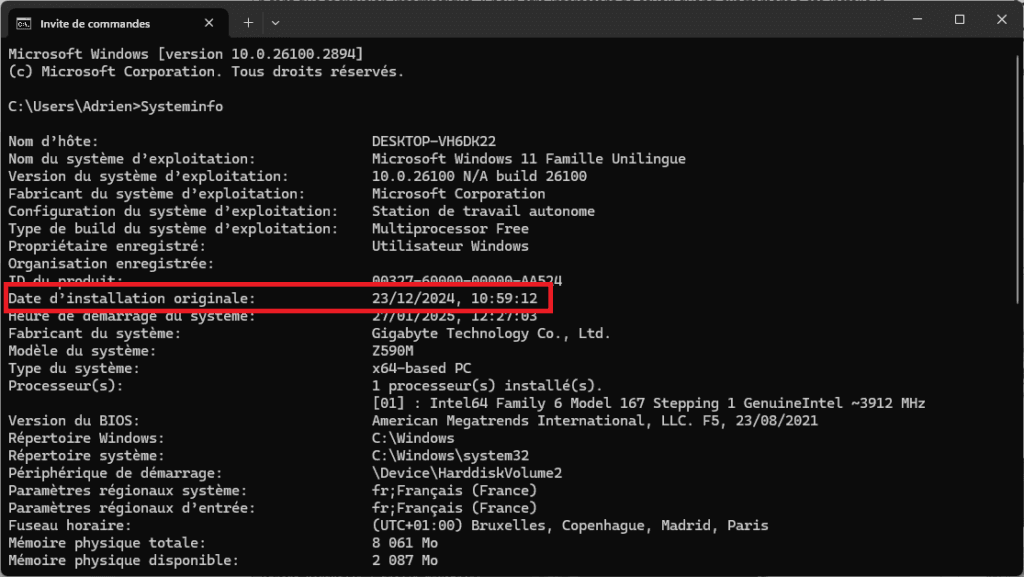
In the report, look for the line Original installation date: This line shows the exact date on which Windows was installed on the device.
Retrieve installation date only
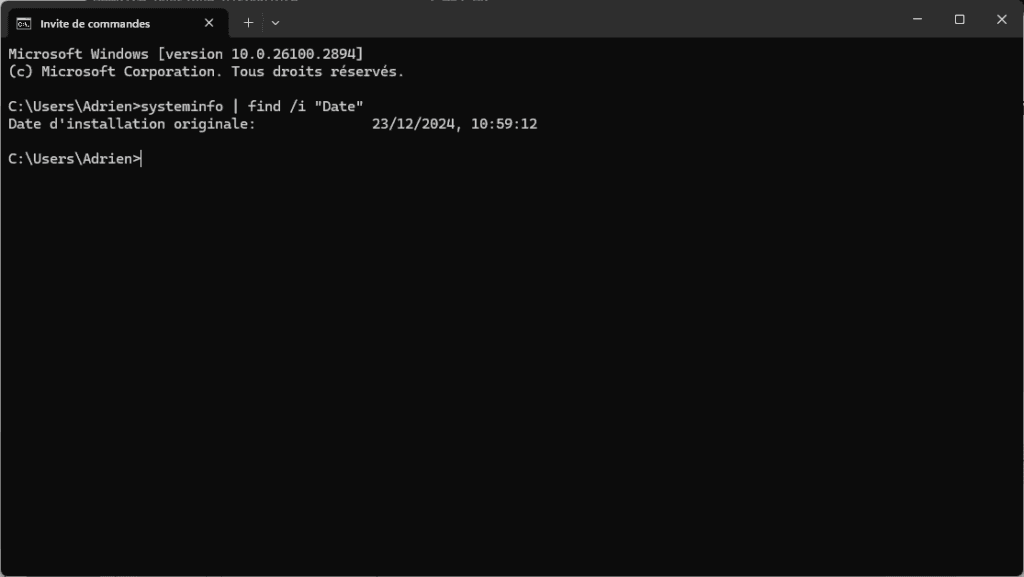
To simplify the result and display only the installation date, use the following command:
systeminfo | find /i "Date"
This command filters the results to keep only those lines containing the word “Date”.
This tip is compatible with all versions of Windows 11/10. It may also work on earlier versions, although the display may differ slightly.
See also how to create a bootable USB key to install Windows 11 cleanly.

Find the Windows installation date with PowerShell
PowerShell is the most reliable tool for finding out the exact installation date of Windows. Unlike the command prompt, it queries system information directly via WMI (Windows Management Instrumentation), guaranteeing instant, accurate results, even on the most recent versions of Windows 10 and Windows 11.
- To get started, open PowerShell in administrator mode.
- Enter the command below, then press Enter:
(Get-CimInstance Win32_OperatingSystem).InstallDate
PowerShell then displays the system installation date.
The advantage of this method is that it’s fast, universal and requires no additional software. You get the exact date on which Windows was installed on your PC, a simple way of finding out how long your system has been running without reinstallation.
Why know the Windows installation date?
Knowing how long Windows has been installed allows you to assess the overall health of a system. Over time, a computer accumulates updates, software residues and temporary files that can impair performance. Knowing this date therefore helps determine whether the system needs a simple optimization or a complete reinstallation to get off to a clean start.
It’s also essential information prior to any technical intervention or sale of a used PC. A technician will use it to measure the age of the system and anticipate possible instabilities. In the case of a purchase, it can be used to check whether the system has been recently reinstalled or is still running on an older version.
Did you find this article helpful?
Share it so others can benefit from it.
Learn more about the author
