A simple movement of the mouse and the Windows 11 widget panel appears, occupying part of the screen and disrupting navigation. For those who don’t use them or find this involuntary opening annoying, there are several ways of disabling this feature or removing widgets from the system altogether.
How do I uninstall the widget panel on Windows 11?
- The widget panel: a Windows-integrated information center
- Disable Widgets icon from taskbar settings
- Permanently uninstall widgets with PowerShell
- Reinstalling Windows widgets from the Microsoft Store
The widget panel: a Windows-integrated information center
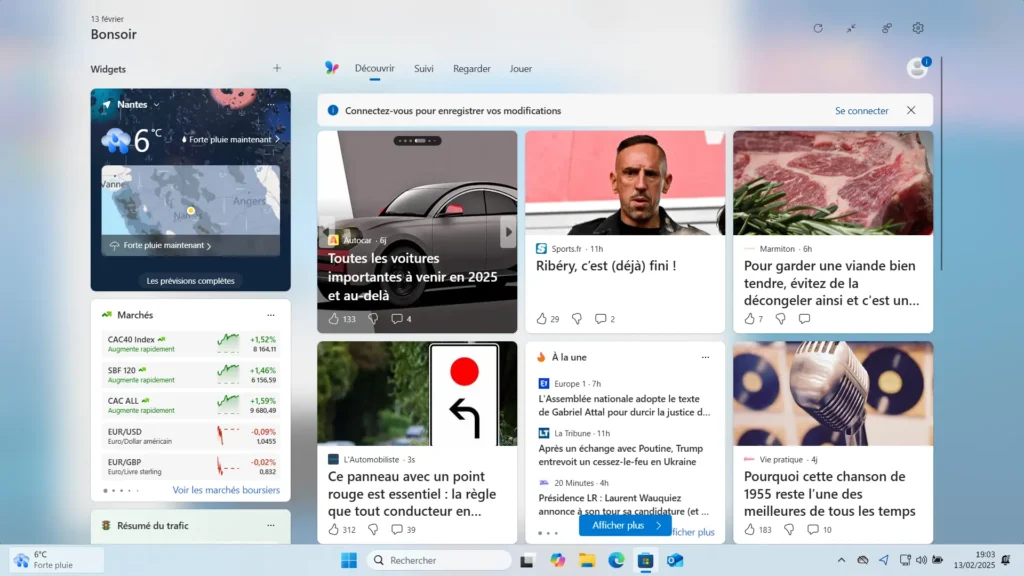
With Windows 11, Microsoft has introduced a widget panel that centralizes a variety of information to provide quick access to news, weather, financial markets and other services. This panel can be accessed via a dedicated icon in the taskbar or via a keyboard shortcut(Win + W). The aim is to give users instant access to relevant information without having to open a web browser or third-party application.
The widgets displayed vary according to the user’s preferences and the services integrated into their Microsoft account. Typical widgets include :
- Real-timeweather and local atmospheric conditions.
- News selected by the Microsoft News algorithm according to your preferences.
- Sports results to follow the live scores of your favorite team.
- Financial markets with stock market indices and economic analyses.
- A synchronized calendar that displays Outlook events and reminders from Microsoft To Do.
- Other practical tools include a traffic summary and quick notes.
The panel’s operation is based on Microsoft Edge WebView2, an engine that enables interactive content to be displayed directly in the Windows interface without the need for an external browser.
A feature designed to keep users loyal to the Microsoft ecosystem
Microsoft didn’t include these widgets by chance. Their introduction reflects a strategic desire to encourage the use of the company’s services and to limit users’ dependence on competing solutions. Unlike Windows 7 widgets, which were simply local mini-applications, Windows 11 widgets are largely connected to Microsoft’s online services.
While Windows 11’s widgets may suit users who appreciate quick access to information, they are perceived as unnecessary, even annoying, by those who prefer a more sober working environment. The absence of a complete deactivation option, and the way in which Microsoft imposes this feature, reinforces this frustration.
Disable Widgets icon from taskbar settings
By default, the widget icon is displayed in the Windows 11 taskbar, providing quick access to the widget panel. If you no longer wish to see this icon, and want to prevent it from being opened accidentally, here’s how to hide it:
- Open Windows Settings by pressing Win + I.
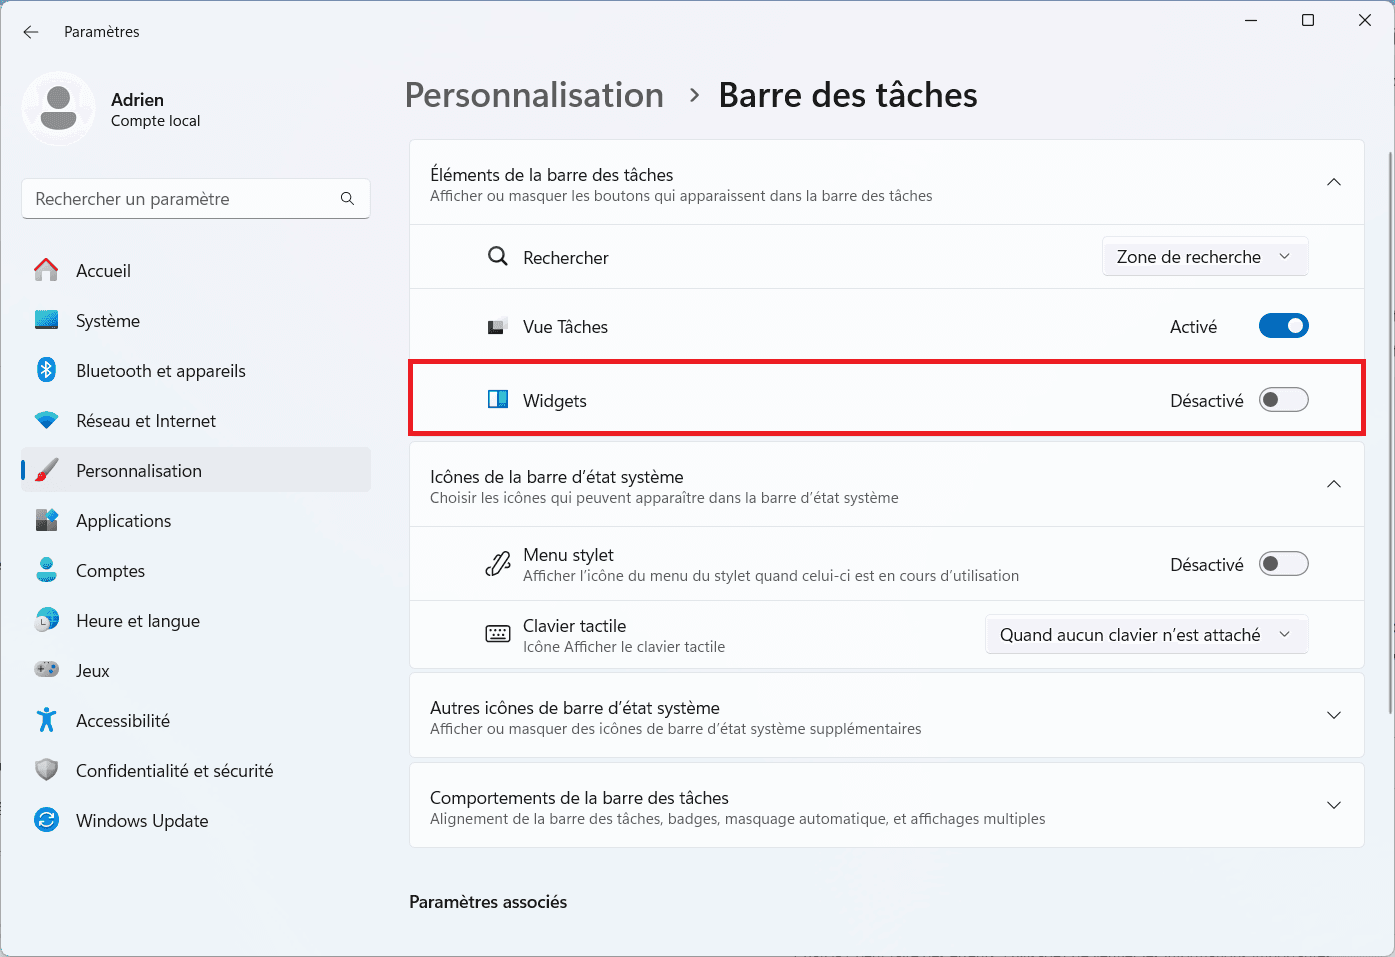
- Go to Personalization > Taskbar.
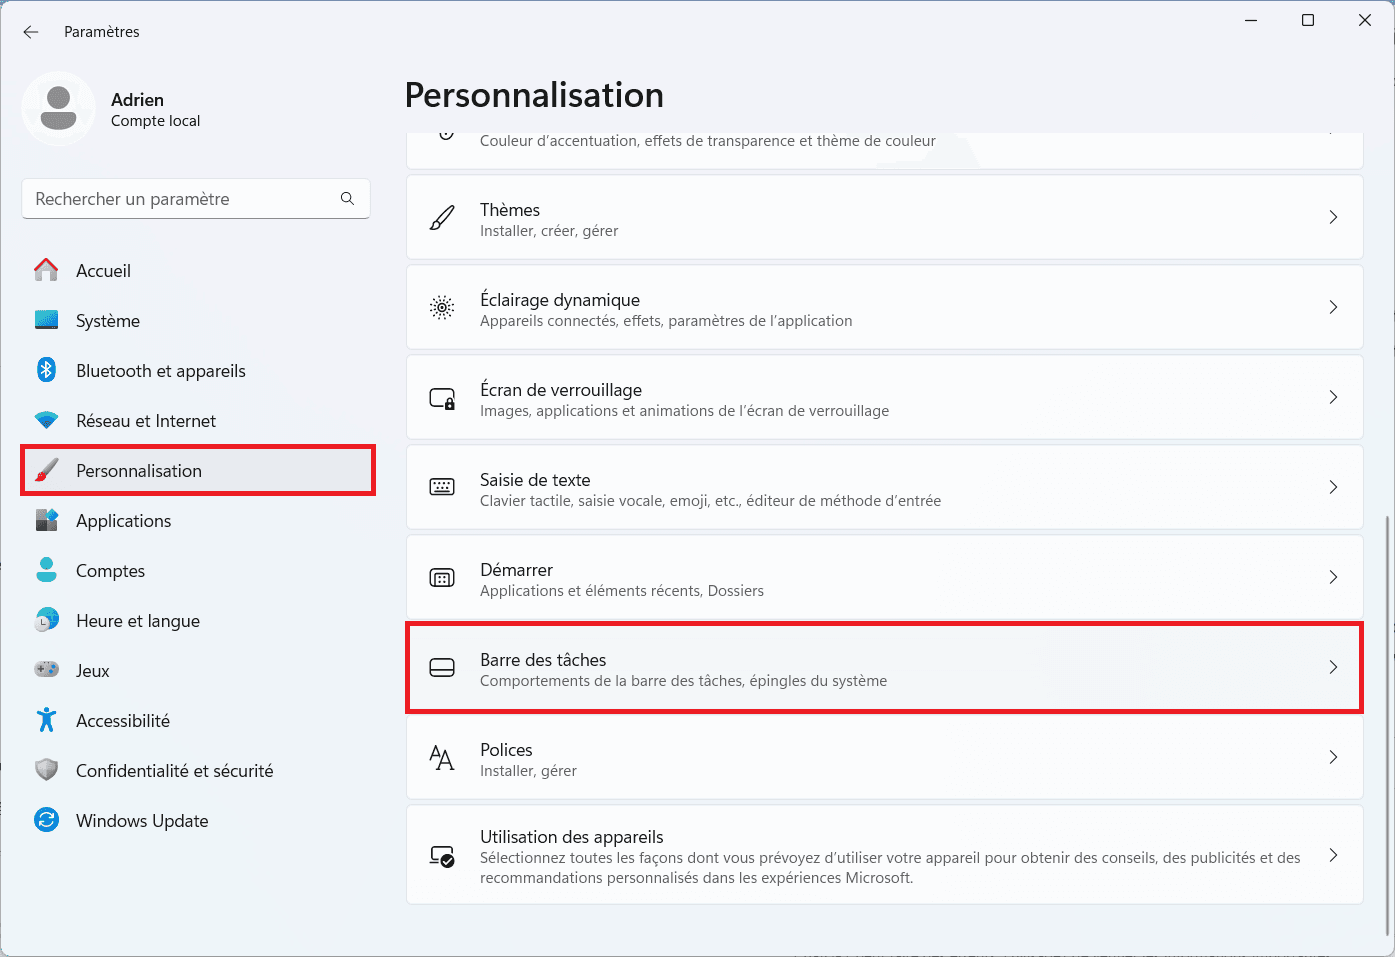
- In the Elements section of the taskbar, search for Widgets and deactivate the switch to hide the icon.
This hides the widget icon, but does not completely deactivate them. They continue to function in the background, and can still be opened using the Win + W keyboard shortcut.

Permanently uninstall widgets with PowerShell
For those wishing to completely uninstall Windows 11 widgets, it is necessary to remove the Windows Web Experience Pack which is responsible for their operation. Windows 11 widgets are not a stand-alone application, but part of a set of services integrated into the system. They are directly linked to the Windows Web Experience Pack, an essential component for the display of certain interactive content in Windows 11.
Windows 11 does not allow widgets to be uninstalled directly from Settings. You must therefore use PowerShell to remove the corresponding package.
- Start by opening PowerShell in administrator mode.
- Right-click on the Start button and select PowerShell (Admin).
- Run the following command to delete the widgets:
Get-AppxPackage *WebExperience* | Remove-AppxPackage- Wait for the process to finish, then restart your computer to apply the changes.
After this deletion, the widget panel will no longer function and cannot be opened, even via the Win + W shortcut.
Reinstalling Windows widgets from the Microsoft Store
If you’ve uninstalled the widgets but want to get them back, you can reinstall them via the Microsoft Store.
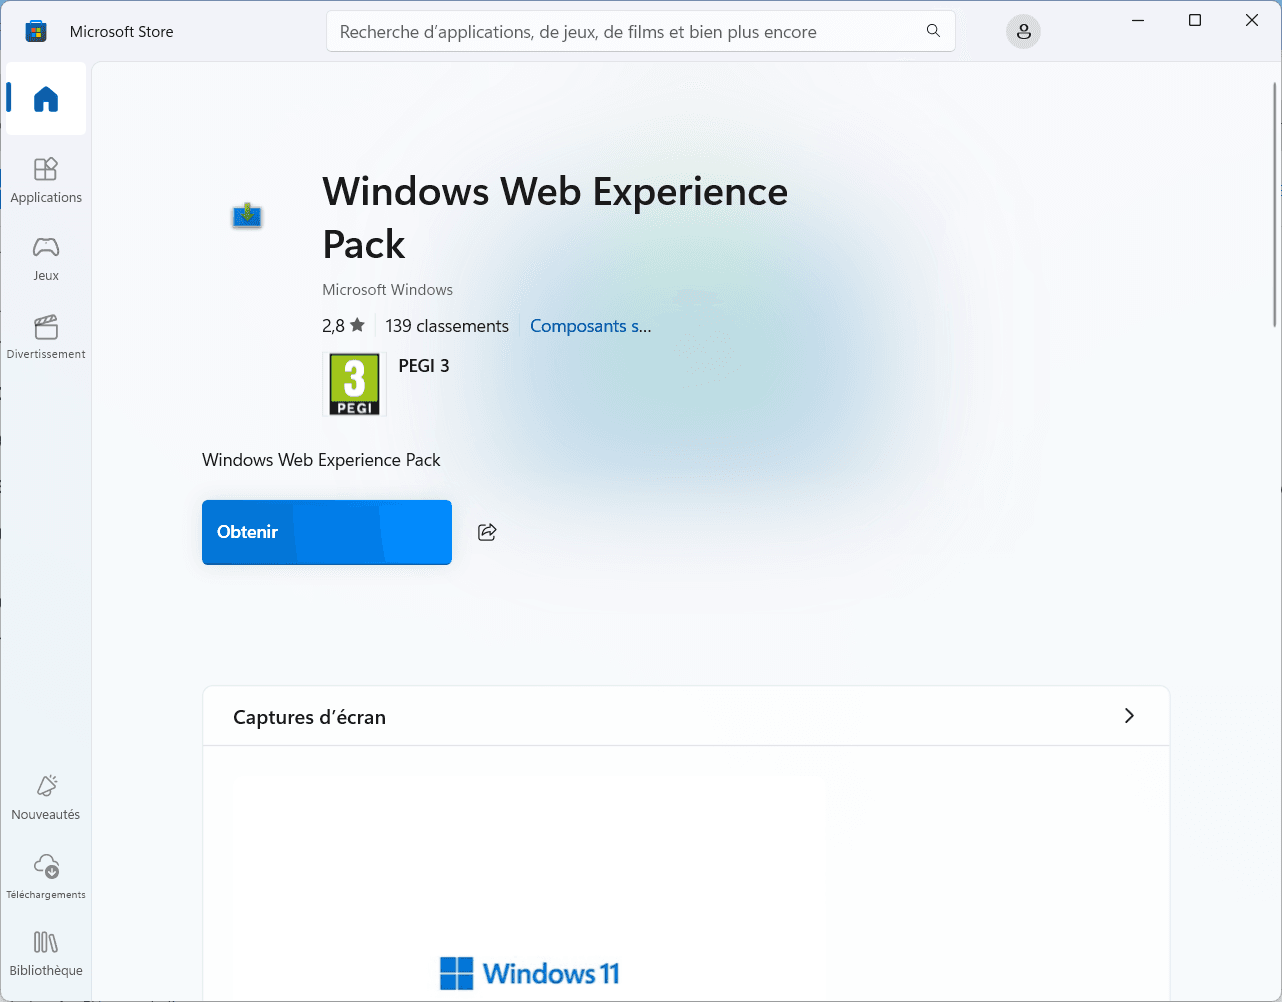
- Visit the Microsoft Store to download the Windows Web Experience Pack.
- Click on Get, then wait for the process to finish.
- Once installation is complete, restart your computer.
After reinstallation, the widget panel will be functional again, and can be opened via Win + W or the taskbar icon.
Did you find this article helpful?
Share it so others can benefit from it.
Learn more about the author
