A faulty fan can quickly cause the processor or graphics card to overheat. Replacing this part is a simple and straightforward procedure. In this tutorial, we’ll show you how to dismantle a laptop, disconnect the fan module, replace the thermal paste and reassemble the unit safely.
How to replace a laptop fan?
- 1. Safely removing the cover from a laptop
- 2. Disconnect battery (safety first)
- 3. Locate and remove the laptop fan
- 4. Order a compatible fan
- 5. Installing the new fan on your PC
- 6. Reassembling your PC after changing the fan
- A new fan for a cooler laptop
1. Safely removing the cover from a laptop
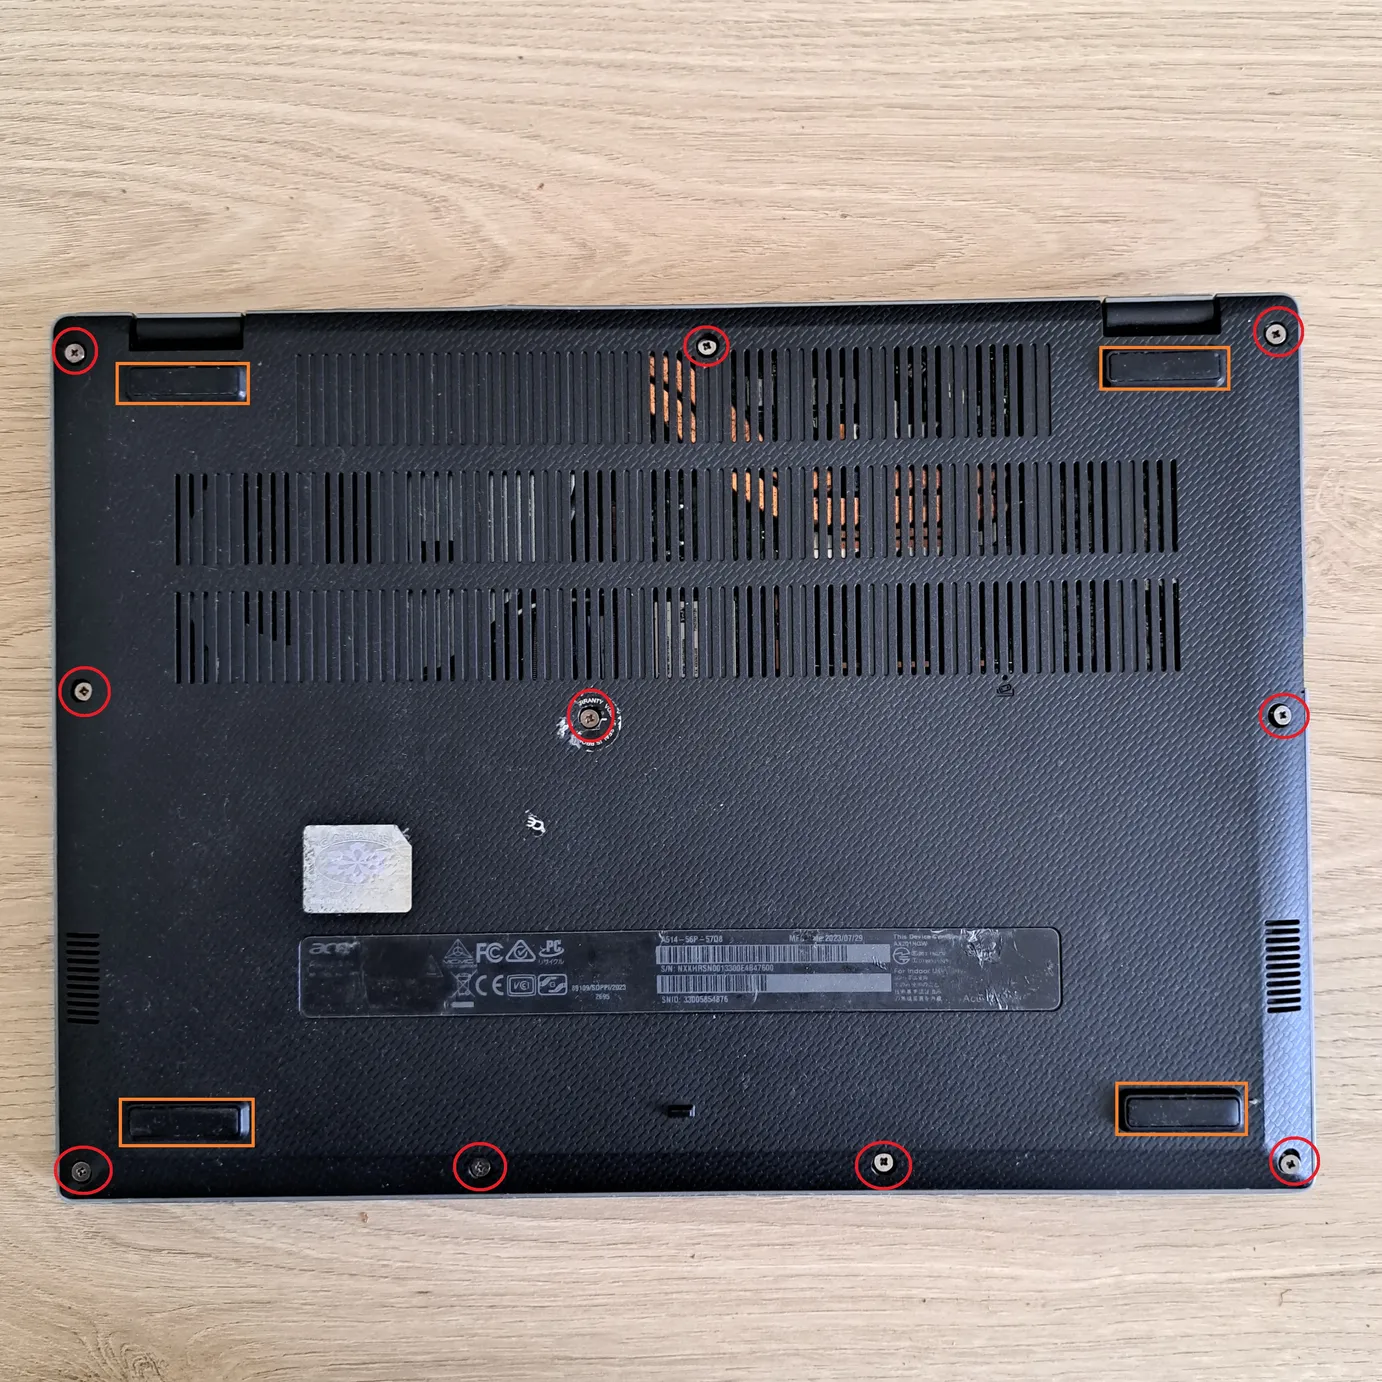
Before starting any work, switch off the PC completely and disconnect it from the mains. Place the unit upside down on a flat surface, preferably covered with a soft cloth to avoid scratches. Using a precision screwdriver, remove all visible screws from the back of the chassis: some screws may be hidden under the rubber pads, so check them before forcing.
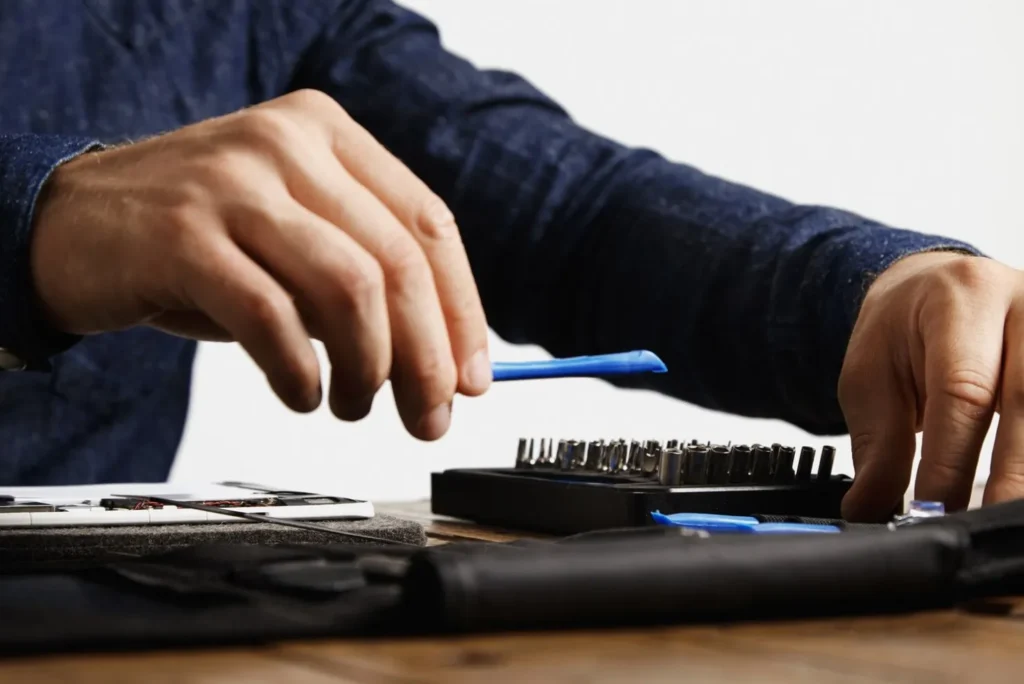
Once the screws have been removed, gently insert a pick or plastic tool into the junction between chassis and shell. Gently lever around the case to unclip the fasteners without damaging the plastic. The bottom cover lifts off without resistance, giving you access to the battery, fan and rest of the cooling system.
2. Disconnect battery (safety first)
Before touching any internal component, it is essential to disable all power supplies. Locate the battery cable connected to the motherboard by a small multi-pin connector. Using a plastic tool or your fingers, gently disconnect this cable without pulling on the wires.

This precaution prevents accidental short-circuiting when removing the fan or heat sink. Once the battery has been isolated, you can continue working safely.
3. Locate and remove the laptop fan
Once the cover has been removed and the battery disconnected, locate the laptop’s fan. It’s usually located near the heat sink, identifiable by its copper ducts connected to the processor. Start by carefully disconnecting the small fan power cable connected to the motherboard.
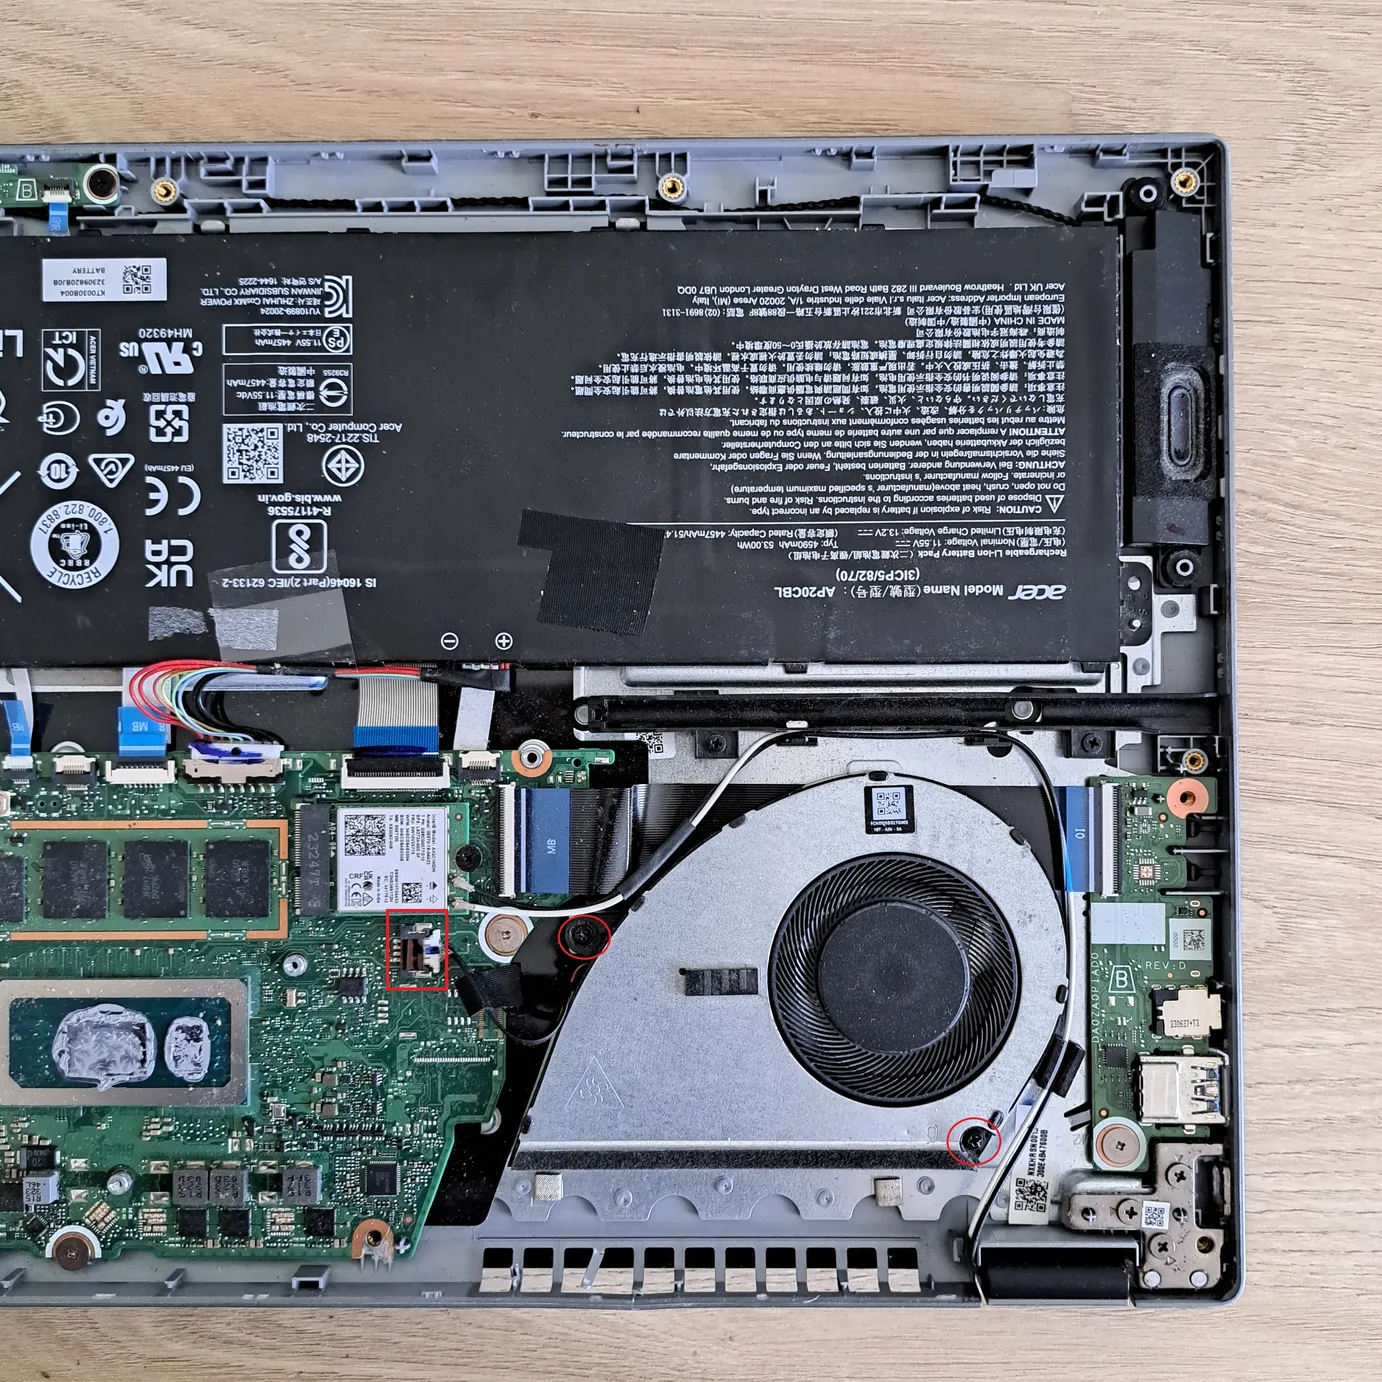
Using a precision screwdriver, remove the screws that hold the fan in place. Lift it carefully, without forcing it, to avoid damaging the fins or surrounding cables. You can then remove it entirely from the chassis for cleaning, or replace it with a new model.
4. Order a compatible fan
To find a fan compatible with your notebook, start by entering your exact model number (e.g. Asus FX505DV). Enter this reference in the field below, then click on Search. You’ll be automatically redirected to Amazon, where the results will show fans suitable for your device.
This method allows you to immediately identify compatible parts.
5. Installing the new fan on your PC
Place the new fan exactly where the old one was, aligning the mounting points and air outlet correctly. Tighten the retaining screws without overtightening, to avoid damaging the chassis or threads. Then reconnect the fan’s power cable to its original connector, ensuring that it is firmly seated.
5.1. Cleaning the cooling system
Before refitting the new fan, take advantage of the opening to carry out a thorough cleaning of the cooling system. Using a compressed-air canister, remove the dust accumulated on the fins, radiator and inside of the fan. This will improve air circulation and considerably reduce the risk of overheating.
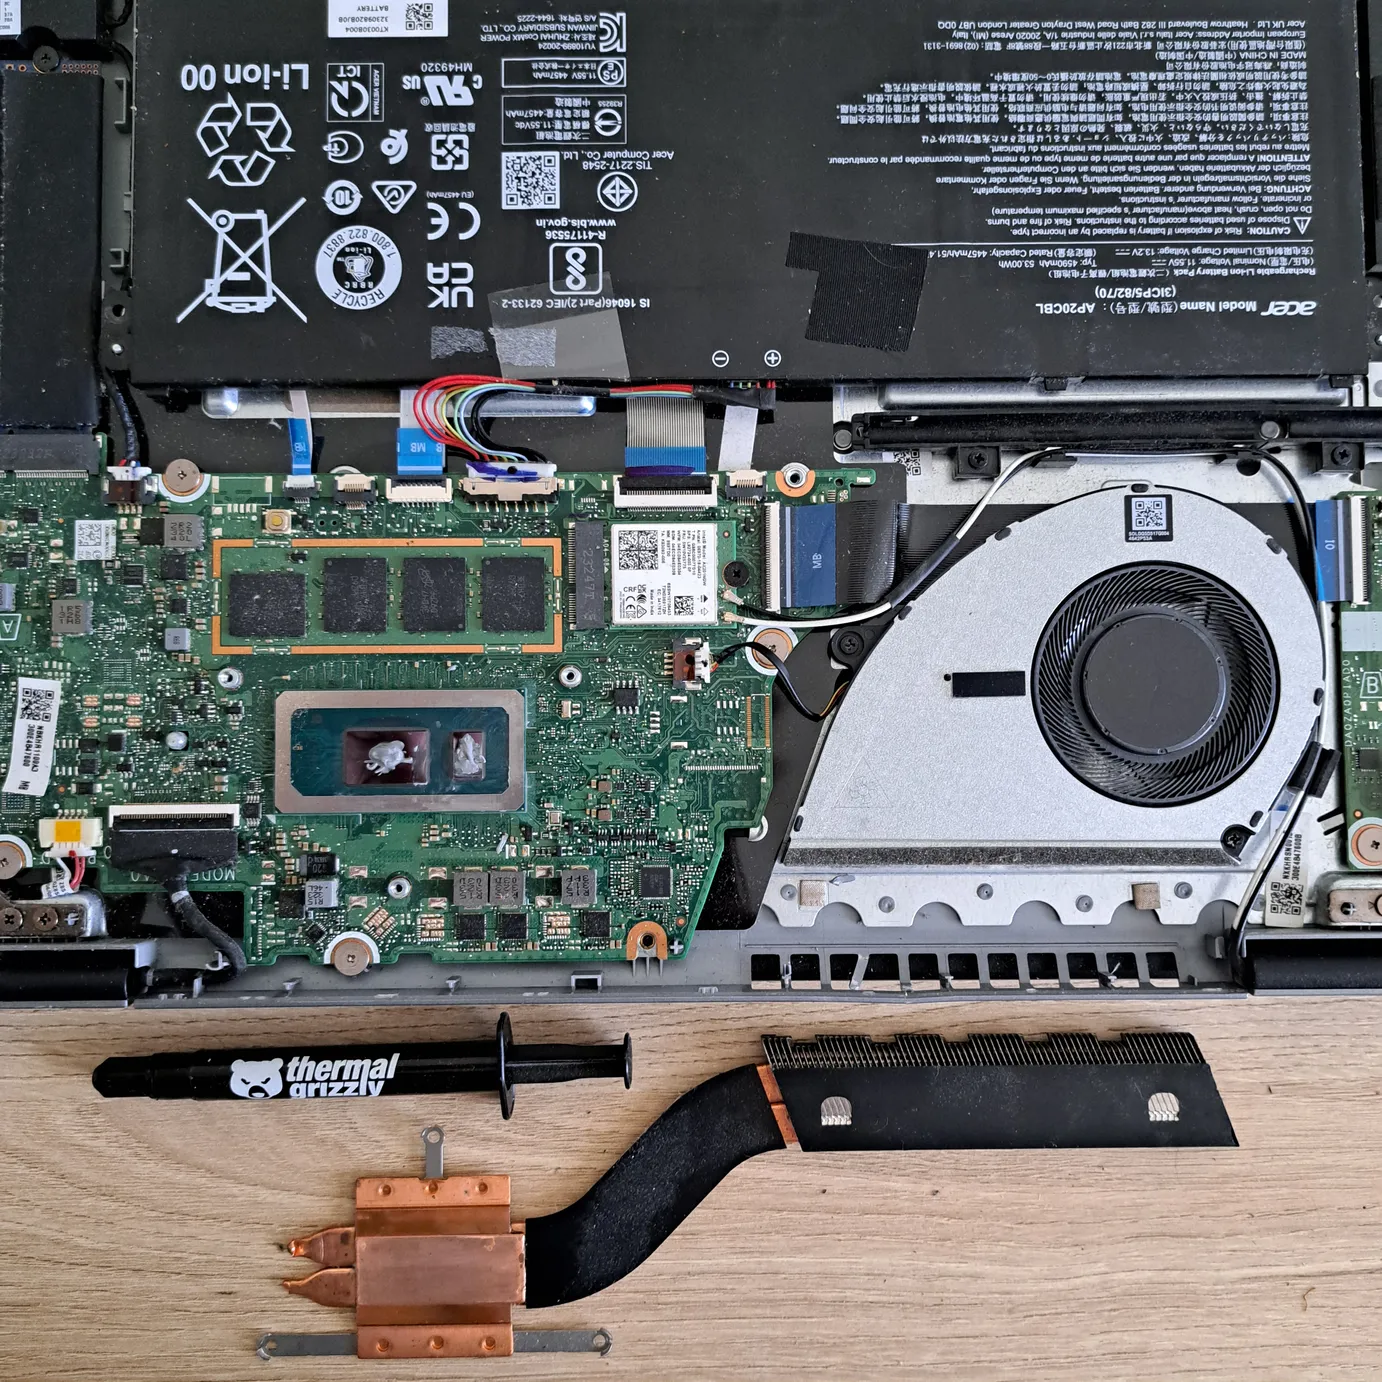
If you’ve dismantled the heatsink, carefully wipe off any old traces of thermal paste from the processor and heatsink base, using a soft cloth lightly soaked in isopropyl alcohol. Then apply a thin dab of new paste to the center of the processor. The pressure exerted when reassembling the heatsink will ensure even distribution and optimum heat transfer.
Discover our comparison of the best thermal pastes.
6. Reassembling your PC after changing the fan
Once the fan is in place, reconnect the battery cable to the motherboard. Then gently snap the bottom cover back into place around the chassis, and tighten all the screws removed during disassembly. Take the time to check that each screw is back in its original position, to ensure a stable, tension-free closure on the shell.
Switch on the PC and make sure the fan starts up normally. You should hear a slight hiss as soon as you switch it on. To confirm that it’s working properly, you can use a temperature monitoring tool for Windows, which displays processor and system temperatures in real time. If everything is stable, your replacement has been successful.
A new fan for a cooler laptop
Replacing the fan on a notebook PC requires a certain amount of care, but is an operation that can be carried out by any careful user. Once the cover has been removed, the battery disconnected, the cooling system cleaned and a new fan installed, all that’s left to do is check that everything’s working properly.
A quiet fan, new thermal paste and an unobstructed air circuit can significantly reduce processor temperature and improve system stability. Regular cooling maintenance extends the life of your computer and prevents overheating-related breakdowns.
Did you find this article helpful?
Share it so others can benefit from it.
Learn more about the author
