
Think you need to wipe everything to fix your PC? Not so fast. Windows has a built-in reset function that can restore your system to its original state without touching your personal documents. Whether your computer is slow, unstable or infected, this method allows you to start afresh without losing your files. Here’s a clear, step-by-step explanation, accessible to everyone. In this guide, we show you how to use the “Keep my files” option to repair your system in just a few clicks.
How to reset Windows without losing my files from Settings
- Windows Reset: a quick solution without data loss
- Open update settings
- After a Windows reset: how do you recover your deleted software?
- Delete Windows.old folder after reset
Windows Reset: a quick solution without data loss
The “Reset this PC” function with the “Keep my files” option enables you to reinstall Windows without deleting your personal documents. It deletes applications and restores factory settings, while preserving files in user folders (Documents, Desktop, Images, etc.). It’s a quick and easy way to get a clean start in the event of slowness, bugs or system errors, without having to back up everything or use external installation media.
To work properly, this reset requires sufficient disk space. It can be performed locally or by downloading a Windows image from the cloud. At the end of the process, a report lists deleted software to facilitate reinstallation.
Technical specifications and system requirements Reset Windows without losing your files :
- Microsoft requires a minimum of 64 GB of total available space
- The PC must be connected to the mains or have a fully charged battery, as a reset interrupted by a power cut can corrupt your system.
- This method does not reinstall proprietary software.
Open update settings
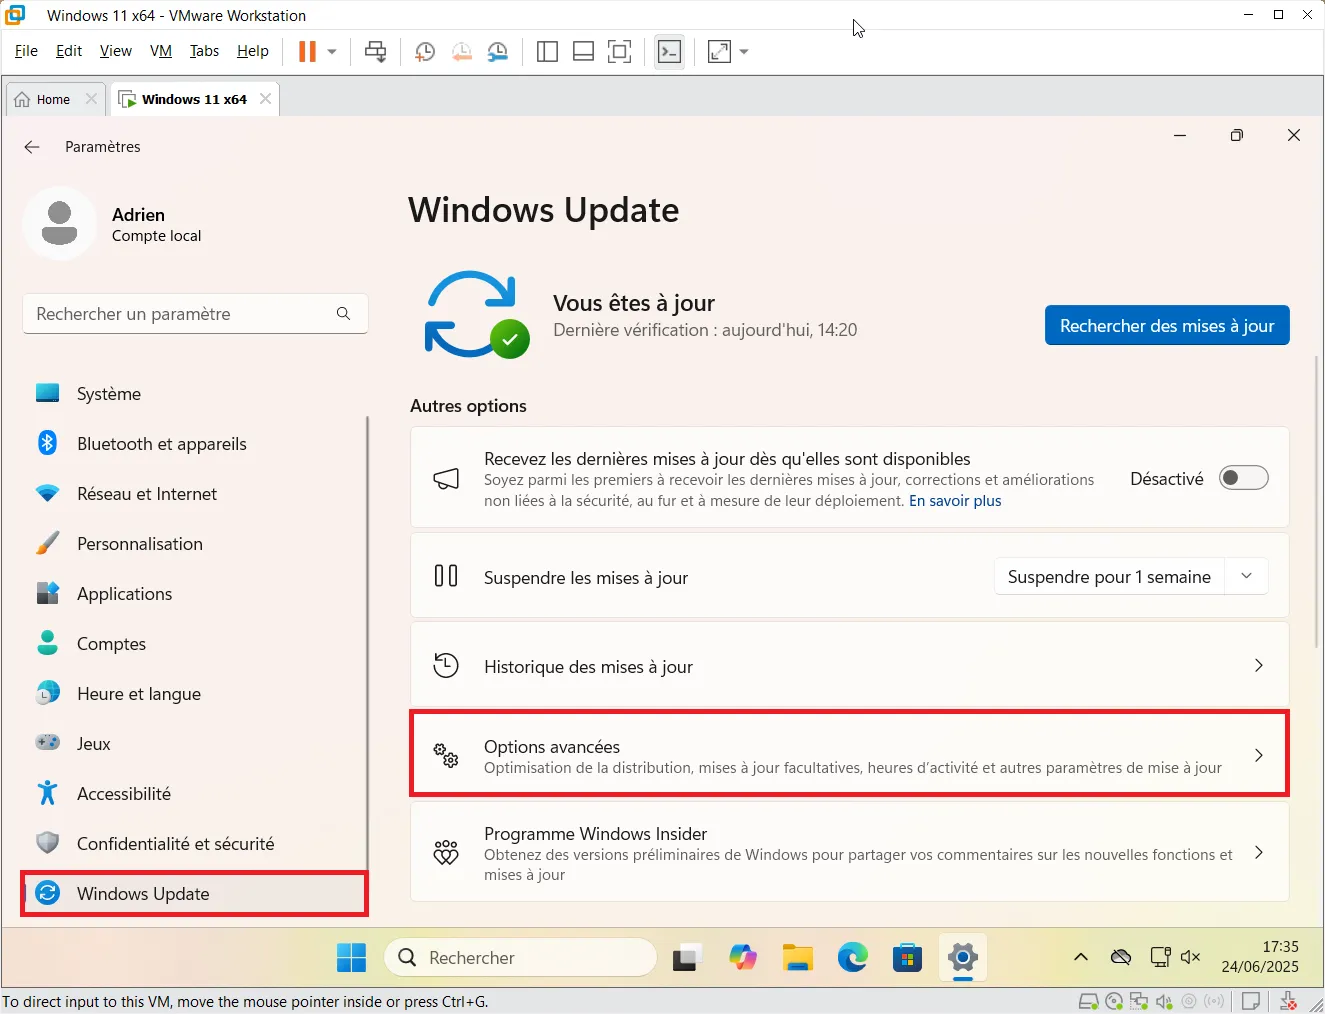
- Start by opening the Settings menu
(Windows + i), then click on Windows Update at the very bottom of the left-hand column. - In this section, click on Advanced options.
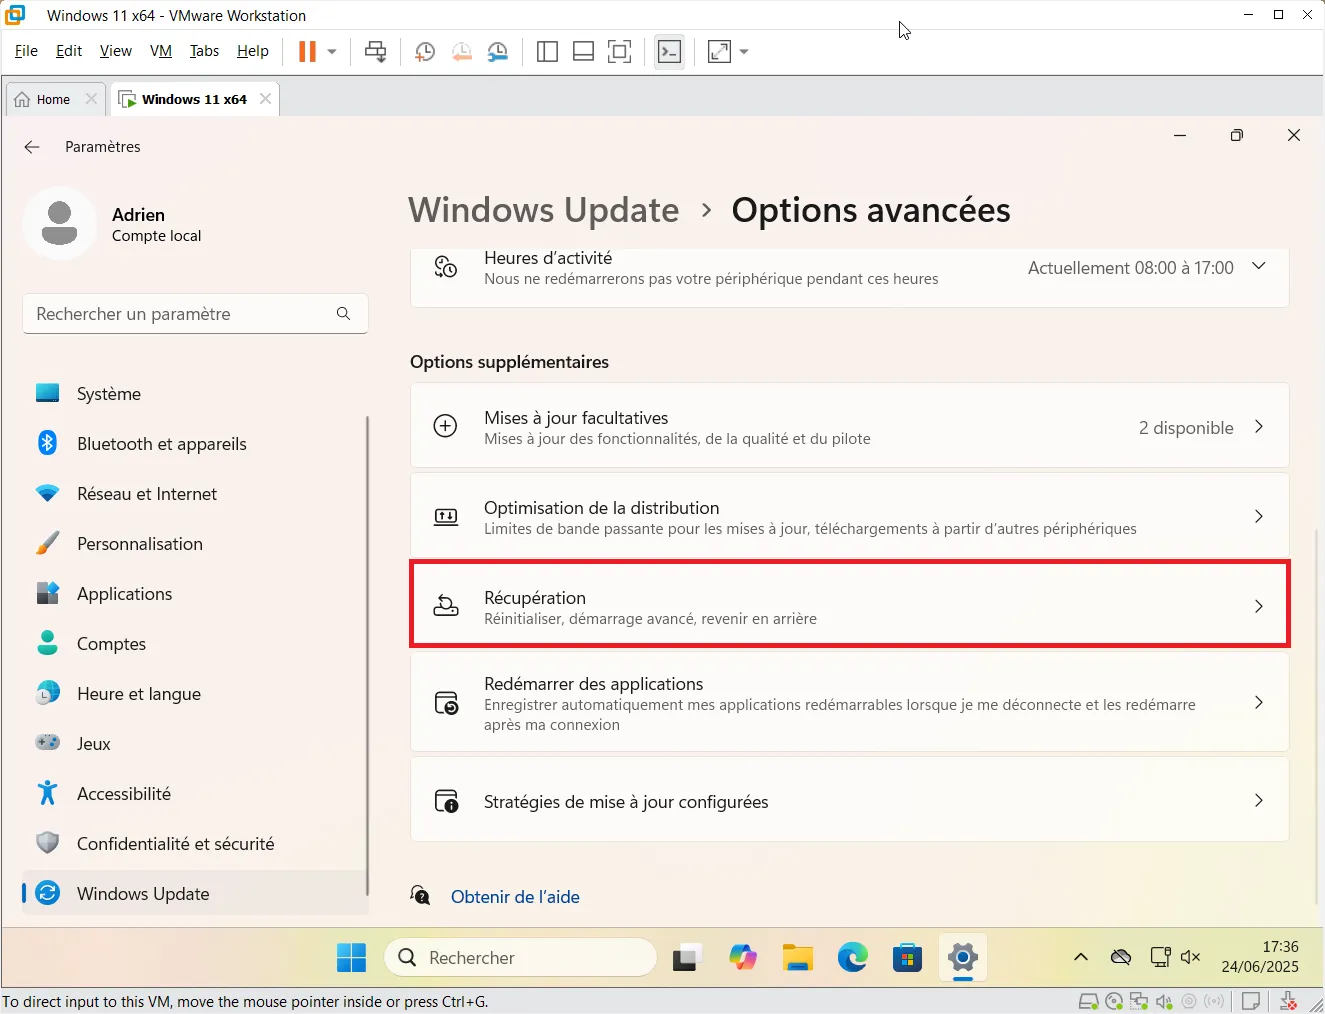
- In Advanced Options, scroll down and click on Recovery. This is where all the reset functions are hidden.
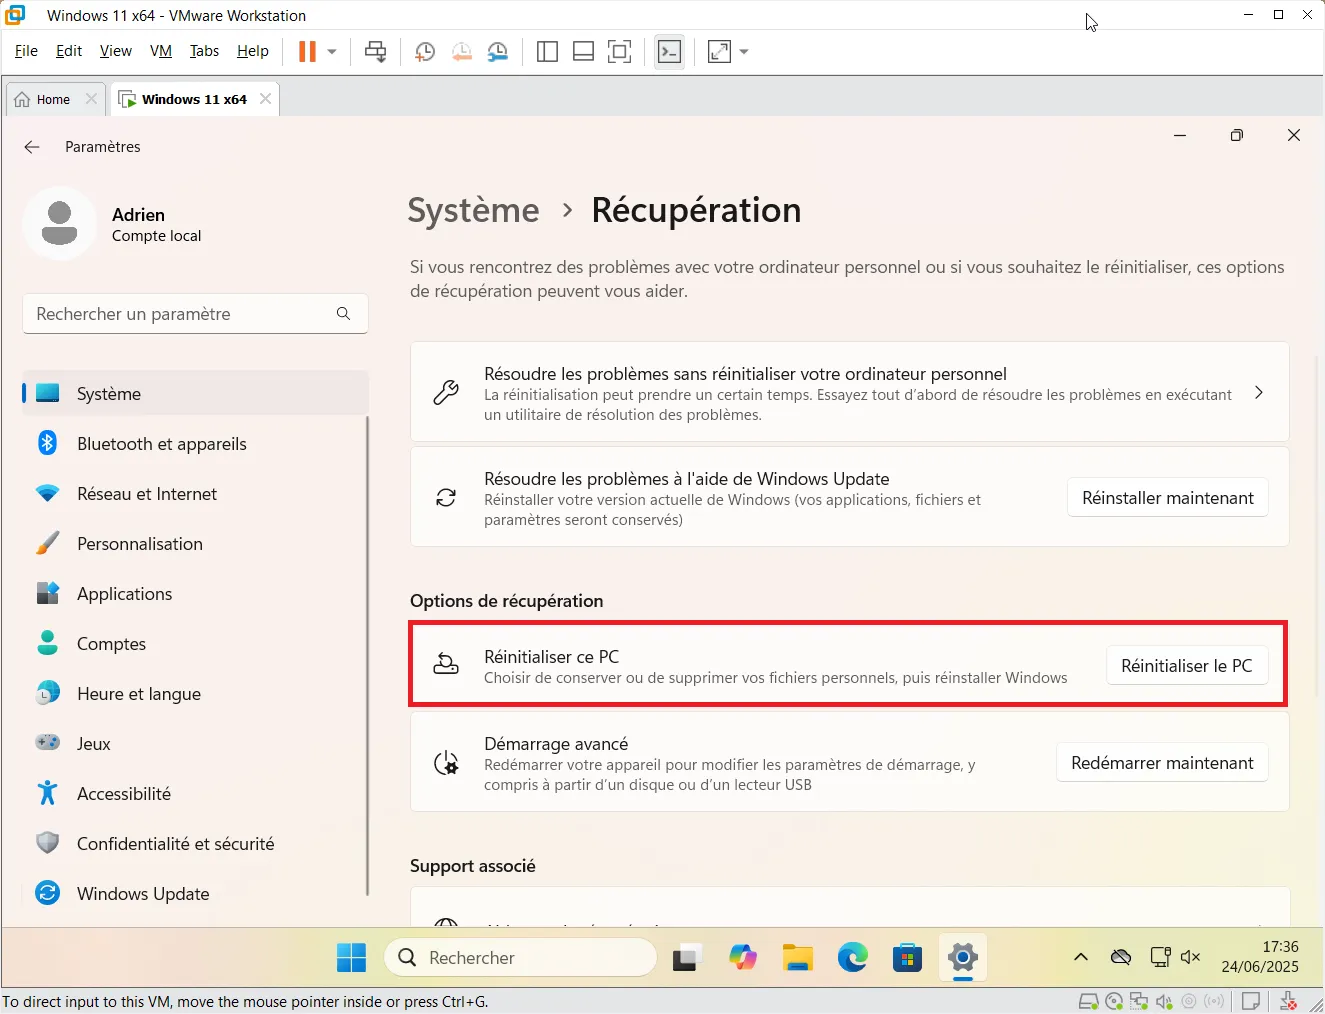
- In the “Recovery options” section, click on Reset PC. This opens a comprehensive step-by-step wizard.
- Click on Keep my files, and Windows will delete your installed applications and system settings, but keep your personal files (Documents, Photos, Music…).
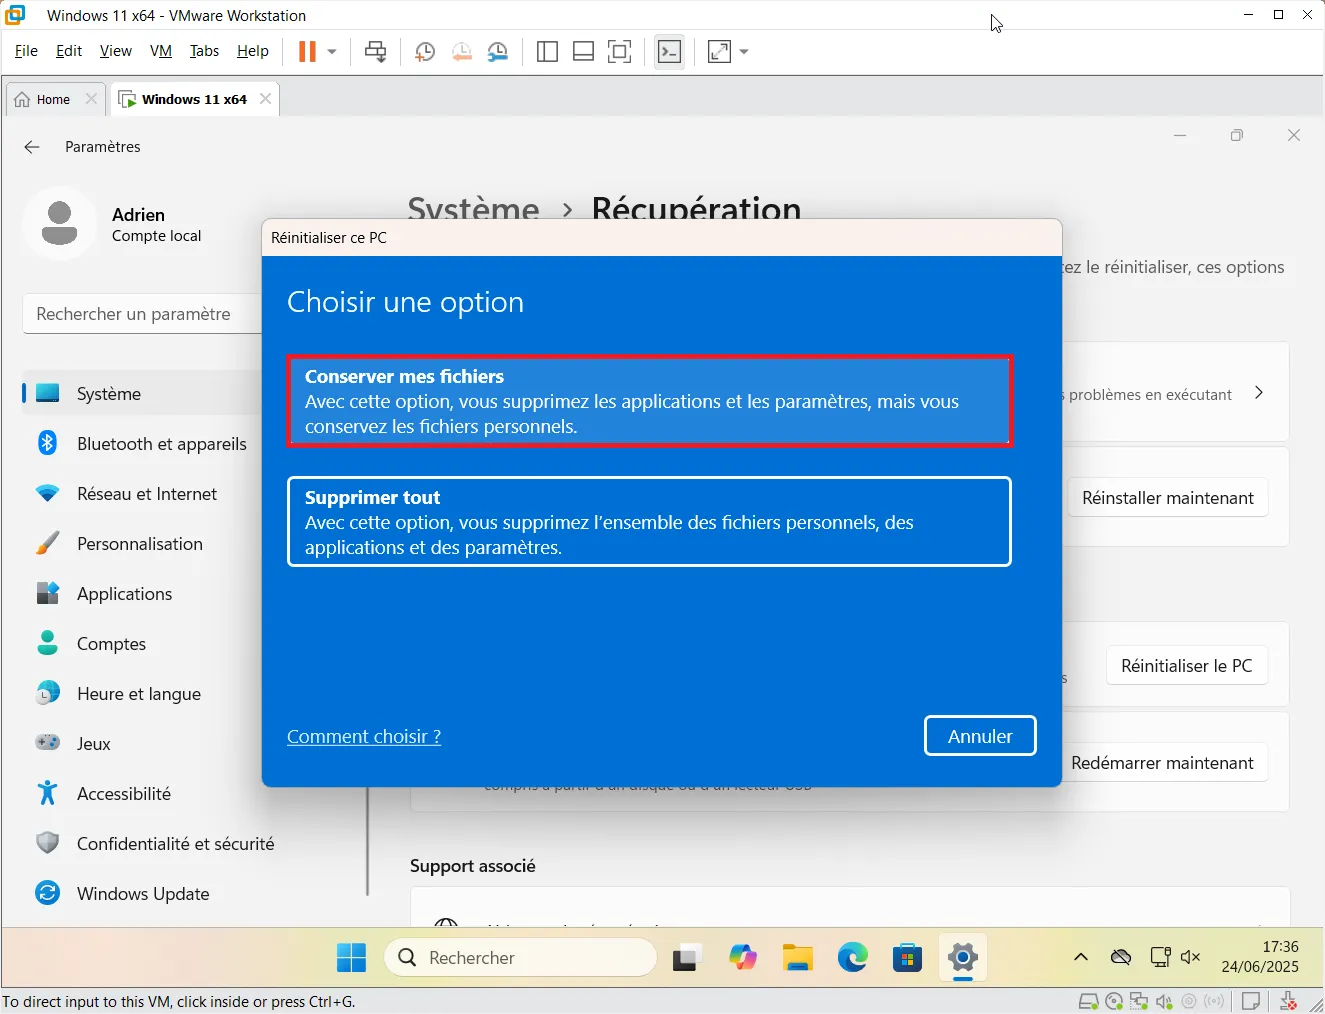
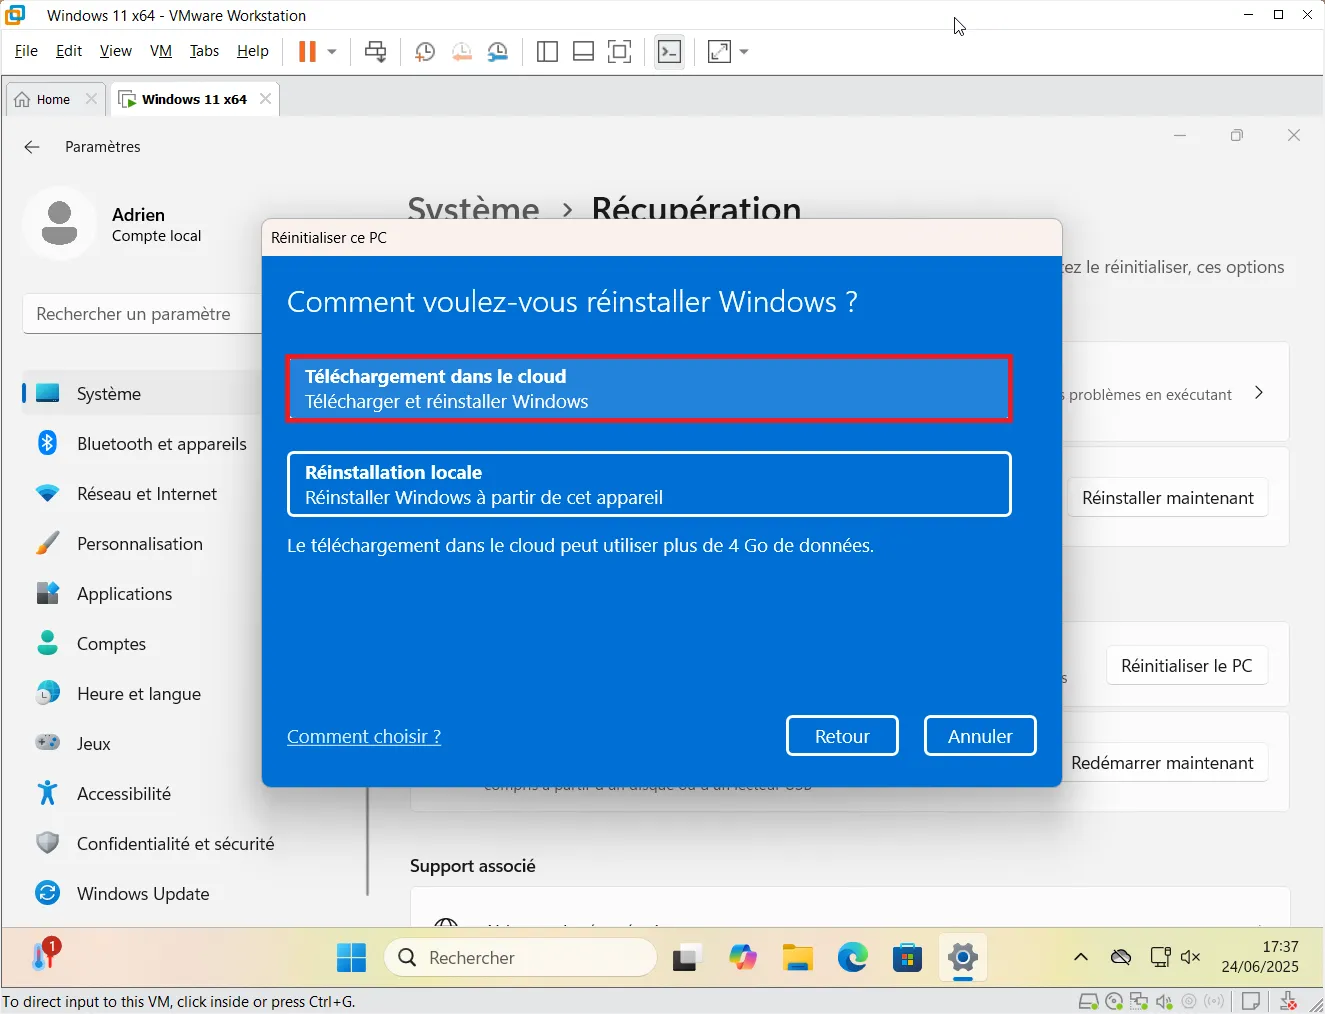
Two options are available:
- Cloud download (recommended): Windows will download a clean system image. Ideal if some system files are corrupt.
- Local reinstallation: Windows reuses files already present on the PC. Faster, but sometimes less reliable if your system is damaged.
- Choose Cloud download if you have a good connection.
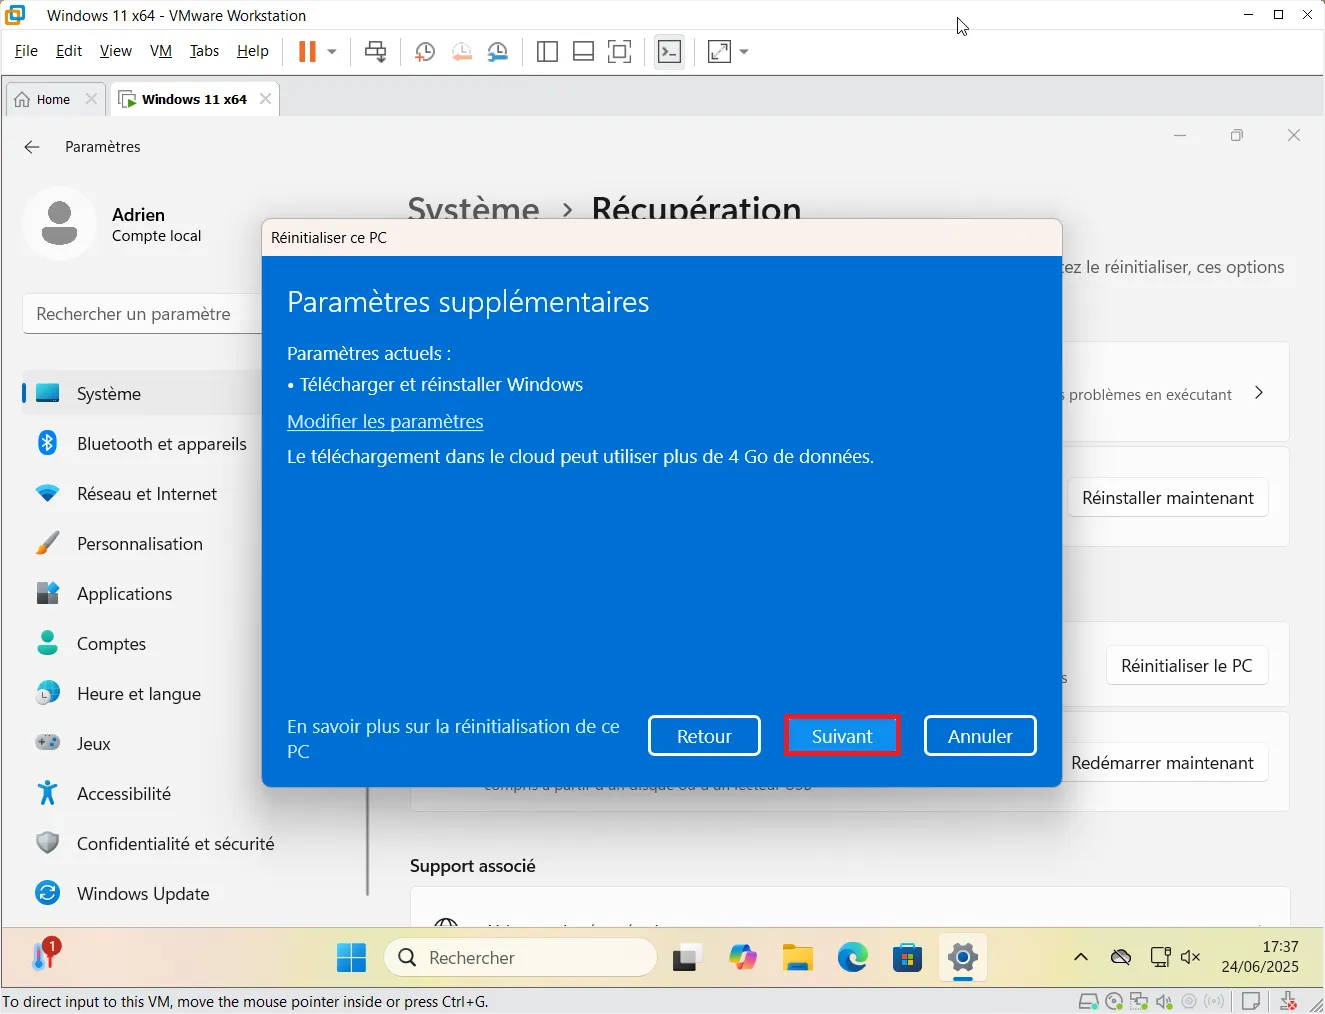
- A confirmation screen shows you your current choices (type of reinstallation, file retention, etc.). If everything is OK, click Next to continue.
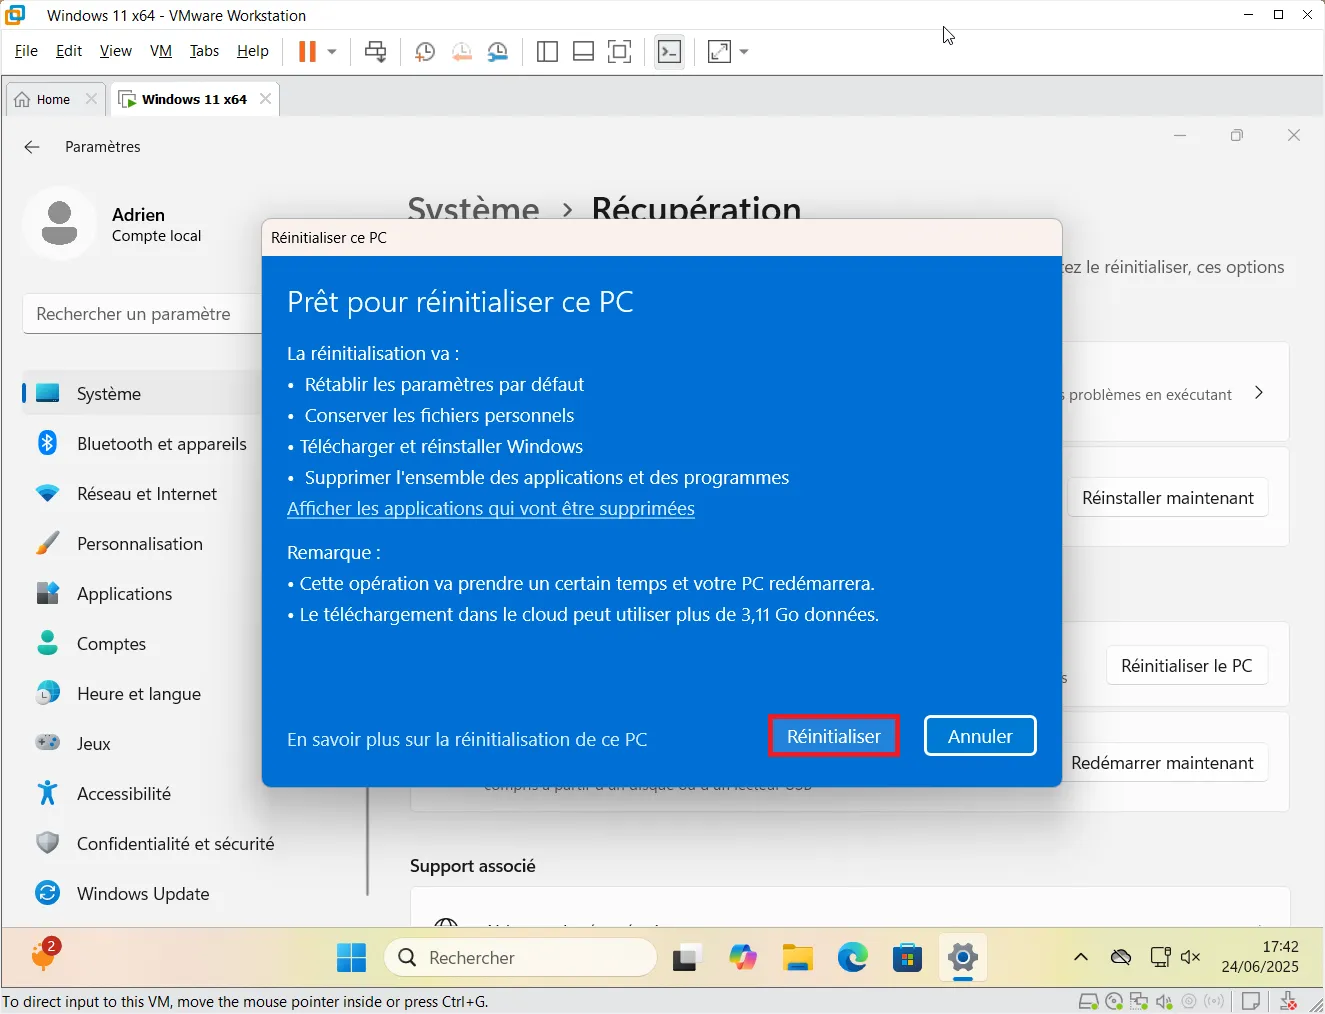
As a final check before launching, the recovery wizard summarizes that :
- Personal files will be kept,
- Installed applications will be deleted,
- Windows will be downloaded and reinstalled.
- Click on Reset to begin the process. Your PC will restart and the operation will take between 20 and 45 minutes.
Once the reset is complete :
- You’ll find your documents, photos and personal files exactly where they belong.
- Windows will be clean, fast and as good as new.
- A file on the desktop will list deleted software.

After a Windows reset: how do you recover your deleted software?
After a Windows reset, the system automatically generates a file entitled “Removed Applications”. This document, usually placed on the Desktop, contains the complete list of software uninstalled during the process. Unlike personal files, which are retained, all manually-installed applications (whether browsers, office suites or technical tools) are removed to start afresh on a clean slate.
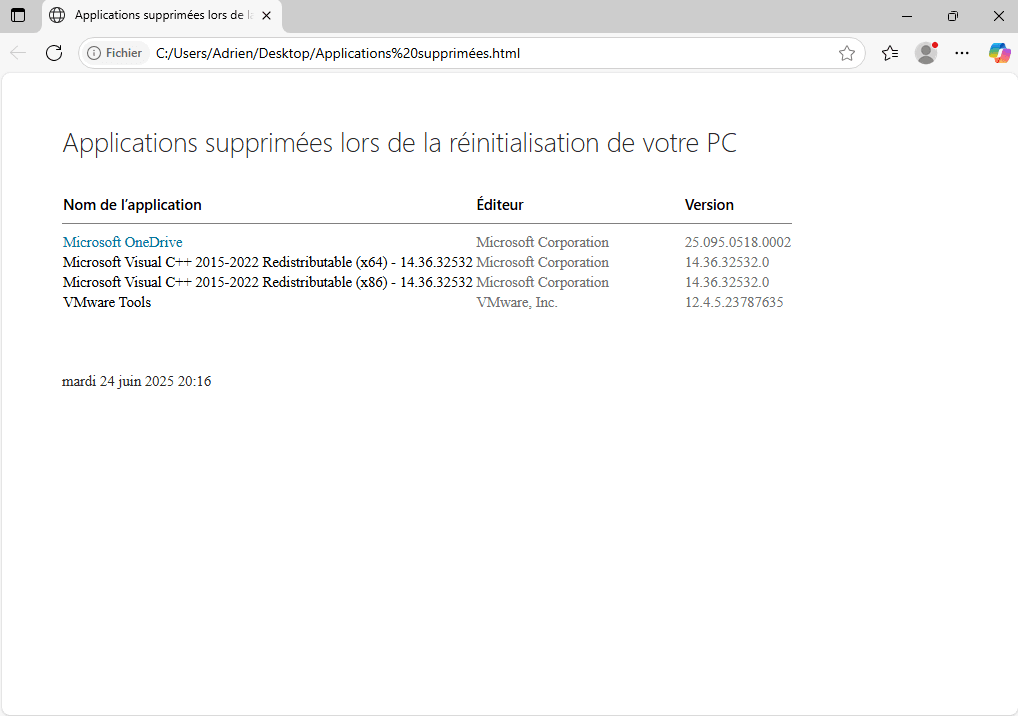
This file serves as a memory of your old configuration. It makes it easy to identify what you’ll need to reinstall after the reset. For each program, you’ll find the name, publisher and exact version, which can be useful for professional software or system components. It’s the perfect way to get back to your usual tools without having to reconfigure everything blindly.
Delete Windows.old folder after reset
After resetting your PC, a folder named Windows.old may appear at the root of the C: drive. This folder contains files from the old Windows installation and is used to restore the system in the event of a rollback. If you’re happy with the new configuration and no longer need this data, you can delete it to free up several gigabytes of space.
⚠️ Please note: once deleted, it will no longer be possible to return to the previous Windows state.
How do I delete the Windows.old folder?
- Open the Start menu and type Disk Cleaner, then launch the utility.
- Select the C: drive if required, then click OK.
- In the window that opens, click on Clean system files.
- Check the Previous Windows installations option (it corresponds to the
Windows.oldfolder). - Click OK, then confirm deletion.
This operation may take a few minutes, depending on the size of the folder. Once completed, the space used by the old version of Windows will be fully recovered.
Did you find this article helpful?
Share it so others can benefit from it.
Learn more about the author
