Virtual memory is a clever trick that Windows uses to supplement your computer’s RAM. When RAM runs out, your system starts using part of your hard disk as a temporary memory extension. This ensures that your applications continue to run smoothly, even when RAM is running low.
By default, the amount of virtual memory allocated may not be sufficient for all your activities. This leaves you with a sluggish PC, applications that close without warning and, let’s be honest, an urge to throw everything out of the window. Fortunately, increasing the amount of virtual memory is child’s play, and I’ll take you through it step by step.
Increase the amount of virtual memory
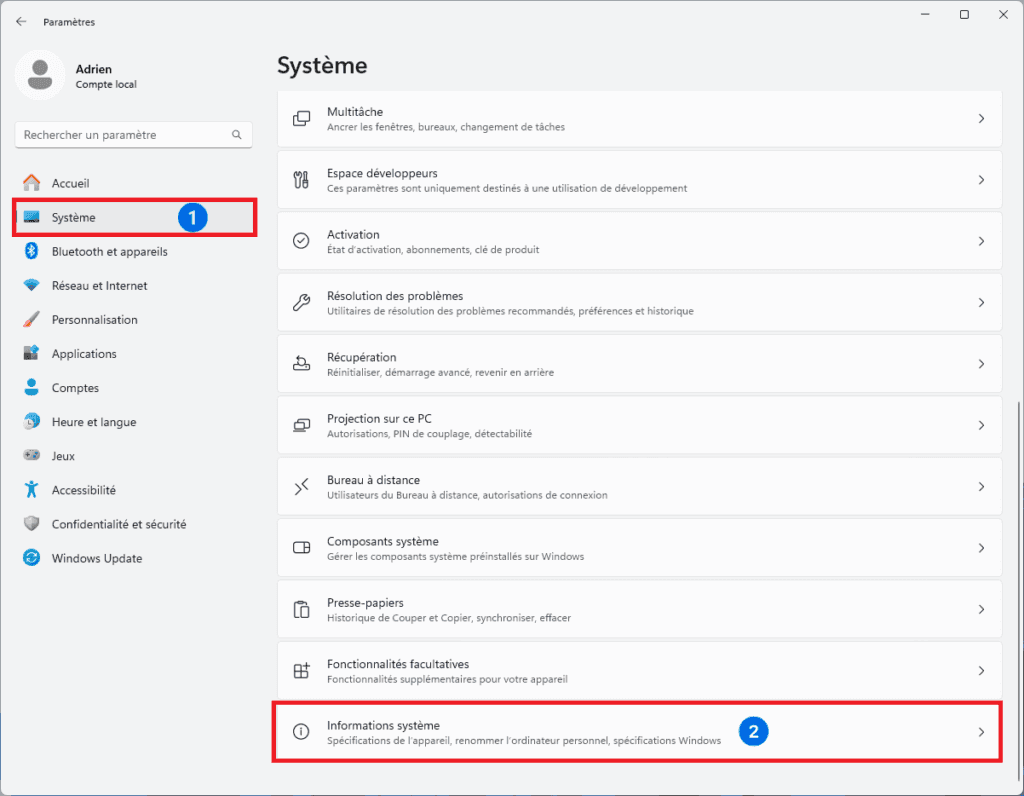
- Enter Windows 11 Settings.
- In System, click on System information.
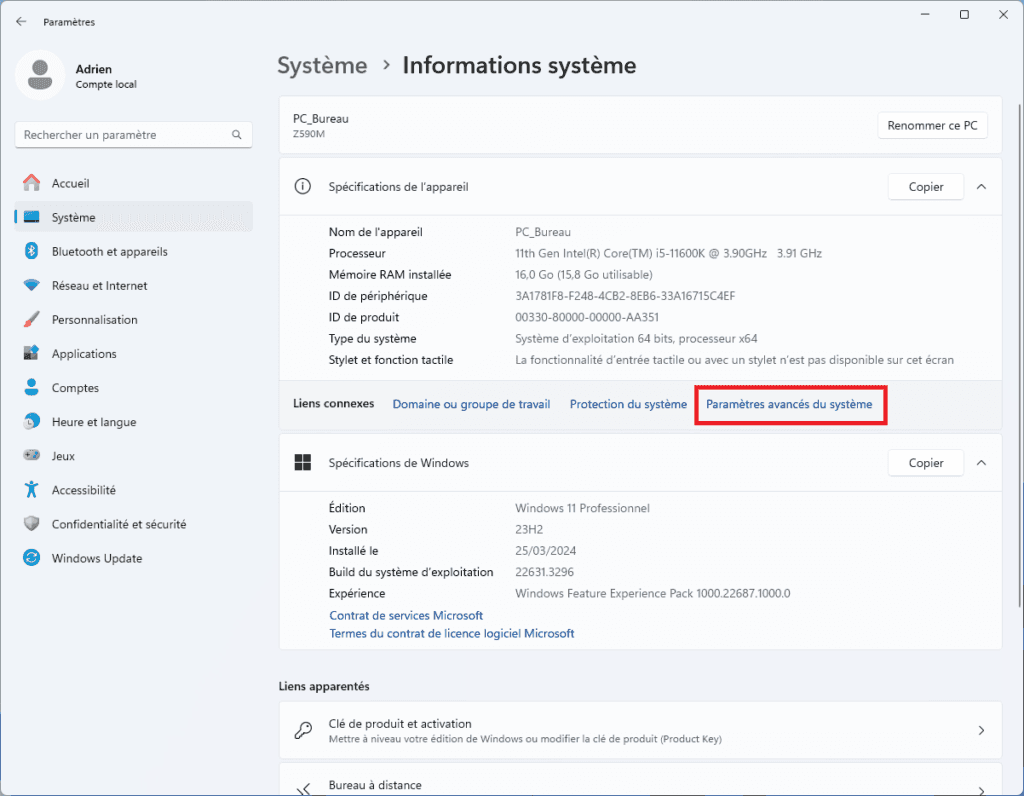
- In System information, click on Advanced system settings.
- In the Performance section, click on Settings.
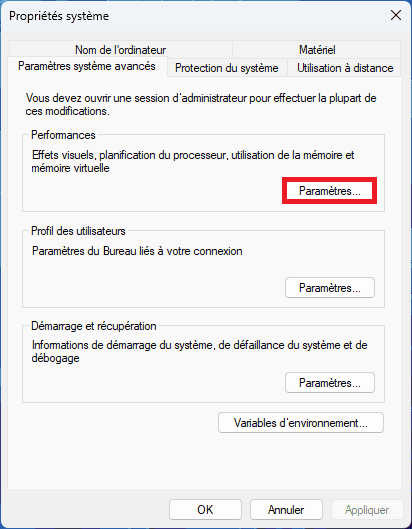
- Go to the Advanced tab.
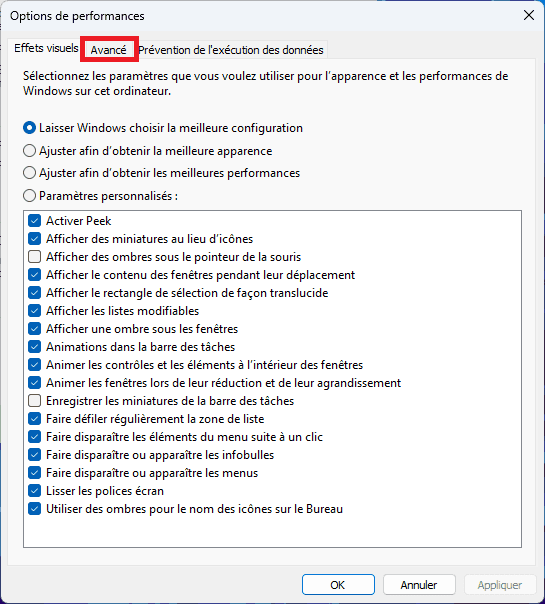
- Finally, in the Virtual memory section, click on Modify.
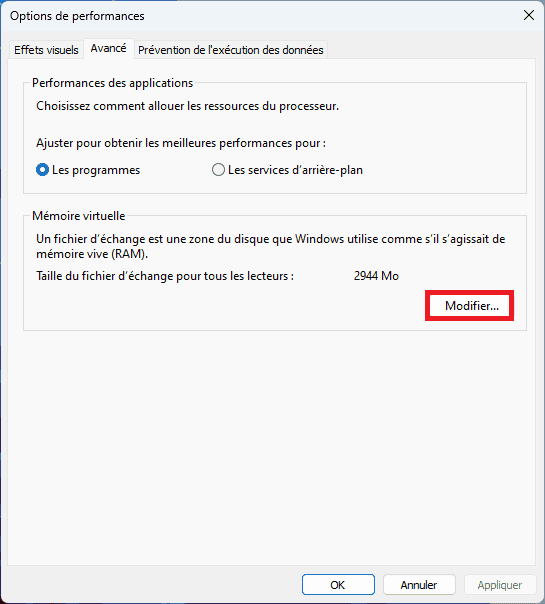
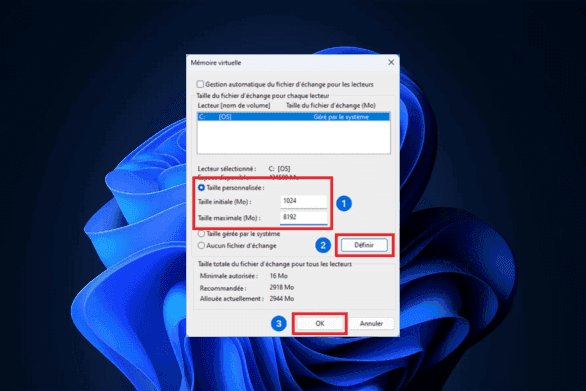
- By default, Windows manages virtual memory automatically. Uncheck this box to access advanced settings.
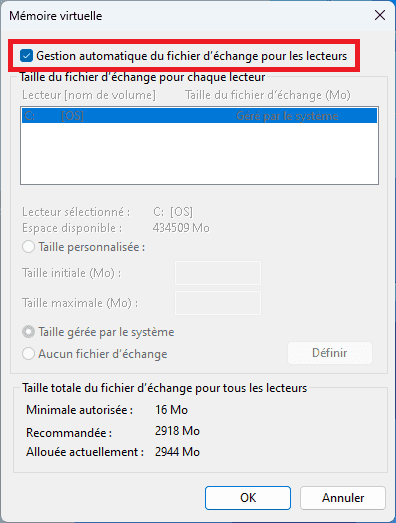
- Then click on the Custom Size box and enter the following quantities:
- Initial size (MB): 1024
- Maximum size (MB): 8192
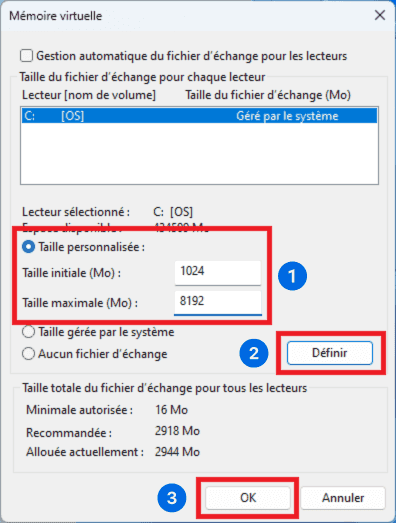
- Then click on Set, then OK. A warning window will open to inform you that the changes will require a restart to become operational.
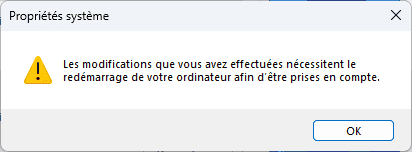
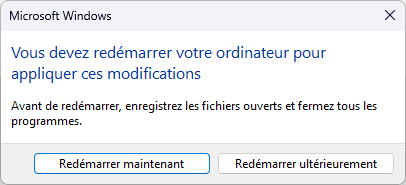
- Then close all windows by clicking OK. The system will then prompt you to restart.
🏆 Bravo! You’ve increased the amount of virtual memory available.
Enable automatic virtual memory flushing
Virtual memory is useful on a slow system, but can also slow down the system if it is constantly full. To deal with this problem, one technique is to automatically empty virtual memory when the computer shuts down.
- Press Windows + R to open the Run window.
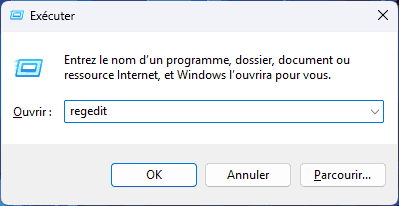
- Type regedit and press Enter, a pop-up window will open, press Yes.
- Then enter the following key in the search bar.
HKEY_LOCAL_MACHINESYSTEMCurrentControlSetControlSession ManagerMemory Management
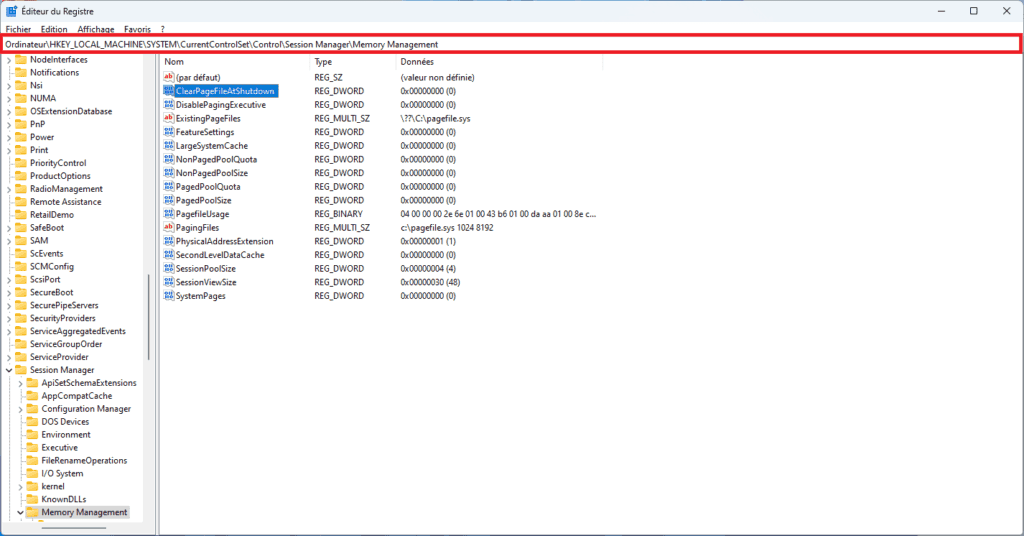
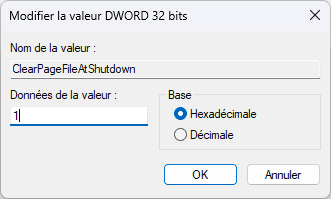
- Double-click on the ClearPageFileAtShutdown key and enter 1 in Value data before confirming.
🏆 Congratulations! You’ve configured virtual memory to empty itself when the computer shuts down.
