Are you working on large files or juggling several applications? If your computer is starting to slow down, it may be time to adjust virtual memory. In this article, learn how to configure this hidden Windows 11 option to boost your PC with ease.
Increase Windows 11 virtual memory to optimize RAM
- What is virtual memory?
- Increasing the amount of virtual memory in Windows 11
- Enable automatic virtual memory flushing
- Optimizing Windows 11: when increasing virtual memory is no longer enough
What is virtual memory?
Virtual memory is an ingenious resource management trick used by our computers. It compensates for the limitations of RAM (random access memory) by using part of the hard disk or SSD as a temporary extension. In practice, the computer creates a simulated memory space where it can move and temporarily store data, freeing RAM for other tasks. This makes it possible to run heavy programs or juggle several applications at the same time, even if RAM is insufficient.
If you use a conventional hard disk drive (HDD), the exchange between RAM and storage is very slow, causing slowdowns. With an SSD, speed improves considerably, but remains well below that of RAM. Ultra-fast NVMe drives offer the best performance for virtual memory, but even the latest M.2 PCIe 5.0 NVMe SSD can’t match the blazing speed of RAM.
Why is virtual memory still useful?
Despite its limitations in terms of speed, virtual memory remains a precious ally. It ensures that your computer keeps running without crashing, even when it runs out of RAM. By optimizing its use and investing in a high-performance SSD, you can considerably reduce the impact on performance, while taking advantage of this feature to boost your PC.
Discover our tips for speeding up your slow Windows laptop.
Increasing the amount of virtual memory in Windows 11
Virtual memory is an essential feature of Windows 11. It takes over when RAM is saturated, using part of the hard disk or SSD to temporarily store data. Although slower than physical RAM, it prevents crashes and keeps the system running smoothly.
If you’re experiencing regular slowdowns, or Windows is displaying error messages indicating a lack of memory, increasing virtual memory can improve your PC’s stability. Here’s how to do it, step by step.
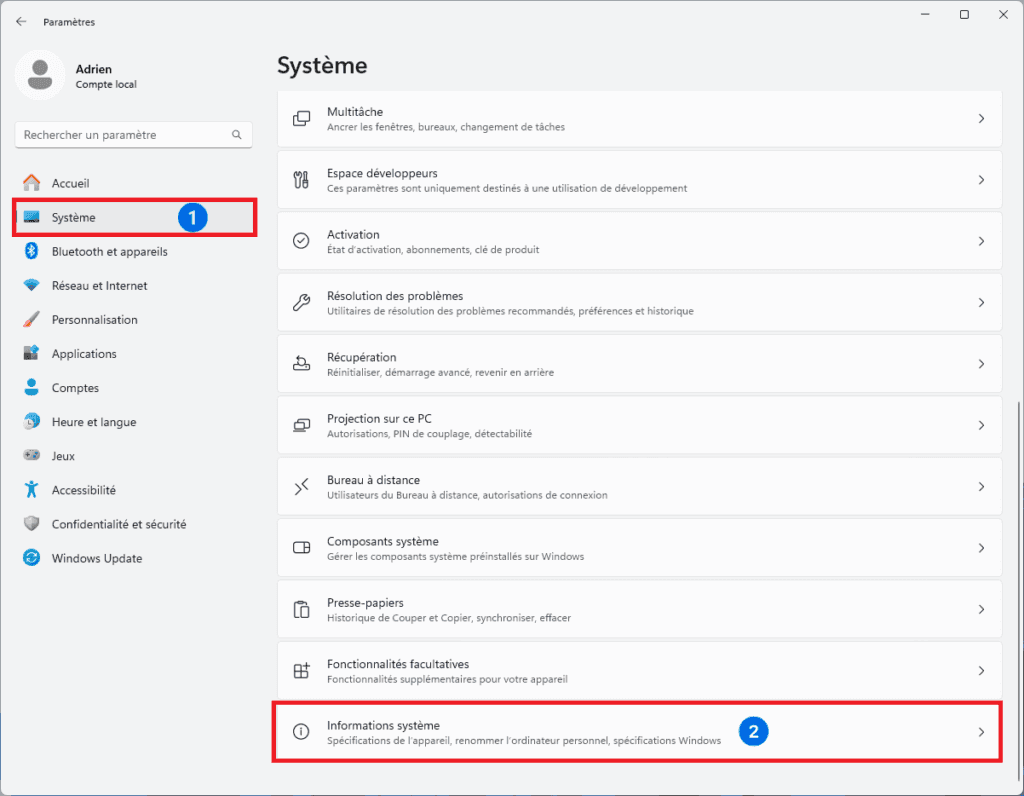
- Enter Windows 11 Settings.
- In System, click on System information.
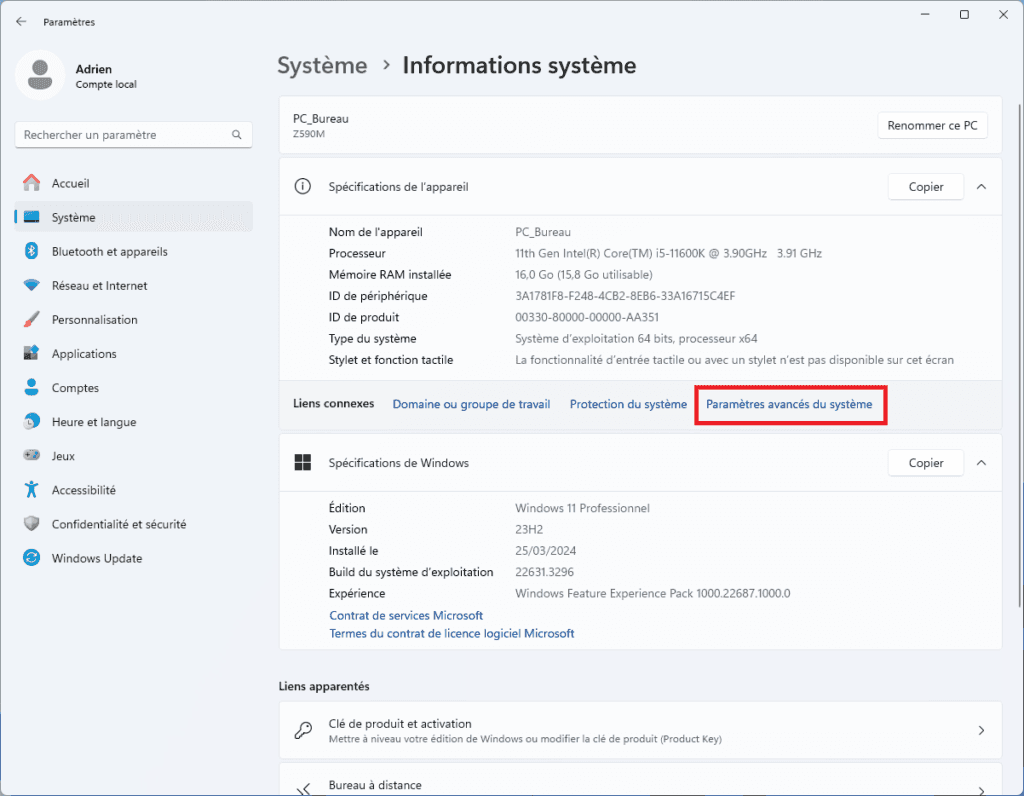
- In System information, click on Advanced system settings.
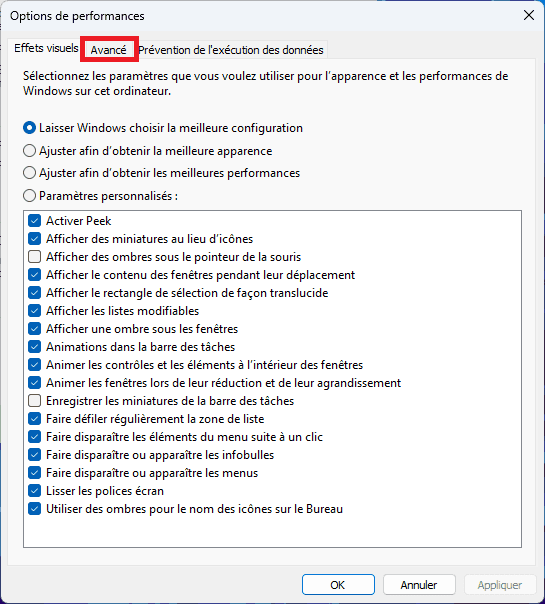
- In the Performance section, click on Settings.
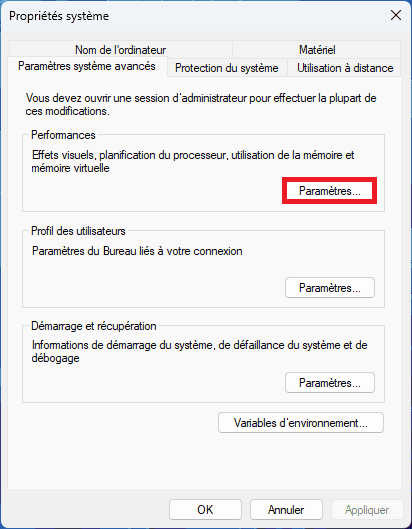
- Go to the Advanced tab.
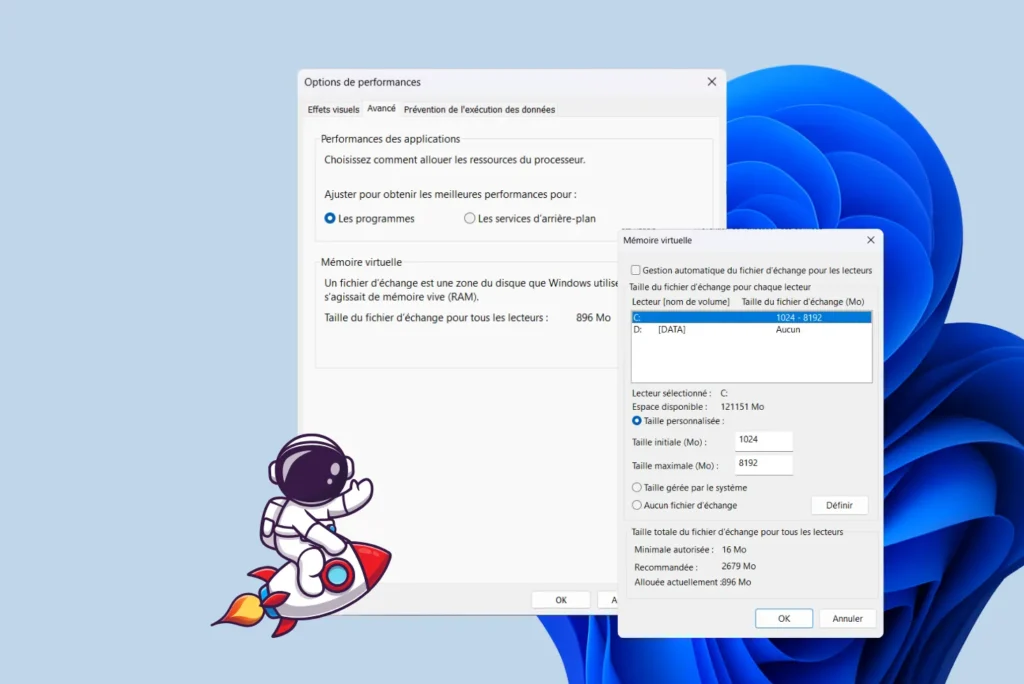
- Finally, in the Virtual memory section, click on Modify.
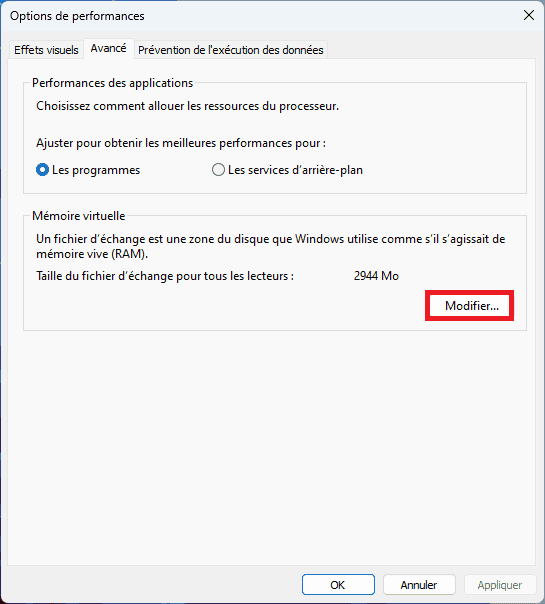
This takes you to the menu where you can manually define the size of the exchange file.
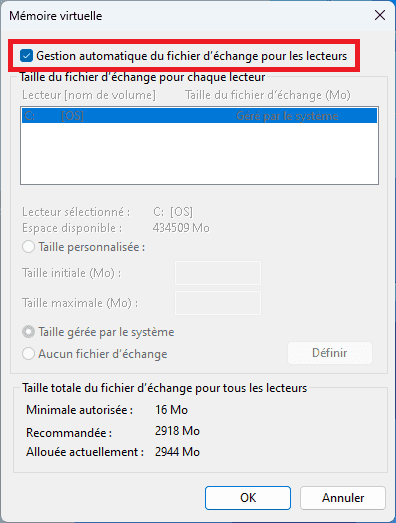
Disable automatic Windows management
By default, Windows automatically manages the size of the exchange file. This is convenient, but not always optimal: the system may assign a size that is too small or too large, which can lead to slowdowns or excessive disk space consumption.
- To regain control, start by unchecking the automatic management option. This will allow you to set a custom size, better suited to your PC’s configuration.
- Then click on the Custom Size box and enter the following quantities according to your configuration.
How much virtual memory for Windows?
Define the right size for your configuration
The amount of virtual memory to allocate depends directly on the RAM installed in your machine. Here are some recommendations:
- With 4 GB RAM: set an initial size of 6144 MB and a maximum size of 12288 MB.
- With 8 GB RAM: choose an initial size of 12288 MB and a maximum size of 24576 MB.
- With 16 GB or more: an initial size of 1024 MB and a maximum size of 8192 MB are generally sufficient.
The idea is to have a sufficient reserve for demanding applications, without wasting too much disk space.
Going even further 👇
To optimize your PC’s virtual memory and avoid errors caused by an inaccessible swap file, here are our recommendations:
- Less than 16 GB RAM: Configure a minimum size equivalent to 1.5 times RAM and a maximum size of up to 3 times RAM to guarantee stable performance.
- 16 GB or more: A minimum file size of 1024 MB is sufficient in most cases. If certain software programs are heavily dependent on the exchange file, you can adjust the maximum size up to 8192 MB.
Although 16 GB or +32 GB of RAM is sufficient in most cases, some Windows applications and services require an exchange file.
These settings boost your PC’s performance while limiting unnecessary use of disk space.
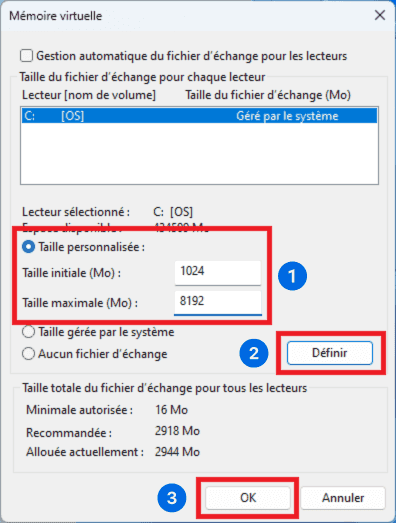
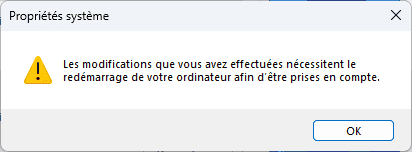
- Then click on Set, then OK. A warning window will open to inform you that the changes will require a restart to become operational.
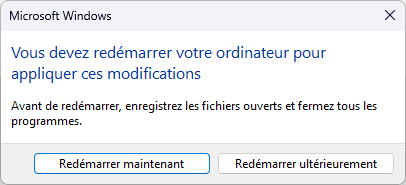
- Then close all windows by clicking OK. The system will then prompt you to restart.
Your virtual memory is now optimized. You should see fewer memory shortage error messages and better overall stability, especially when running heavy software or intensive multitasking.

Enable automatic virtual memory flushing
Virtual memory is a good complement to RAM, but it also has a drawback: if it remains constantly saturated, it can slow down the system and, in some cases, pose a security problem. In fact, the swap file may contain fragments of sensitive data (passwords, files in use, system information).
To limit these risks, Windows automatically empties the exchange file (pagefile.sys) each time the computer is shut down. The operation takes a little longer at shutdown, but guarantees a cleaner, safer system.
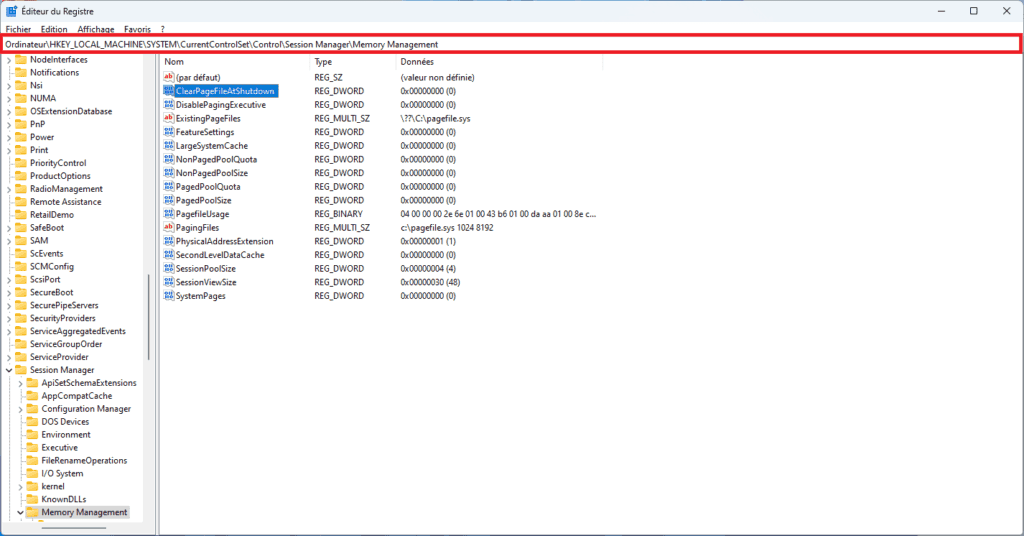
- Press Windows + R to open the Run window.

- Type regedit and press Enter, a pop-up window will open, press Yes.
- Then enter the following key in the search bar.
Computer\HKEY_LOCAL_MACHINE\SYSTEM\CurrentControlSet\Control\Session Manager\Memory Management
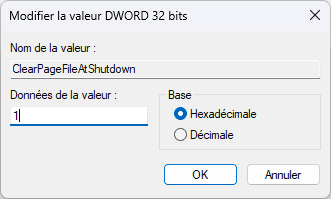
- Double-click on the ClearPageFileAtShutdown key and enter 1 in Value data before confirming. ⚠️
Your exchange file will be cleaned every time you shut down, improving security and limiting the problems associated with virtual memory that is too often saturated.
⚠️ Please note: this operation may slightly increase PC downtime, especially if you have a very large exchange file.
Optimizing Windows 11: when increasing virtual memory is no longer enough
Increasing virtual memory on Windows 11 can help improve system stability and avoid certain slowdowns, especially on computers with little RAM. However, it’s important to bear in mind that this solution is no substitute for a genuine hardware extension. The addition of RAM bars remains the most effective and long-lasting option for improving fluidity and user comfort.
In the meantime, adjusting the size of the exchange file can optimize performance and adapt Windows to your needs. Feel free to experiment with different settings to find the ideal balance between responsiveness and disk space consumption.
Did you find this article helpful?
Share it so others can benefit from it.
Learn more about the author
