
Are you considering adding RAM to your computer for better multitasking, but don’t know whether your system can accept more memory, and which RAM would be compatible?
In this article, you’ll discover a quick and easy way to find out the maximum RAM capacity supported by your configuration.
How can you find out the maximum RAM capacity supported by your PC?
- Identify the RAM compatible with the Crucial Scanner (simplest method)
- Find out the maximum RAM capacity supported by PowerShell
- How do I get the maximum RAM capacity with PowerShell?
- How can I obtain the maximum number of memory slots with PowerShell?
- How can I find out how much RAM I have installed?
- How do I obtain the speed, DDR type and shape of the RAM installed?
Identify the RAM compatible with the Crucial Scanner (simplest method)
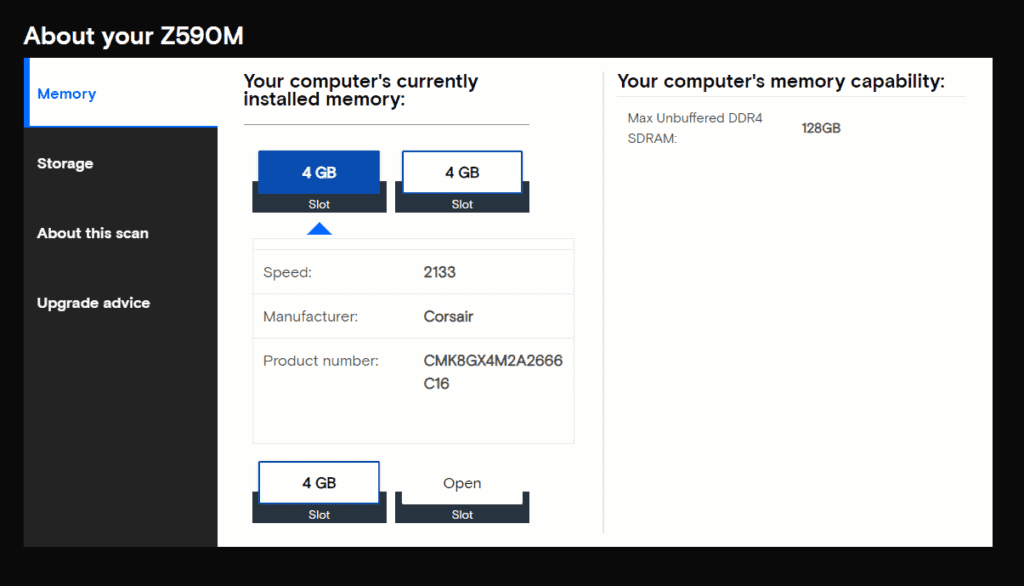
The quickest way to find out the maximum RAM capacity supported by your computer is to use the Crucial System Scanner. This tool from memory and SSD manufacturer Crucial is totally secure and free of charge. It automatically analyzes your hardware configuration to determine the amount of memory installed, the number of slots available and the maximum capacity supported by your motherboard.
No technical manipulation is required. In just a few moments, the scanner detects your system’s complete configuration and displays information on the memory in place. All you have to do is visit the Crucial website, launch the free scan and authorize execution of the downloaded program. The scan then starts from the browser and finishes in a few seconds.
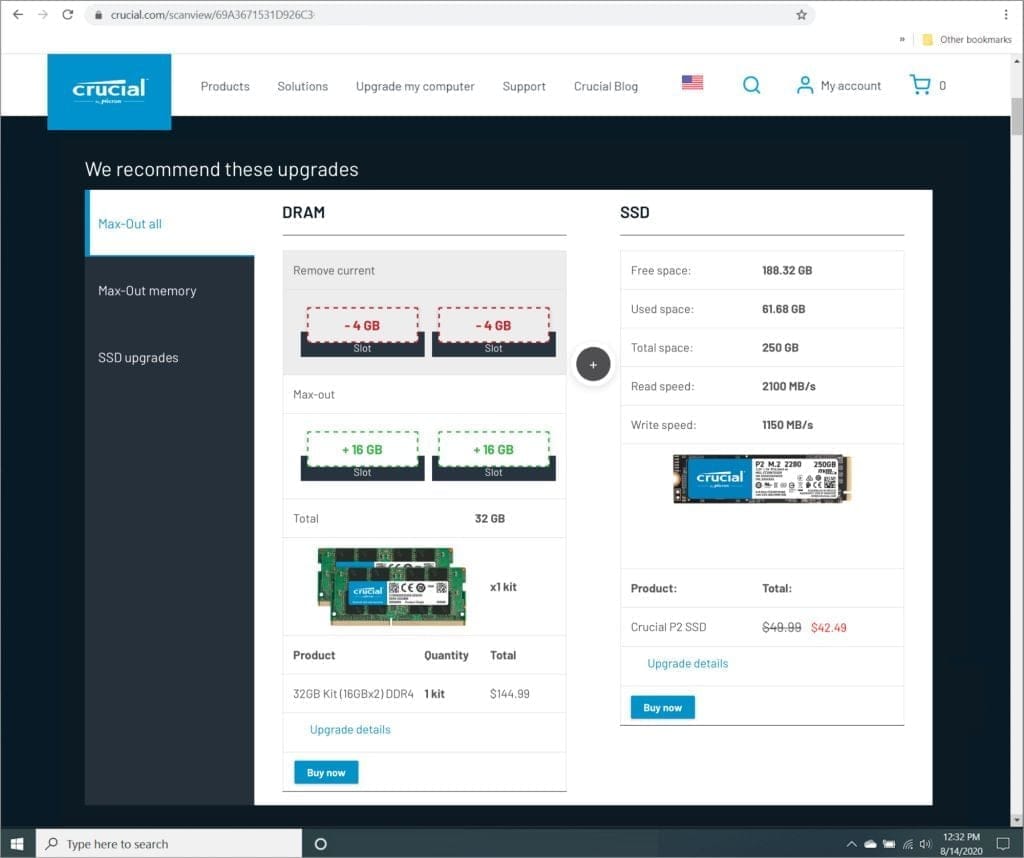
The report generated shows the amount of memory currently installed, the number of used and free slots, and the maximum capacity your computer can accommodate. With this information, it will provide you with specific recommendations on which Crucial products are suitable for your device, enabling you to upgrade your hardware and helping you avoid purchasing errors… Simply check the DDR memory generation indicated by the tool, respect the frequency compatible with your motherboard and select the format corresponding to your device – SODIMM format for a laptop or DIMM module for a desktop PC.
How do I use the Crucial system scanner?
- Visit the Crucial System Scanner website
- Click on Start my free scan!

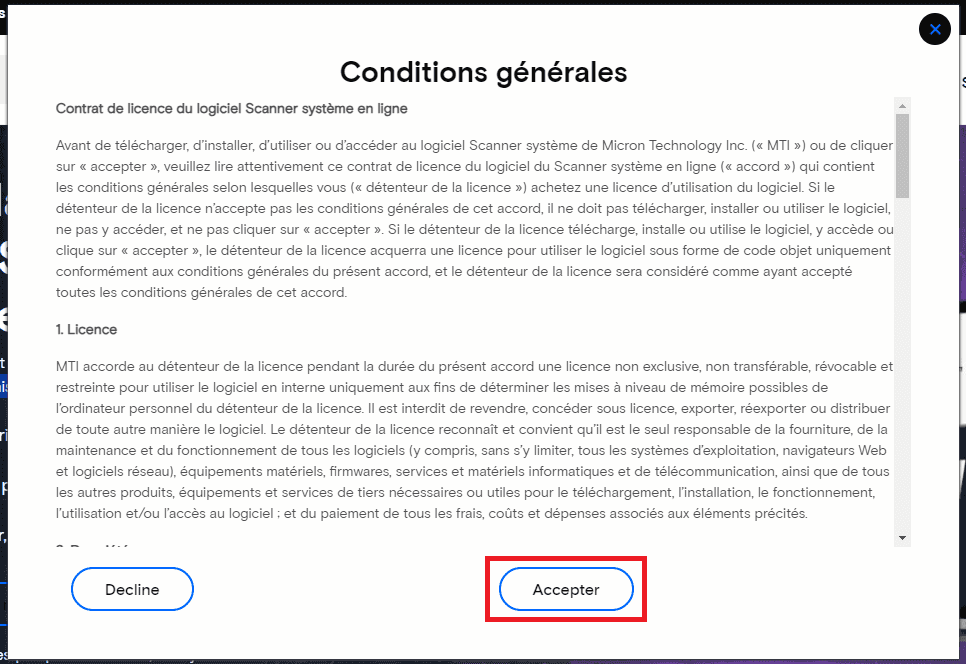
- Accept the terms of use.
- Open the small program to get the scanner working properly.
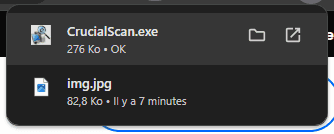
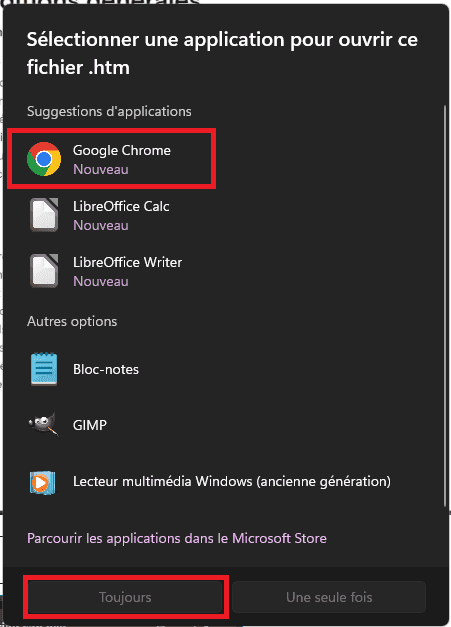
- Open the utility with your web browser.
- Once the scanner is running, it will analyze your system to identify RAM memory and storage, and then display a list of products compatible with your system.
With this information, you can easily interpret the data and choose a compatible strip:
- Observe the specified DDR type (DDR3, DDR4, DDR5);
- select a frequency equal to or lower than the recommended frequency;
- make sure you choose the right format (SODIMM or DIMM);
- and do not exceed the total capacity displayed by the scanner.
Discover our tips for choosing the right RAM for your PC and avoiding mistakes.
Find out the maximum RAM capacity supported by PowerShell
Open Powershell with administrator rights.
In the Powershell window, enter the following command:
$memoryArray = Get-CimInstance -ClassName Win32_PhysicalMemoryArray if ($memoryArray) { $maxCapacityKB = $memoryArray.MaxCapacity $maxCapacityGB = [math]::Round($maxCapacityKB / 1048576, 2) $totalSlots = $memoryArray.MemoryDevices Write-Output "Maximum RAM capacity : $maxCapacityGB Go" Write-Output "Maximum number of memory slots : $totalSlots" } else { Write-Output "Impossible to retrieve information from Win32_PhysicalMemoryArray." }You’ll get a result like this 👇
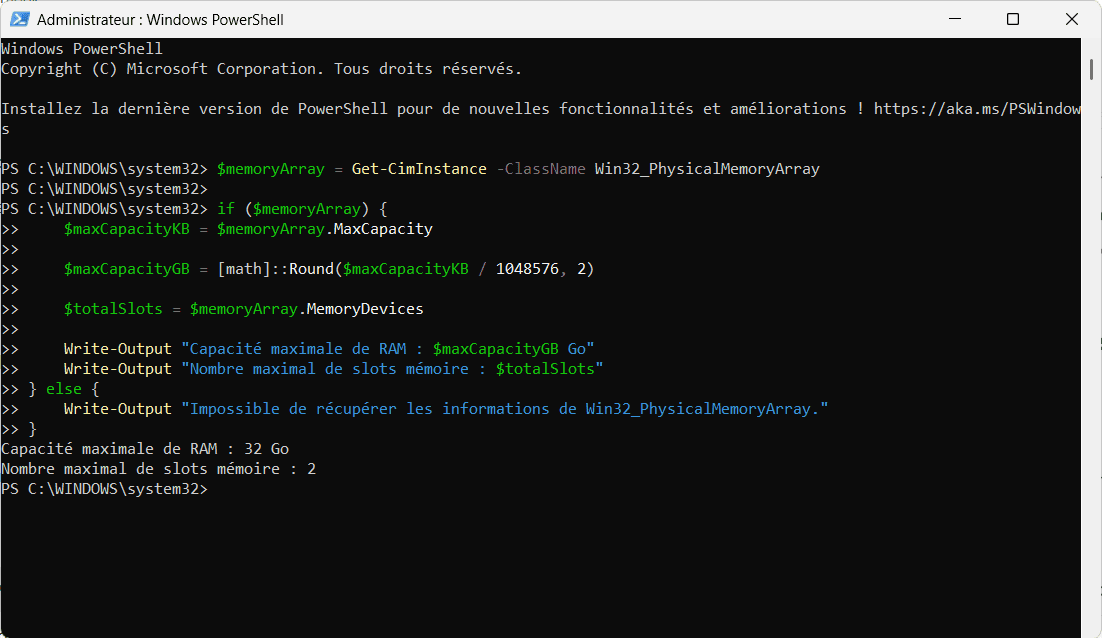
In our example, the maximum RAM capacity that can be installed in our computer is 32 GB, and we have two dedicated RAM slots on our PC’s motherboard. We can therefore deduce that we can install up to two 16 GB RAM modules per slot, for a total of 32 GB.
How do I get the maximum RAM capacity with PowerShell?
The MaxCapacity property returns the maximum RAM capacity that the motherboard can manage. This value is expressed in kilobytes (KB).
$memoryArray = Get-CimInstance -ClassName Win32_PhysicalMemoryArray if ($memoryArray) { $maxCapacityKB = $memoryArray.MaxCapacity $maxCapacityGB = [math]::Round($maxCapacityKB / 1048576, 2) Write-Output "Maximum RAM capacity: $maxCapacityKB KB, i.e. $maxCapacityGB GB" } else { Write-Output "Impossible to retrieve maximum RAM capacity information." }Conversion to gigabytes (GB) is performed using the following formula:
1 GB = 1048576 KB (1024 x 1024)
In our example, the maximum RAM capacity that can be installed in our computer is 33554432 Kb, or 32 GB.
How can I obtain the maximum number of memory slots with PowerShell?
MemoryDevices: Indicates the number of slots dedicated to RAM on your computer’s motherboard. Here, we can see that our motherboard has 2 memory slots.
$memoryArray = Get-CimInstance -ClassName Win32_PhysicalMemoryArray if ($memoryArray) { $totalSlots = $memoryArray.MemoryDevices Write-Output "Maximum number of memory slots: $totalSlots" } else { Write-Output "Unable to retrieve memory slot information." }By dividing the total capacity by the number of available slots, we can deduce that each slot can accommodate a maximum of 16 GB.
So, to reach a total capacity of 32 GB, all you need to do is install 2 strips of 16 GB each.
How can I find out how much RAM I have installed?
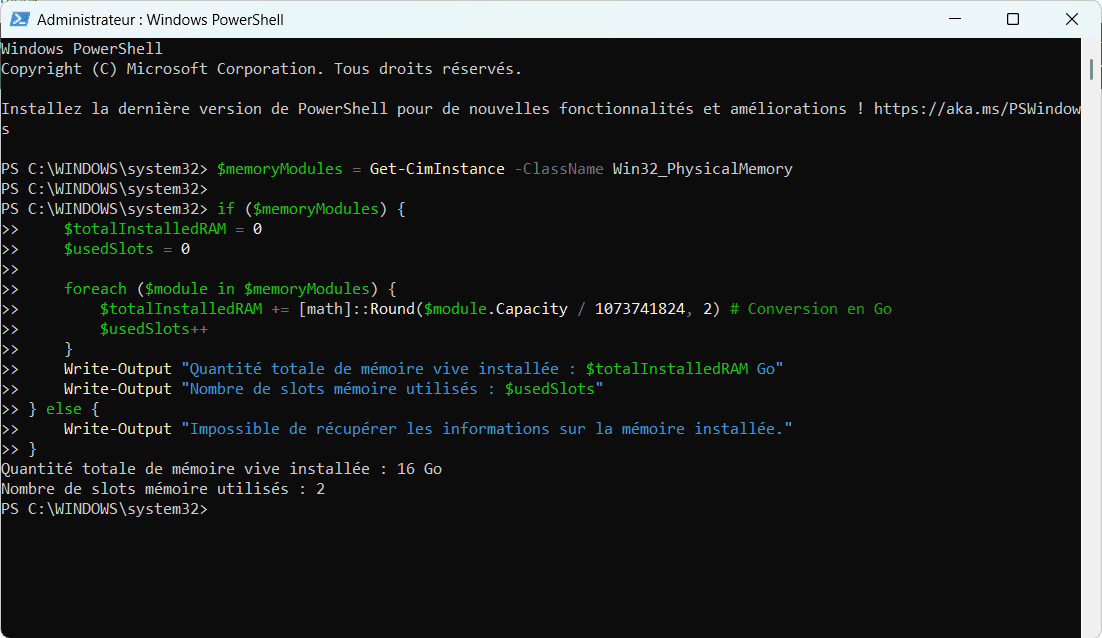
To obtain the total amount of RAM installed and the number of memory slots used, you can use a PowerShell script based on the Win32_PhysicalMemory class :
$memoryModules = Get-CimInstance -ClassName Win32_PhysicalMemory if ($memoryModules) { $totalInstalledRAM = 0 $usedSlots = 0 foreach ($module in $memoryModules) { $totalInstalledRAM += [math]::Round($module.Capacity / 1073741824, 2) # Conversion to GB $usedSlots++ } Write-Output "Total amount of installed RAM: $totalInstalledRAM GB" Write-Output "Number of memory slots used: $usedSlots" } else { Write-Output "Impossible to retrieve installed memory information." }You’ll get a result like this 👇
How do I obtain the speed, DDR type and shape of the RAM installed?
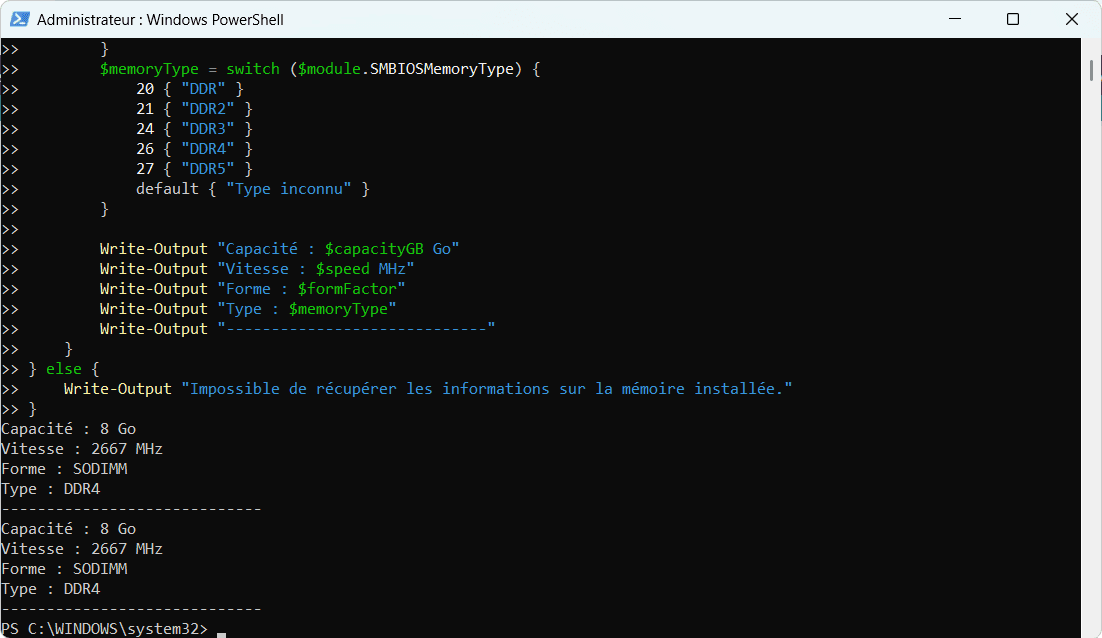
Here’s a simple script you can copy and paste into PowerShell. It displays useful information about each RAM strip installed in your system.
$memoryModules = Get-CimInstance -ClassName Win32_PhysicalMemory if ($memoryModules) { foreach ($module in $memoryModules) { $capacityGB = [math]::Round($module.Capacity / 1073741824, 2) $speed = $module.Speed $formFactor = switch ($module.FormFactor) { 8 { "DIMM" } # Standard desktop module 12 { "SODIMM" } # Laptop module default { "Unknown" } } $memoryType = switch ($module.SMBIOSMemoryType) { 20 { "DDR" } 21 { "DDR2" } 24 { "DDR3" } 26 { "DDR4" } 27 { "DDR5" } default { "Type unknown" } } Write-Output "Capacity: $capacityGB Go" Write-Output "Speed: $speed MHz" Write-Output "Form: $formFactor" Write-Output "Type: $memoryType" Write-Output "-----------------------------" } else { Write-Output "Unable to retrieve installed memory information." }You’ll get a result like this 👇
With all this information in hand, all you need to do is check the data to choose a memory strip compatible with your system.
Don’t forget :
- Check the DDR type (DDR3, DDR4, DDR5).
- Respect the frequency (MHz) supported by your motherboard.
- Choose the right physical format (SODIMM for notebooks, DIMM for desktop PCs).
- And finally, do not exceed the maximum capacity managed by your motherboard.
Your system will soon be ready for a RAM upgrade for better performance!
Did you find this article helpful?
Share it so others can benefit from it.
Learn more about the author
