
Is your PC running out of space, or is Windows displaying a warning message? Before downloading any cleaning software, check what Windows is already doing. Since 2017, an automatic cleaning tool has been built directly into the system settings. It’s called the Storage Assistant. On our test machine, the first clean-up freed up 7 GB in a matter of minutes, without installing anything.
It is disabled by default, and its default settings are too conservative to be effective. This guide shows you how to enable it, configure it so that it actually works, and what to do when it is no longer sufficient.
In this article
- What is the Windows Storage Assistant used for?
- 1. Enable the Storage Assistant
- 2. Configure the Storage Assistant to make it useful
- How often the Storage Wizard runs
- Empty the Recycle Bin regularly
- Empty the Downloads folder
- Run the Storage Wizard now
- 3. Cleaning tips: where the real benefits lie
- 4. Free up space with OneDrive without losing any data
- Is the Storage Assistant enough to clean up my PC?
What is the Windows Storage Assistant used for?
The Storage Assistant constantly monitors your disk space and automatically deletes files it deems unnecessary, temporary files created by Windows and its applications, old items in the Recycle Bin, and leftover files from updates installed a long time ago. Unlike third-party software, it requires no installation, no account and no paid version.
It only works on the system drive. It never touches your photos, documents or videos. What it cleans is the invisible layer that builds up underneath, which you’re not even aware of.
The tool is also available on Windows 10, under the name Storage Sense. If you haven’t yet upgraded to Windows 11, the steps are almost identical; the interface is slightly different, but it works in the same way.
1. Enable the Storage Assistant
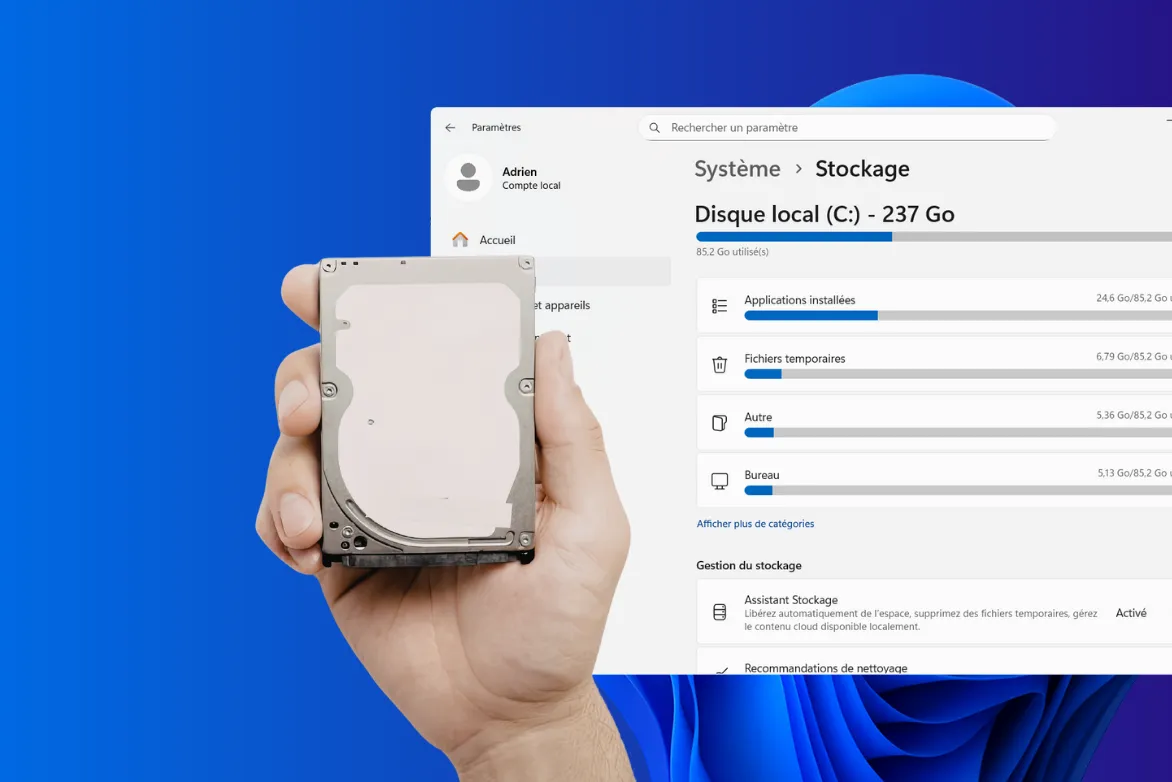
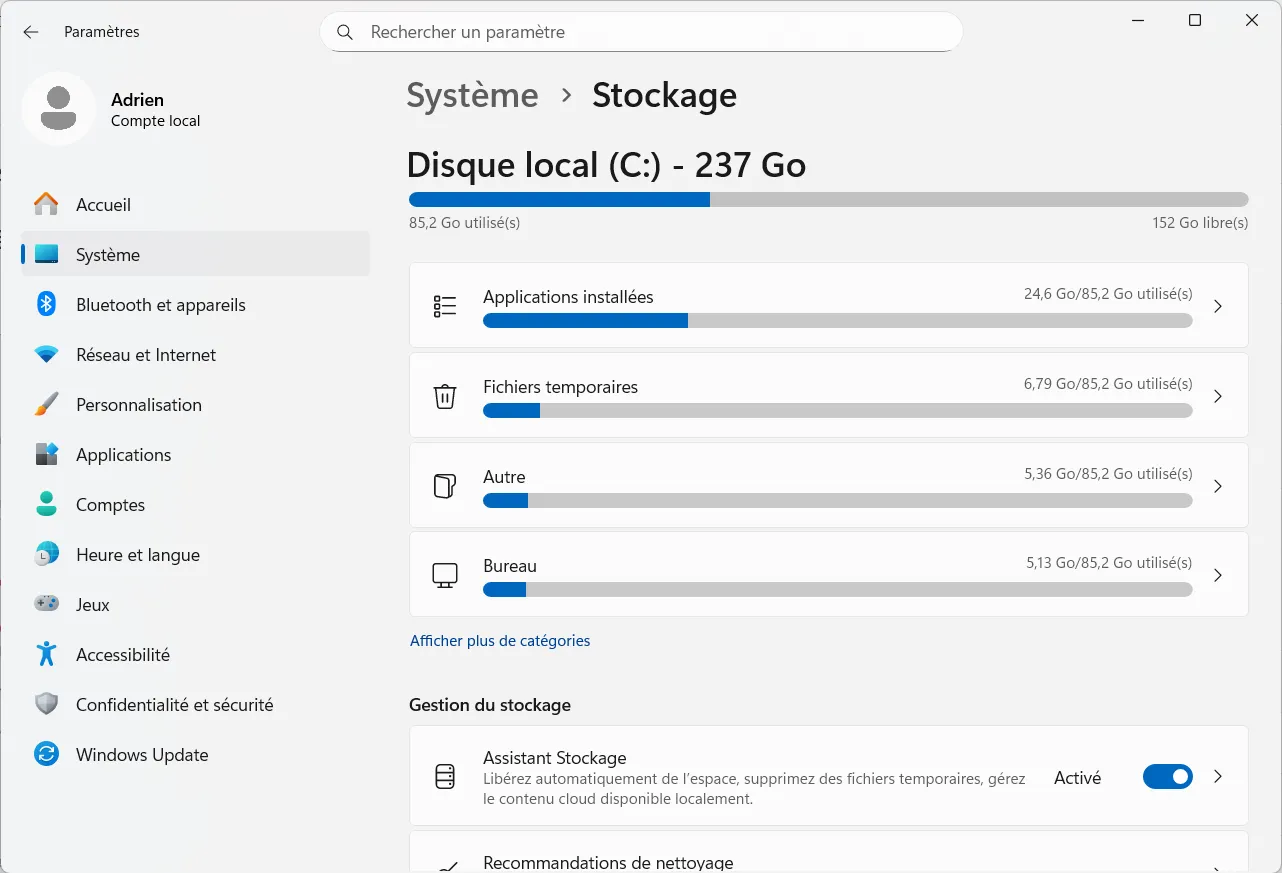
Open Windows Settings using the Windows + I shortcut. Go to System, then Storage.
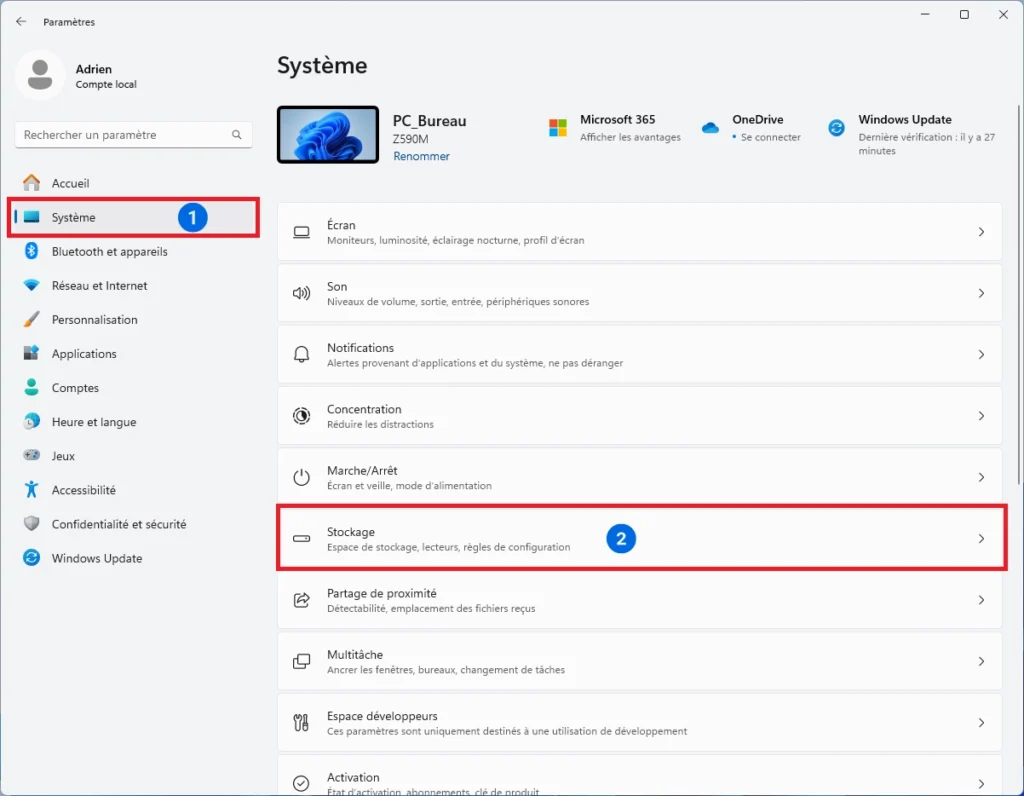
Click on Storage Assistant. You’ll be taken to a dedicated page with an activation button; this is disabled by default on most PCs, even new ones.
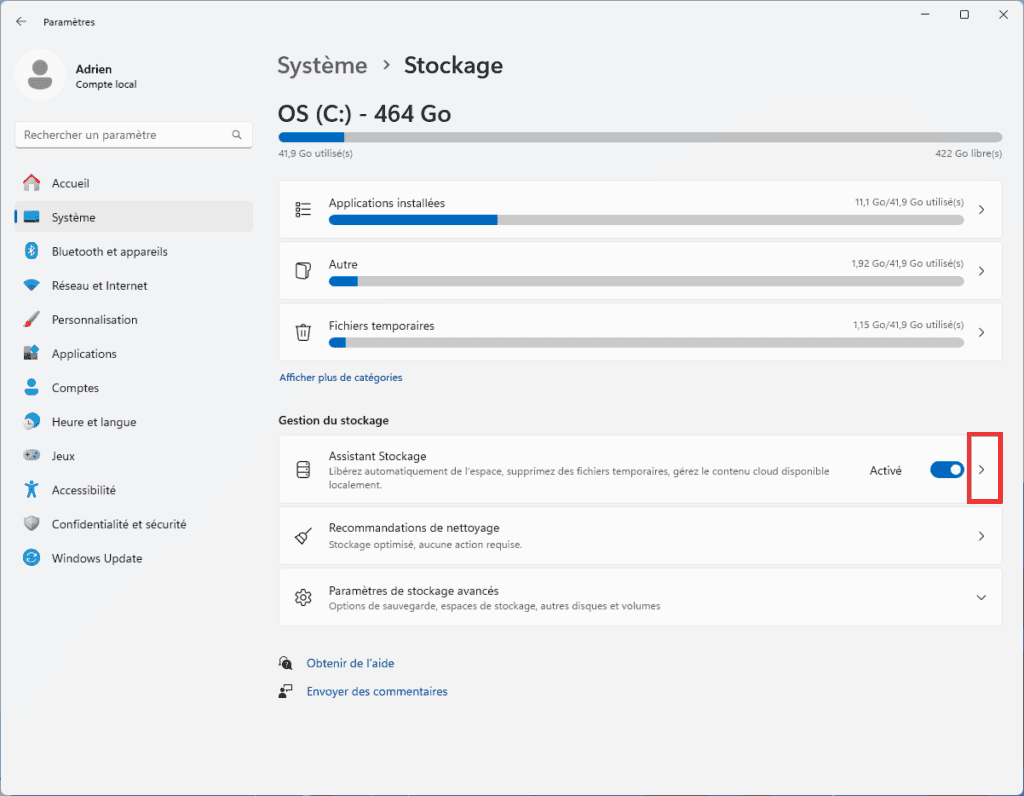
Enable automatic cleaning of user content. The tool is now active. However, if you leave the settings at their defaults, it will do almost nothing, which is why many people conclude that it doesn’t work.
2. Configure the Storage Assistant to make it useful
By default, Windows applies three overly conservative rules: cleaning only when the drive is almost full, emptying the Recycle Bin after 30 days, and not deleting anything from the Downloads folder. These settings render the tool essentially inactive under normal usage conditions.
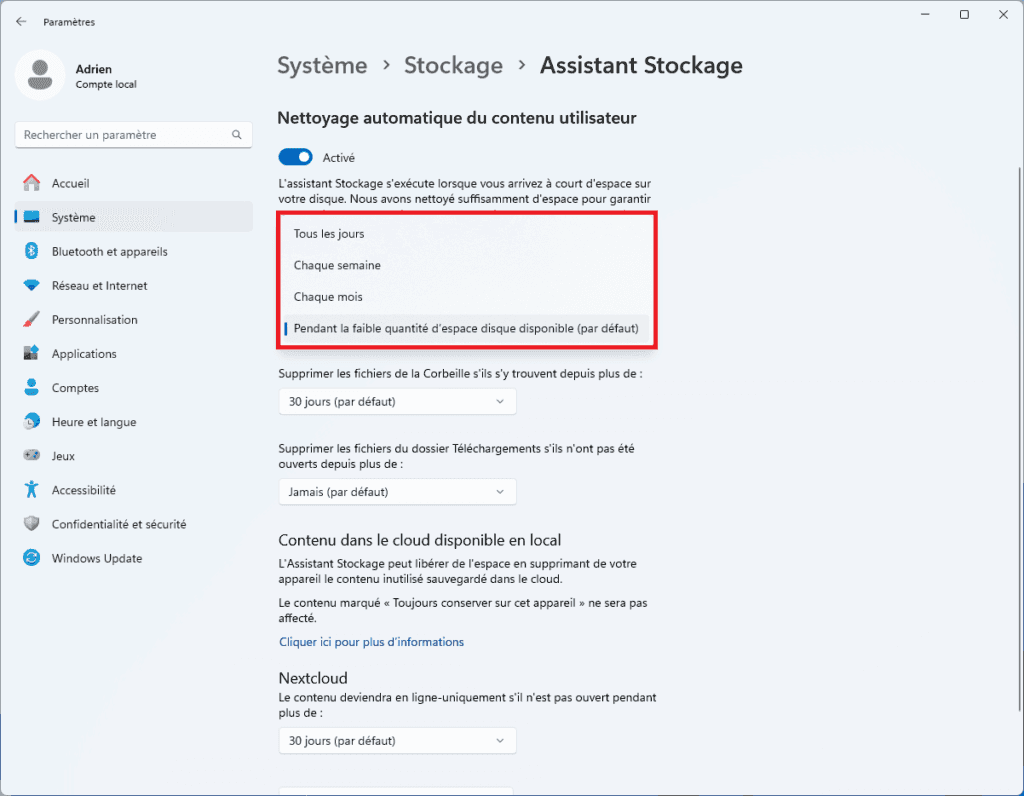
How often the Storage Wizard runs
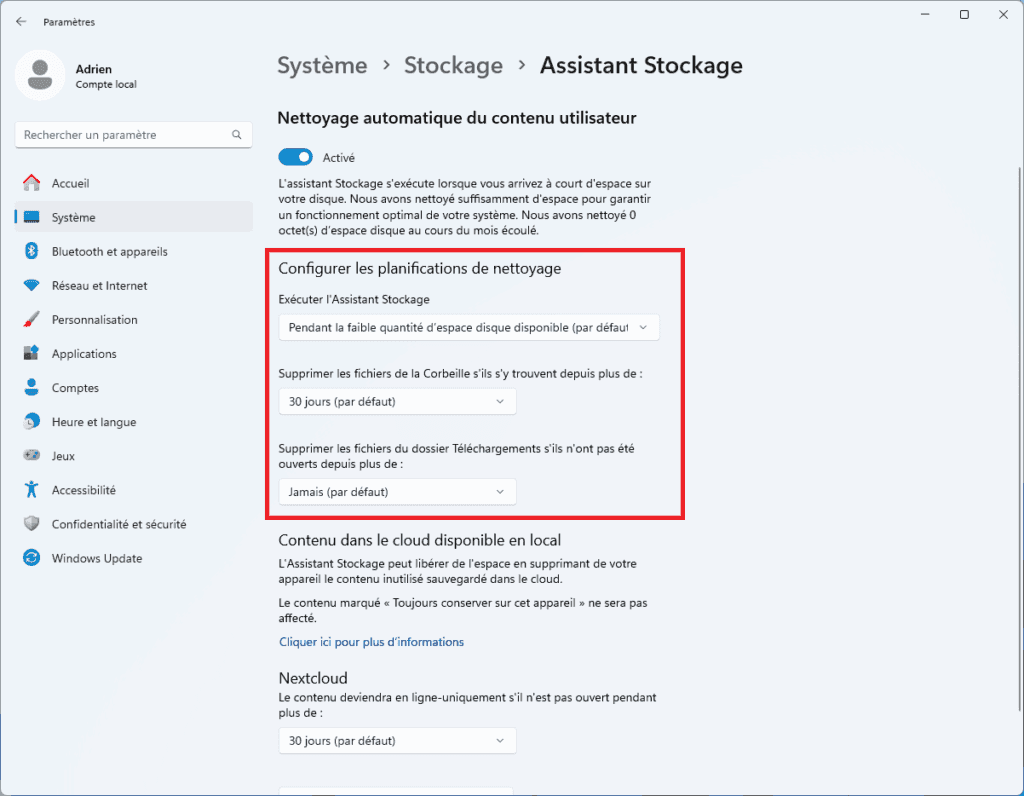
The setting ‘When there is little disk space available’ only kicks in once you’re already in the red. That’s not prevention, it’s a last-minute fix. Change it to ‘Every week’. You won’t have to think about it anymore, and your PC will stay tidy all the time.
Empty the Recycle Bin regularly
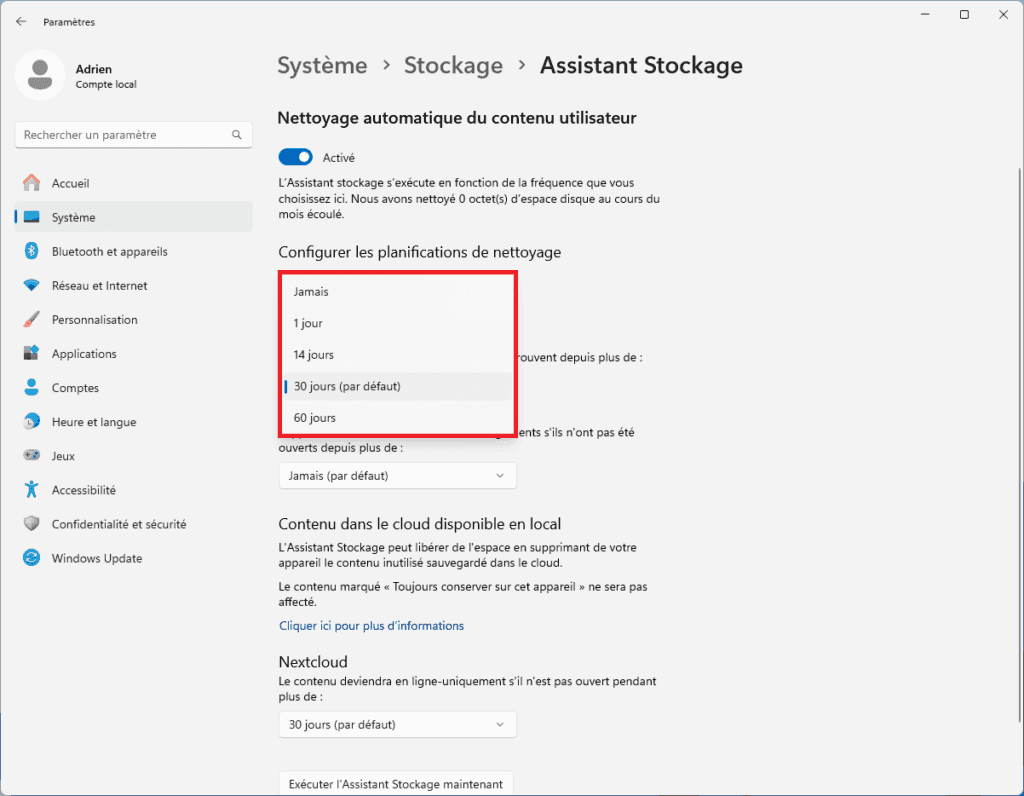
14 days is a reasonable timeframe. It gives you time to recover a file deleted by mistake without the Recycle Bin becoming a bin that’s never emptied. The default setting of 30 days is unnecessarily long for most purposes.
Empty the Downloads folder
Leave this setting set to ‘Never delete’. This is the only area of Storage Sense that’s really risky. Installers, documents received via email and downloaded work files all end up here.
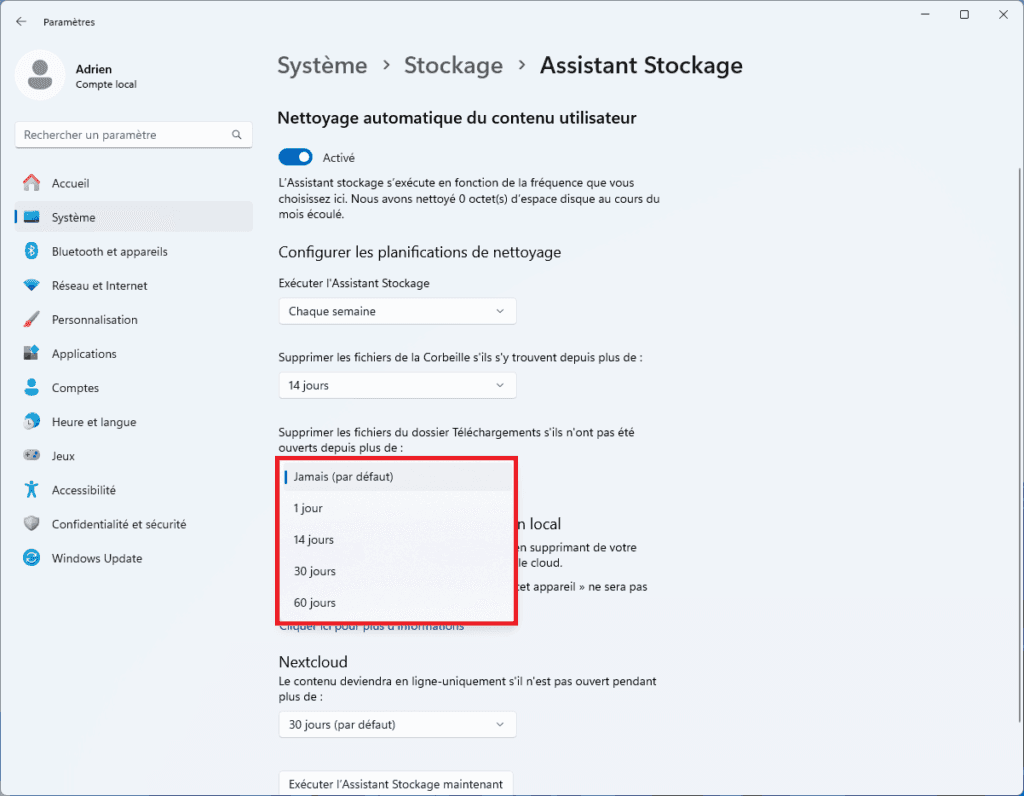
Allowing Windows to delete them automatically (even after 60 days) is a risk you’ll regret the day you look for a file that’s no longer there. This folder is worth sorting through manually once a month.
Run the Storage Wizard now
Once you have changed the settings, click ‘Run the Storage Wizard now’ to start an immediate initial clean-up.
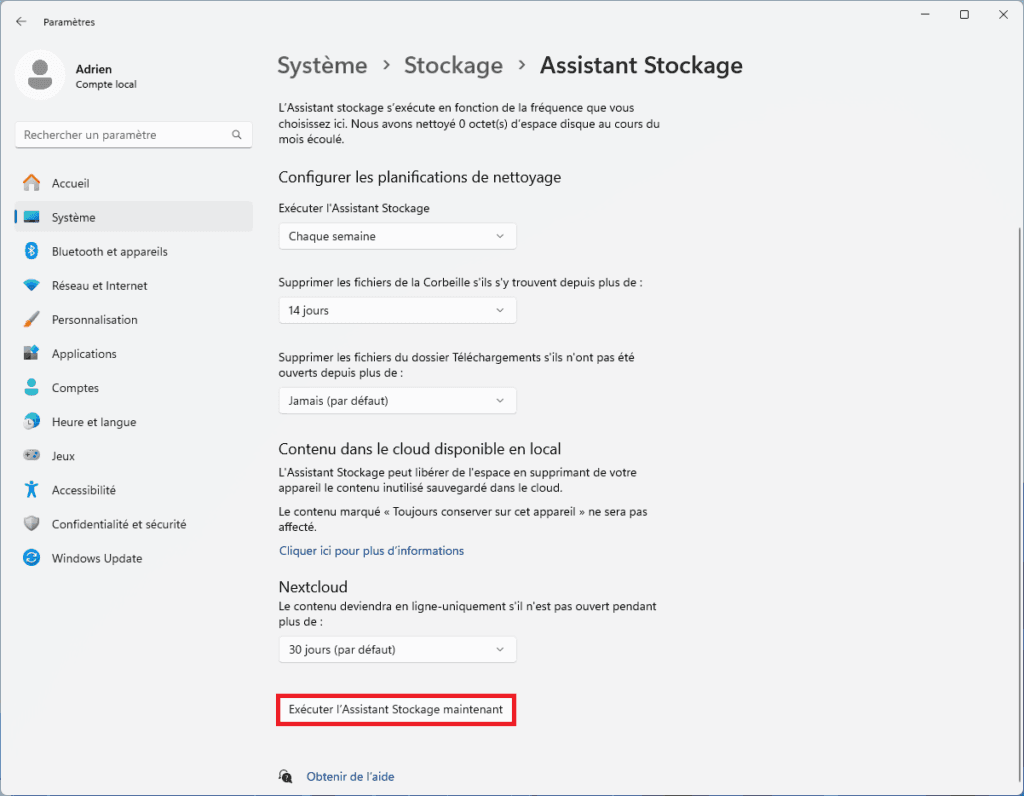
The process takes a few minutes, depending on the condition of the machine. You can carry on working in the meantime.
3. Cleaning tips: where the real benefits lie
Go back to the main Storage page (Settings → System → Storage) and scroll down. You’ll see a section called ‘Clean-up recommendations’. That’s where the biggest gains are to be found.
Windows lists the files by category, showing the recoverable space before you even confirm. The first category you should always check is ‘Windows Update Cleanup’. It contains old installation files for updates that have already been applied, which Windows keeps as a precaution but which you no longer need. On a machine that has never been cleaned, this category alone often accounts for between 5 and 15 GB.
Other useful categories include temporary files (app caches, installation leftovers), apps that haven’t been used for a long time (with their file sizes shown), and large files, so you can quickly identify what’s taking up the most space. Each line shows exactly how much space you’ll free up. Tick the box and confirm.
4. Free up space with OneDrive without losing any data
If you use OneDrive, the Storage Assistant can remove synchronised files from your PC that you haven’t opened for a while. These files aren’t deleted; they remain available in the cloud and will be downloaded automatically when you open them.
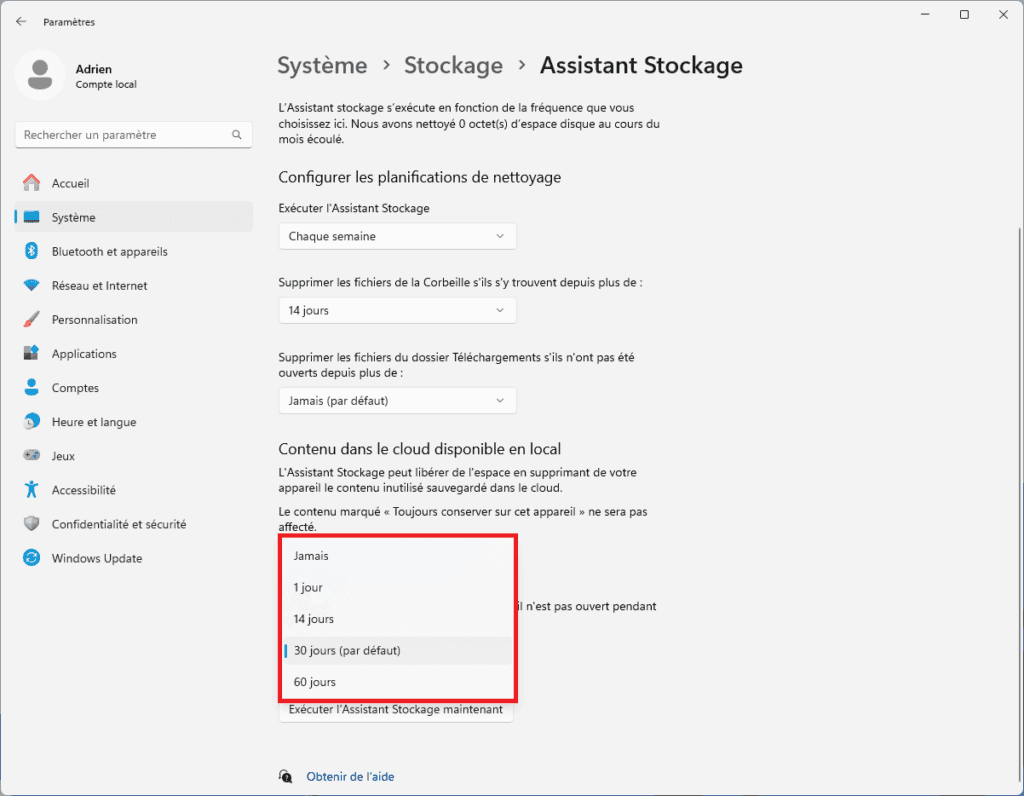
The 14-day setting is suitable for most purposes. A file you haven’t touched for two weeks probably doesn’t need to take up local storage space. If you regularly work offline, disable this option or change it to 60 days.
Is the Storage Assistant enough to clean up my PC?
Storage Sense clears out what Windows considers to be unnecessary files. It will never delete your games, films or photos. If your drive is still full after the clean-up, the problem lies elsewhere.
Start by checking what’s taking up space. The charts in Settings → System → Storage show the breakdown by category (apps, documents, music, videos). This is the starting point for deciding what to delete.
If pre-installed apps or software you’ve never used are taking up a lot of space, uninstalling them completely can free up several gigabytes in one go. If the problem is that your SSD is too small for your PC’s needs, software solutions have their limits. Additional cleaning software helps with residual files, but it is no substitute for a larger drive if you are fundamentally short on space.
If your PC is still running slowly despite having freed up some space, it’s probably no longer a storage issue. The real causes of a slow PC running Windows 11 usually lie elsewhere.