
Hardware virtualization technologies, such as Intel’s VT-x and AMD’s AMD-V, are essential for running virtual machines with optimum performance. They enable virtualization software such as VirtualBox, VMware or Hyper-V to directly access processor resources for faster instruction execution. These features are not always enabled by default and require BIOS/UEFI intervention. This guide explains how to check and enable hardware virtualization on your PC, so you can take full advantage of virtualized environments.
Enable hardware virtualization in BIOS/UEFI on PCs (VT-x and AMD-V)
- Check whether virtualization is enabled on your PC
- Enable VT-x or AMD-V hardware virtualization in BIOS/UEFI
- Activate Hyper-V and the Virtual Machine Platform under Windows
Check whether virtualization is enabled on your PC
Before accessing the BIOS/UEFI, it’s best to check whether virtualization is already enabled. Under Windows, follow these steps:
- Open Task Manager andaccess the Performance tab.
- Select Processor and check whether the Virtualization line indicates Enabled or Disabled.
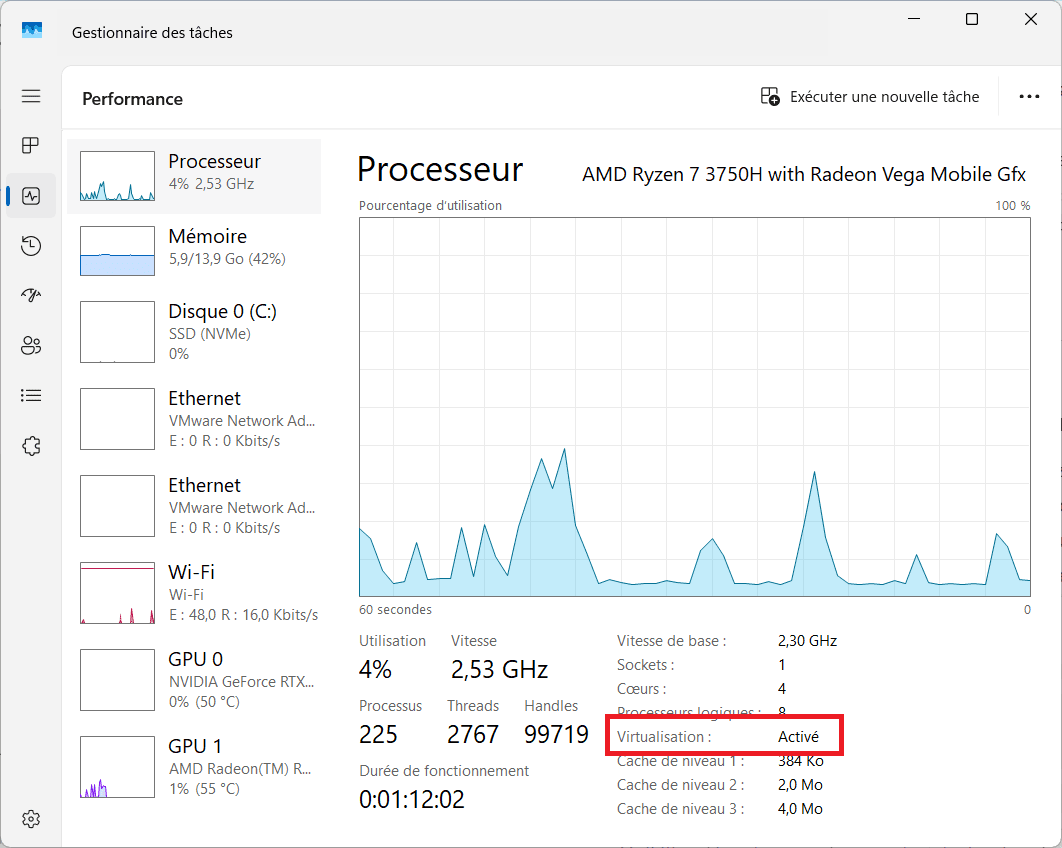
If virtualization is disabled, it must be enabled in the BIOS/UEFI.
Enable VT-x or AMD-V hardware virtualization in BIOS/UEFI
- Restart your PC.
- Access BIOS/UEFI by pressing the key corresponding to your motherboard at boot-up(Suppr, F2, F10, or Esc depending on the model).
Discover the list of BIOS / UEFI access keys by manufacturer.
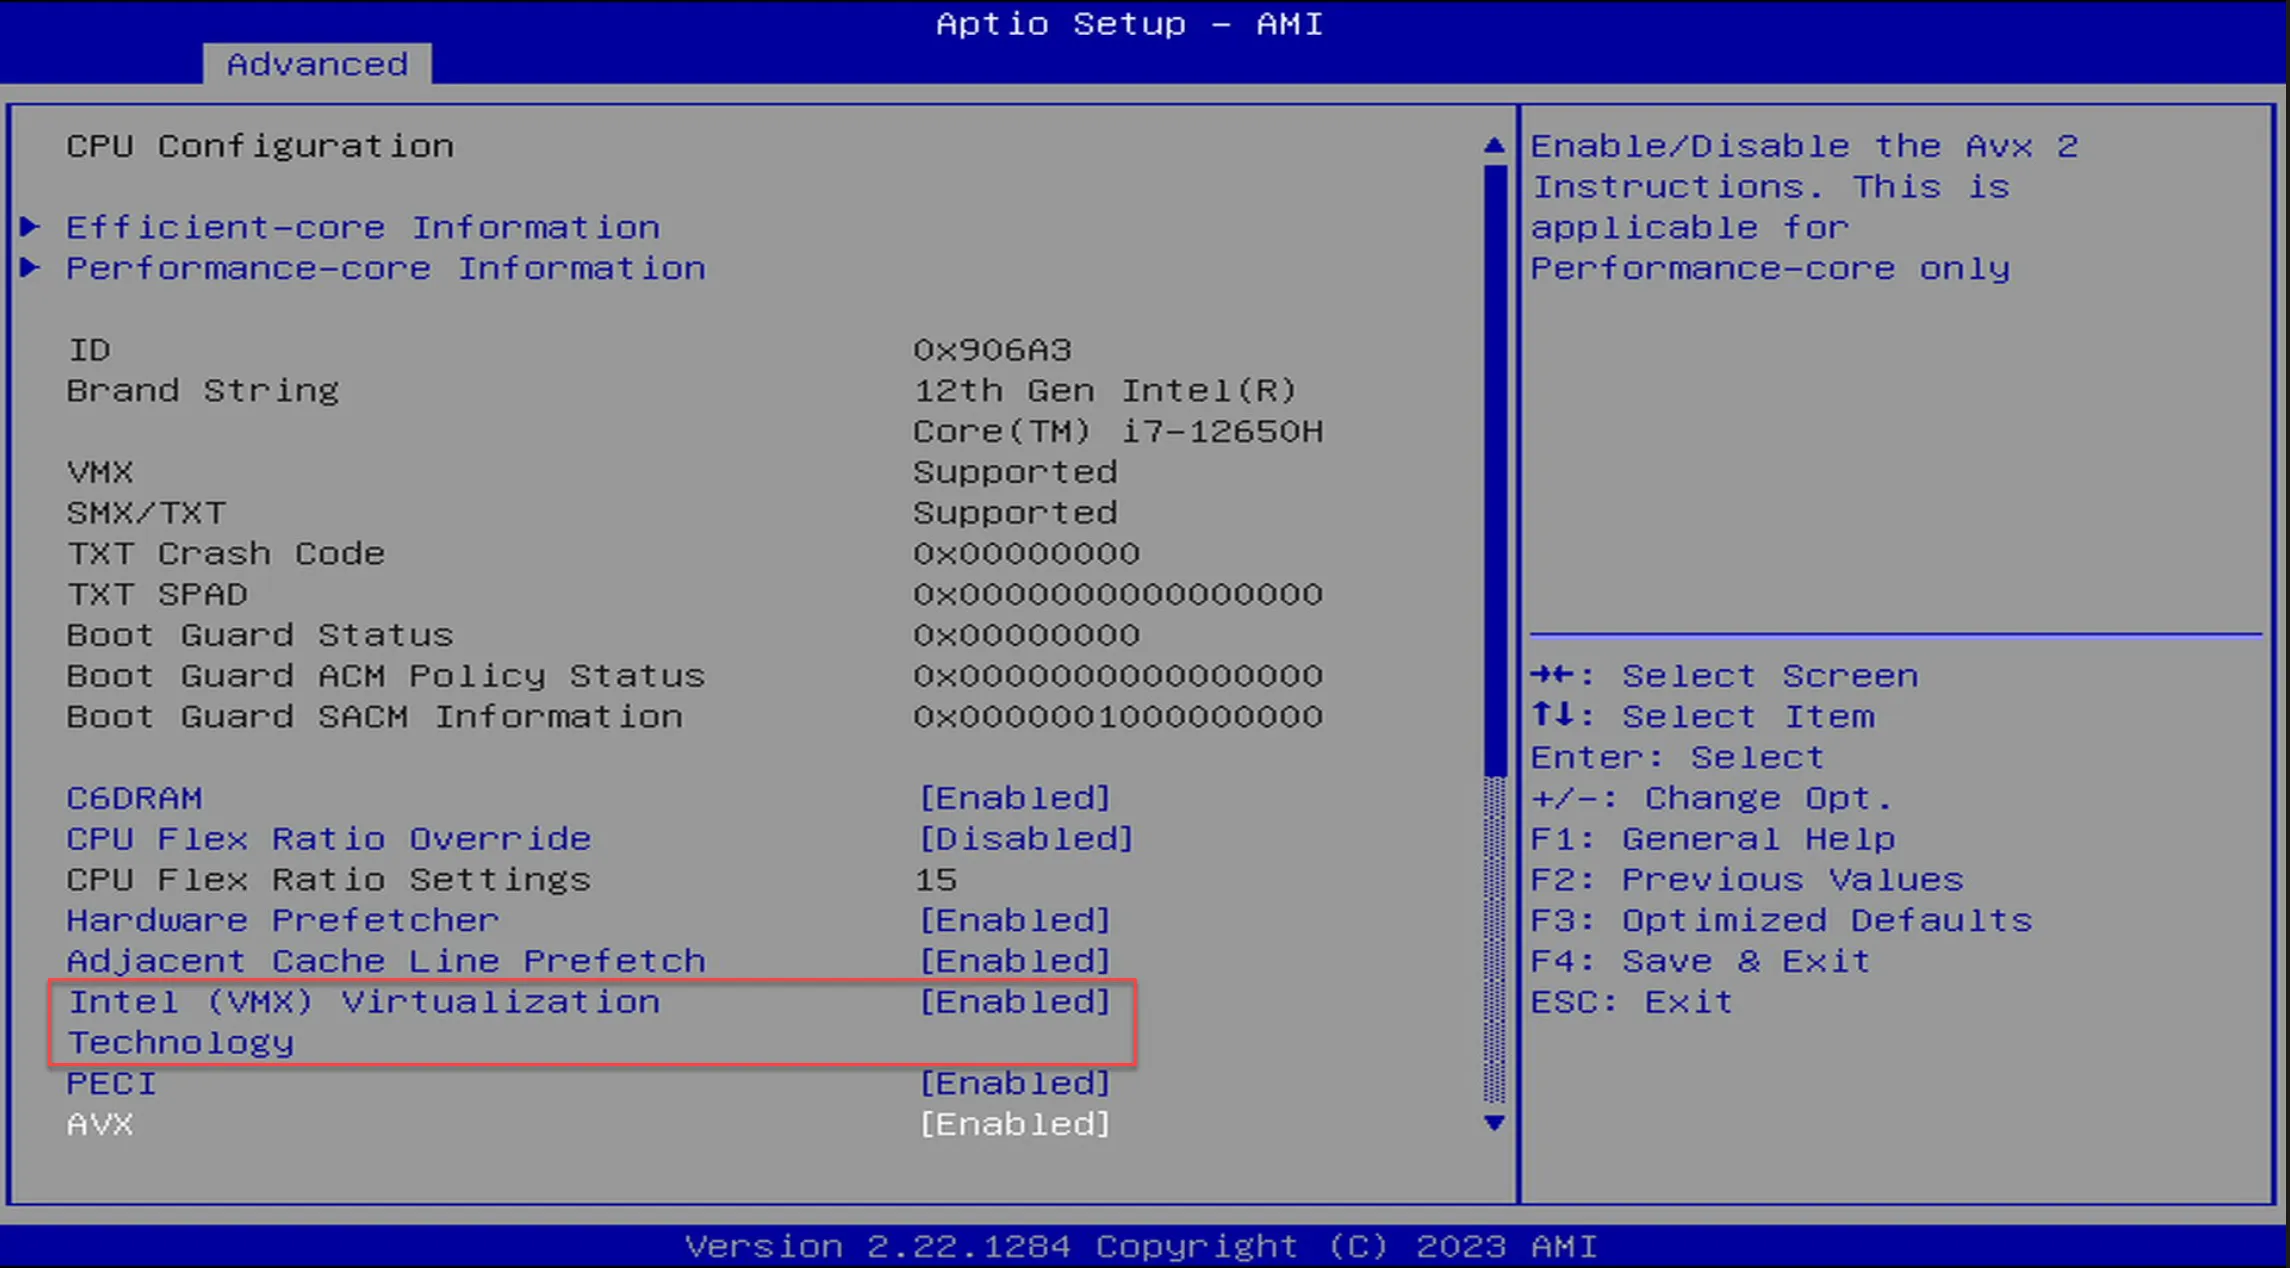
- Once in BIOS/UEFI, navigate to the Advanced or CPU Configuration tab.
- Search for Intel (VMX) Virtualization Technology or AMD SVM Mode (depending on your processor) and enable this option (Enabled).
- Save your changes and restart your PC.
Once you’ve followed these steps, you can check again in the Task Manager that virtualization has been enabled.

Activate Hyper-V and the Virtual Machine Platform under Windows
Hyper-V is a virtualization technology integrated into Windows that lets you create and manage virtual machines. To use it, you need to activate certain functions. Here are the detailed steps for activating Hyper-V and the Virtual Machine Platform under Windows 10 and 11.
Find out how to install Hyper-V on a Windows Home Edition.
- Open the Control Panel.
- Go to Programs > Enable or disable Windows features.
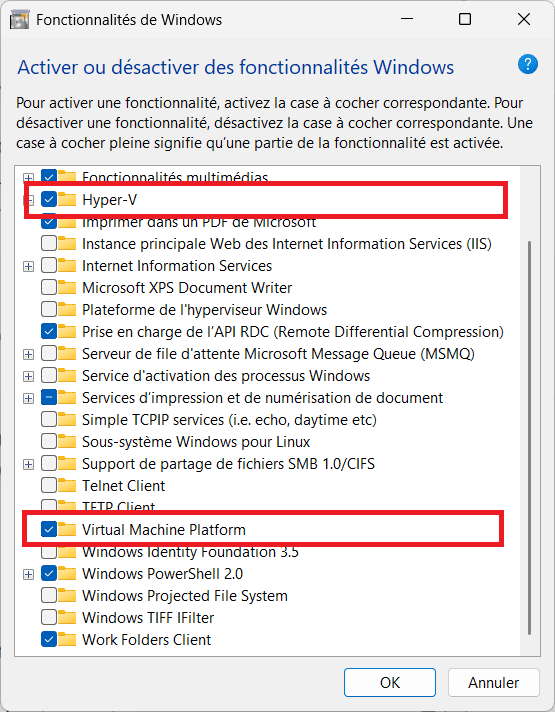
- Click OK, then restart your PC.
Did you find this article helpful?
Share it so others can benefit from it.
Learn more about the author
