When you decide to replace the hard disk in your laptop with an SSD, the question that often comes up is: do you have to reinstall everything? Good news: the answer is no! Thanks to disk cloning, you can copy your entire system and data. In this article, I’ll show you several ways to clone your hard disk and ensure a smooth migration.
SSD: How to clone a laptop hard disk?
- Method 1: Clone your disk with a docking station
- Method 2: Clone your disk using dedicated cloning software
Prepare the following materials:
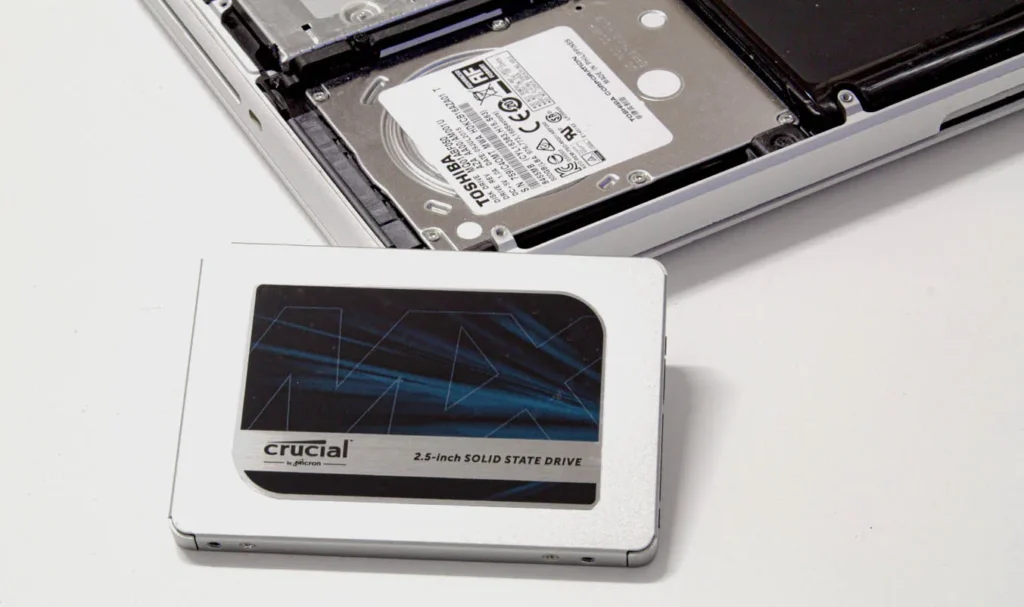
- A SATA or M.2 SSD depending on your computer’s compatibility.
- A precision screwdriver.
- A hard disk/SSD enclosure to clone the existing disk.
- A plastic spudger for removing the PC case without damaging it.
Method 1: Clone your disk with a docking station
This first method is the simplest, and is ideal if you’re looking for an effortless solution. It involves using a dedicated tool or device that automates the process of cloning your data at the touch of a button. No complicated software or advanced technical knowledge is required!
⚠️ Caution: Make sure you choose a docking station that supports cloning for this method to work properly.
For example, the Sabrent EC-CH2B Docking Station is an excellent option. It supports direct cloning without the need for additional software.
1.1 Removing the hard disk from your laptop
Place your laptop on a clean, flat surface, then turn it over. Look for a screwed-on access panel, often identified by a specific icon or logo. If your PC is a compact model, the hard disk may only be accessible by removing the entire bottom cover.
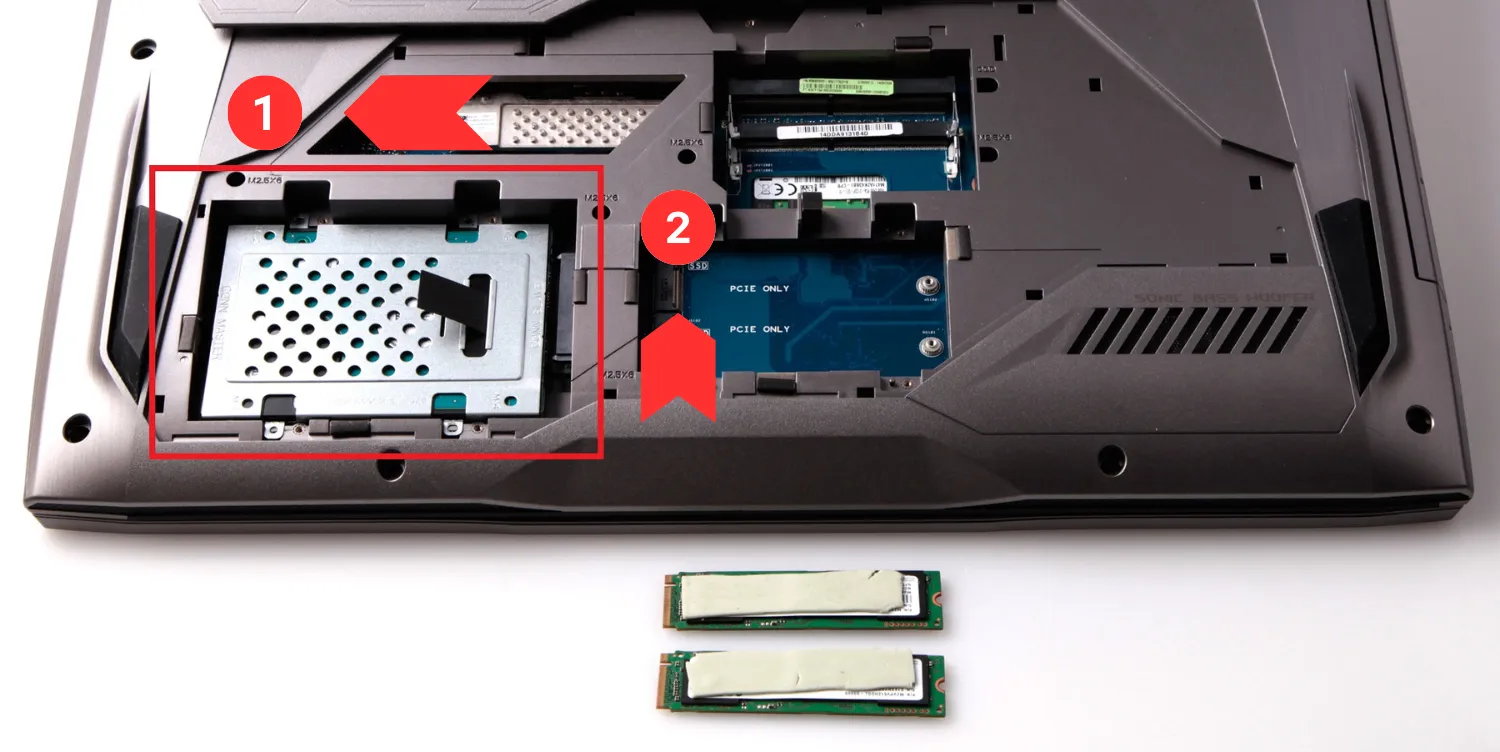
Using a precision screwdriver, carefully unscrew the screws on the access panel. Use a plastic tool (spudger) to lift the panel without scratching or damaging the housing.
Once the panel has been removed, the hard disk will appear. It usually takes the form of a metal rectangle held in place by screws or clips. Carefully unscrew these fasteners.
Pull gently on the disk to disconnect it from its SATA port. Never use force, as the connectors are fragile. If the drive is mounted in a metal frame or chassis, remove it, noting its orientation for reassembly.
1.2 Connect disks to the station and start cloning
First, plug your docking station into an electrical outlet. Some also require connection to your PC via USB, but in many cases, cloning works autonomously. Take a second to check the manufacturer’s instructions, just to make sure you’re doing the right thing.
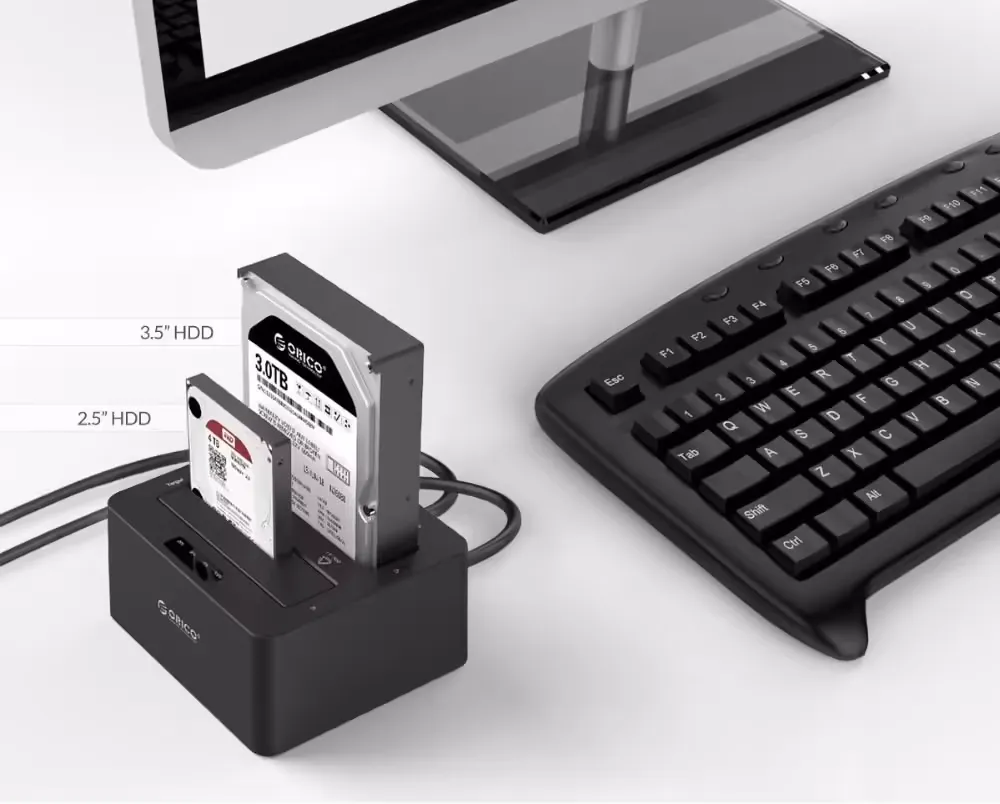
Insert discs into the docking station
First, plug your docking station into an electrical outlet. Some docking stations also require a USB connection to your PC, but in many cases cloning works independently. Take a second to check the manufacturer’s instructions, just to be sure.
- Slide your old hard disk (the one containing your data) into the station’s Source or HDD1 slot.
- Then place your new SSD in the Target or HDD2 slot. Make sure both disks are firmly seated to avoid false contacts.
To clone a hard disk, the space available on the target drive must be greater than the amount of data used on the source drive. For example, if your current drive uses 680 GB, we recommend you opt for a SATA SSD of at least 1 TB.
The station does all the work for you. Find the button marked Clone or a similar icon. Hold it down for a few seconds until an LED lights up or starts flashing. This means that cloning is in progress. All you have to do now is wait.
The time required depends on the amount of data to be copied and the speed of the disks. On average, it can take between 15 and 60 minutes. In the meantime, you can relax and enjoy the idea of a faster future PC thanks to your new SSD.
1.3 Connect the cloned hard drive and enjoy your new SSD
Now that the cloning is complete, it’s time to give your new SSD its place of honor. Pick it up and insert it where your old hard disk used to be.
- Connect it to the SATA port: align the connectors and push gently until you hear a click.
- If the SSD is held in place by a frame or screws, make sure you replace everything correctly.
- Replace the access panel or bottom cover of your PC and tighten the screws to hold everything in place.
- Reconnect the battery (if removable) and connect the computer to the mains.
- Press the power button and let your computer start.
At this point, your system should look exactly as it did before… but much faster!
👉 Bonus tip: If your PC has a second hard drive slot, you can reuse your old drive as additional storage space. A practical solution for backing up your files without cluttering up your brand-new SSD.

Method 2: Clone your disk using dedicated cloning software
The best cloning software available
Among the most reliable software for cloning a disk, here are a few popular options:
- Acronis True Image: This is one of the most powerful and intuitive cloning programs available. It offers a user-friendly interface and advanced features such as partition management and data backup.
- Clonezilla: A free, open-source tool, ideal for experienced users looking for a customizable solution.
- EaseUS Todo Backup: This versatile software is ideal for both disk cloning and regular backups.
If, like us, you’re replacing your drive with a Crucial BX500, Acronis True Image is a particularly recommended option. Crucial offers a free version of this software for this SSD, which you can download from this link: Download Acronis True Image for Crucial.
2.1 Cloning a hard disk with Acronis True Image for Crucial
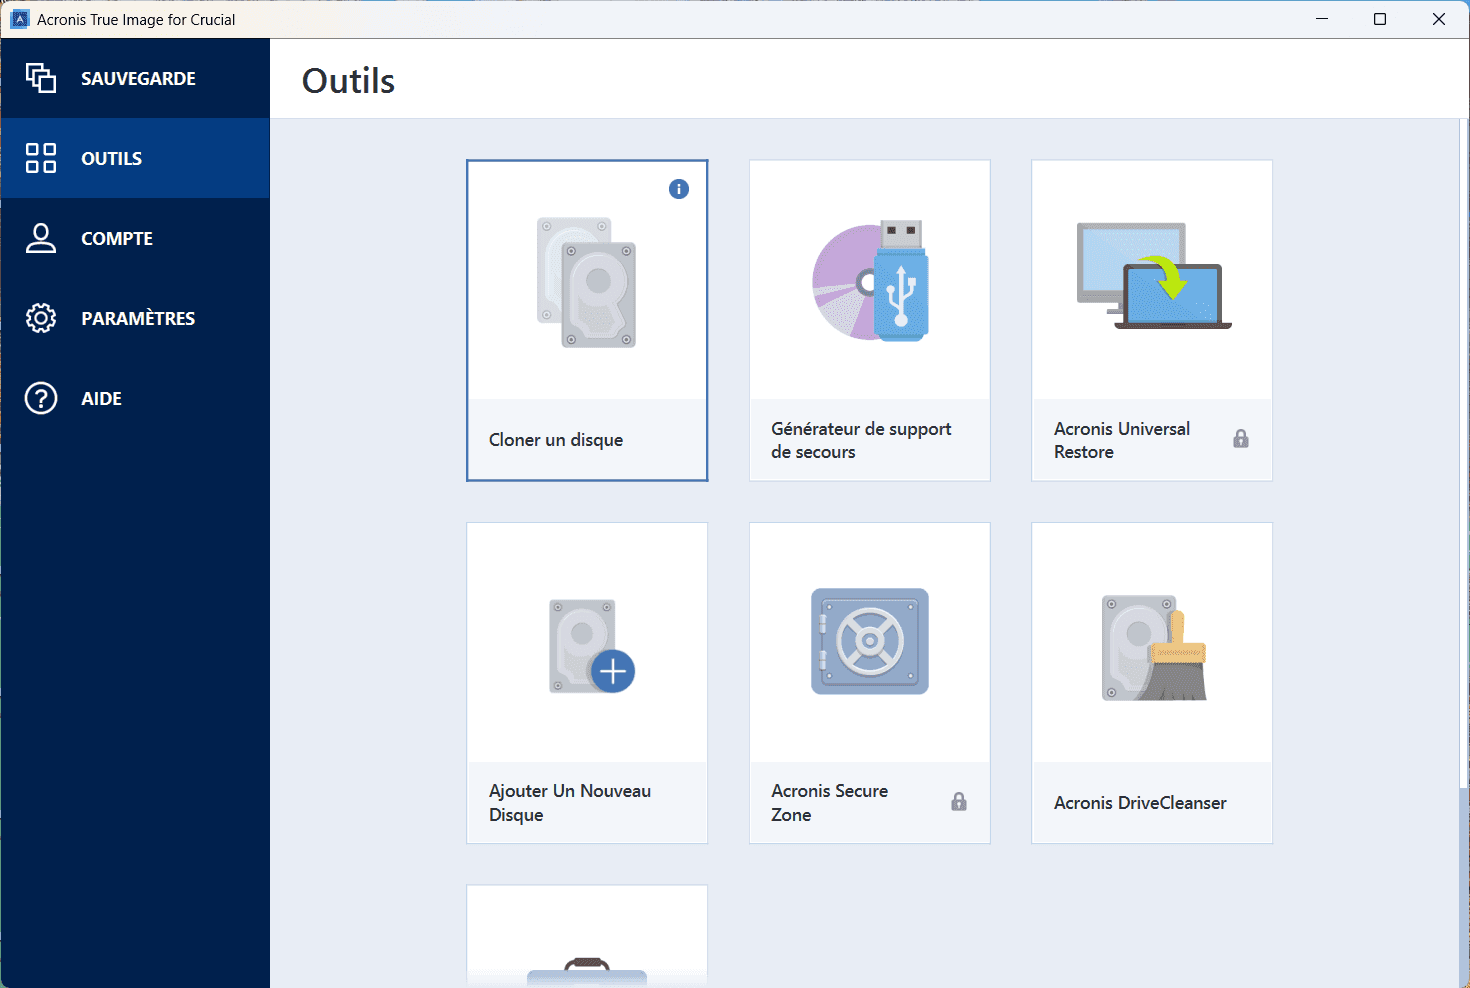
Start Acronis True Image for Crucial. Click on the Tools tab in the left-hand side menu and select Clone disk from the available options (see screenshot below).
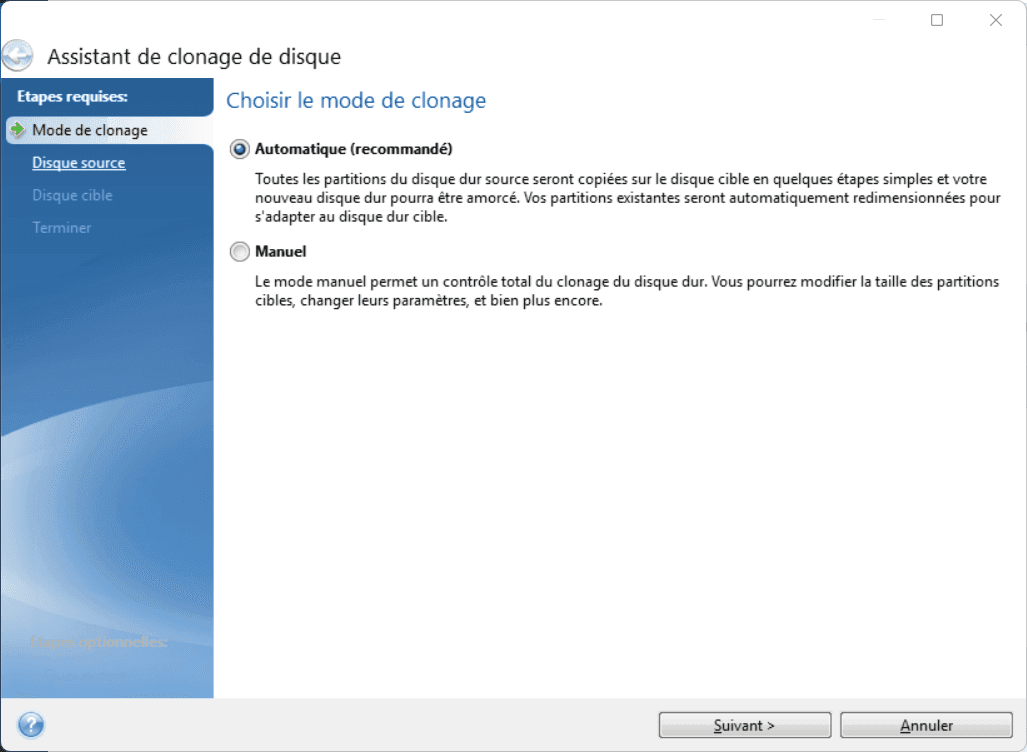
Acronis offers two cloning modes:
- Automatic (recommended): All partitions will be copied and resized automatically to fit the target disk. This mode is ideal for beginners.
- Manual: Allows total control over cloning, including partition selection and size.
For this tutorial, select Automatic mode, then click Next.
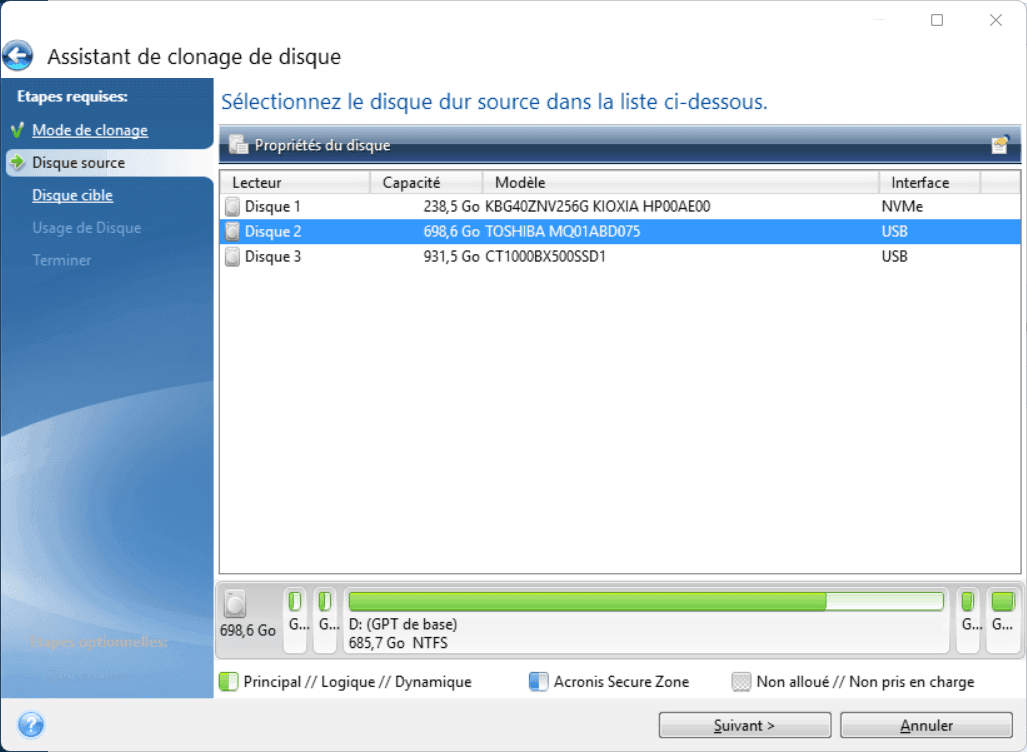
A list of your available disks appears.
Click on the disk containing the data to be cloned (source disk). Make sure you select the correct one.
Once selected, click Next.
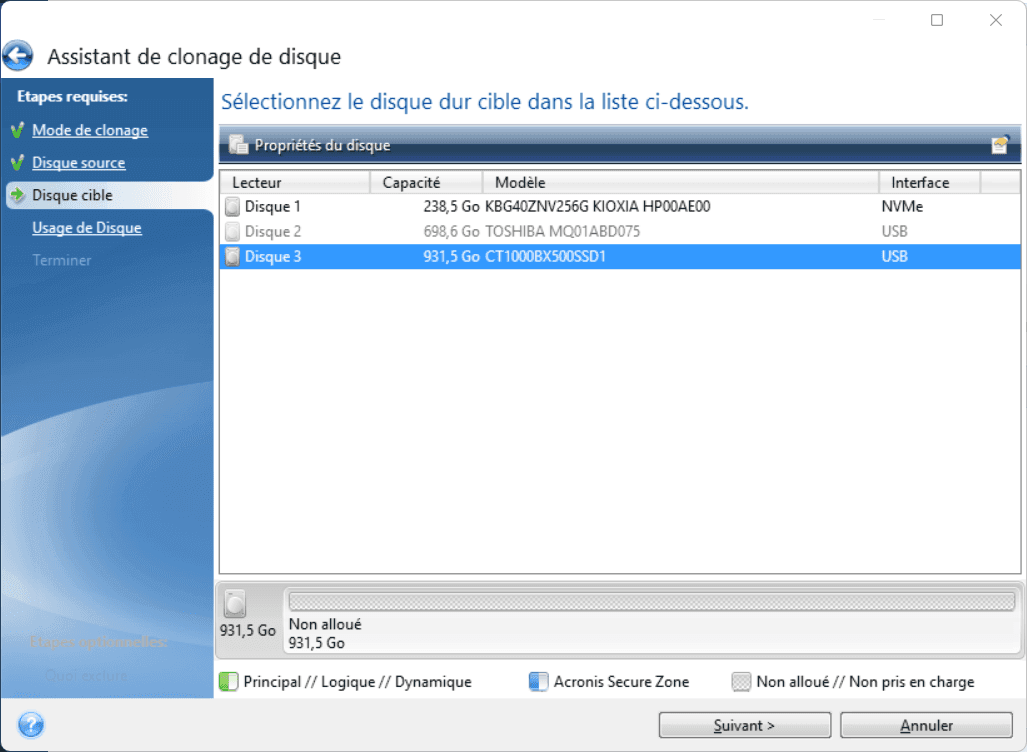
Select your target drive(SSD Crucial BX500 in our case) from the list of available drives.
Make sure it’s empty, or that there’s no important data in it, as cloning will overwrite any existing content.
Click Next to continue.
Acronis offers you three options for defining the use of your cloned disk:
- To replace a drive on this machine: Ideal if you’re installing the SSD in the same computer.
- For use on another machine: If you want to move the SSD to another device.
- To use as a data disk: To create a dedicated storage disk.
Select the option best suited to your needs ( To use on another machine in our case) then click Next.
- Check the cloning parameters. Acronis will display a summary of the actions to be performed.
- Click on Finish to start the cloning process. This can take from several minutes to several hours, depending on the size of the data to be cloned.
Disk cloning creates an exact, complete copy of your hard disk ( operating system, applications and files) ready for use on a new disk. By contrast, backup involves copying only specific files or folders to protect them against loss, without enabling a system to be booted directly.
👉 Cloning: ideal for migrating to an SSD or replacing a disk.
👉 Backup: perfect for preserving your data over the long term.
The two methods complement each other for maximum protection of your data and system.
Did you find this article helpful?
Share it so others can benefit from it.
Learn more about the author
