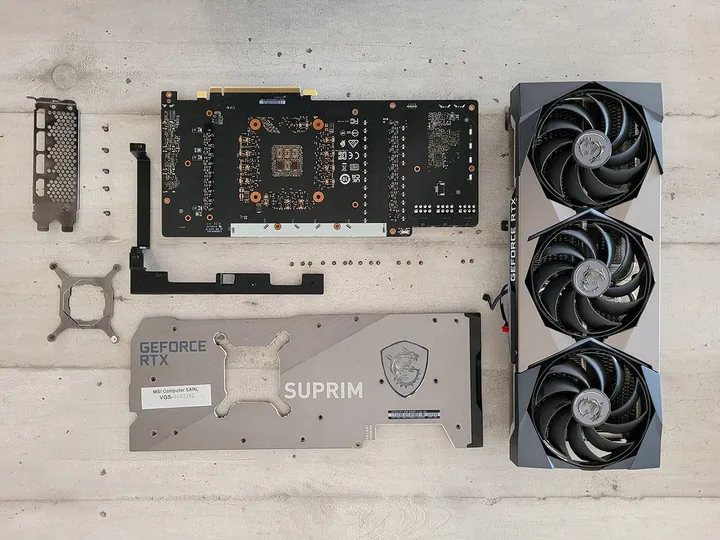
Are you having problems with your graphics card? If it’s heating up abnormally, or if you’re having trouble playing your favorite games, it’s possible that the thermal paste is deteriorating. In this article, we’ll help you understand why and how to change the thermal paste on your graphics card.
When and how to change the thermal paste on your graphics card ?
- GPU thermal paste: When should you consider replacing it?
- How to replace the thermal paste on your graphics card?
- 1. Prepare for disassembly and remove graphics card
- 2. Dismantling the graphics card
- 3. Clean off old thermal paste
- 4: Apply new thermal paste
- 5. Add copper thermal shims to VRAM (for high-performance GPUs)
GPU thermal paste: When should you consider replacing it?
If your graphics card is the beating heart of your gaming setup or creative projects, thermal paste is its silent guardian. Responsible for ensuring proper heat dissipation between the GPU and its cooling system, this little layer is essential for maintaining optimum performance. But like everything else, it has a limited lifespan. So when should you think about replacing it? The signs that don’t deceive :
- Abnormally high temperatures: If your GPU heats up more than usual, even under moderate load, this may indicate that the thermal paste is no longer doing its job.
- Unusual fan noise: Fans constantly running at full speed to cool the GPU are another sign of overheating.
- Performance drops: Frequent slowdowns or crashes during gaming sessions or video rendering can be linked to excessive temperature.
It’s advisable to check the condition of the thermal paste every 2-3 years on a Gaming PC. However, replace the paste if you remove the cooler for any reason.
Changing your GPU’s thermal paste is not a task to be taken lightly, but neither is it a chore to be repeated every year. Be on the lookout for signs of overheating, and respect the recommended intervals. With proper maintenance, your graphics card will continue to run at peak performance for years to come.
How to replace the thermal paste on your graphics card?
Although it may seem daunting, with the right tools and a rigorous method, it’s an operation accessible even to beginners. Here’s a step-by-step guide to help you along the way.
Before you begin, gather these tools:
- A new, high-quality thermal paste (e.g. Arctic MX-4, Noctua NT-H1, or Thermal Grizzly Kryonaut).
- A suitable screwdriver (usually Phillips).
- Cleaning wipes to remove used thermal paste.
- An antistatic mat or surface for safe working.
☝️Retrouvez links to quality products and fast delivery.
1. Prepare for disassembly and remove graphics card
Switch off your PC and disconnect it from the power supply.
Remove your graphics card from the motherboard. Be careful not to damage the PCIe connector.
2. Dismantling the graphics card
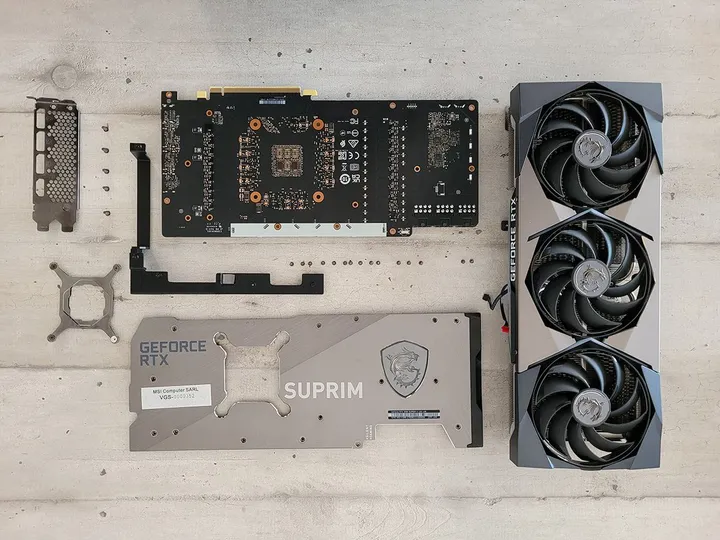
Identify the screws holding the heatsink to the graphics card (often located on the back). Unscrew them carefully.
Carefully separate the heatsink from the GPU. Be careful with the cables connecting the fans to the PCB; disconnect them if necessary.
3. Clean off old thermal paste
Using a wipe soaked in isopropyl alcohol, gently wipe the old thermal paste from the GPU chip.
Do the same on the contact surface of the heatsink. Make sure no residue remains.
4: Apply new thermal paste
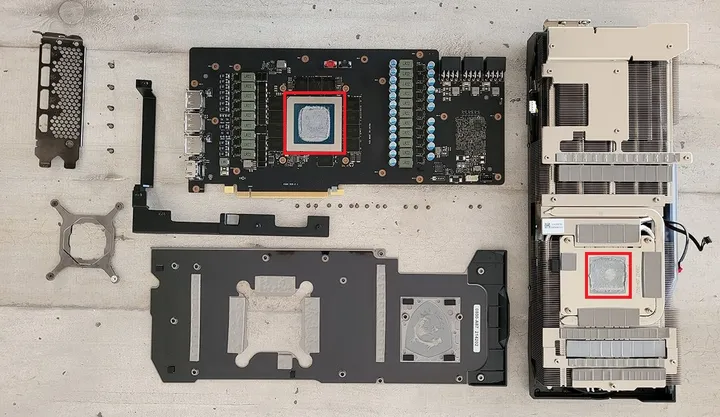
Place a small amount of thermal paste in the center of the GPU chip. An amount equivalent to a grain of rice is sufficient.
Once the heatsink is back in place, the pressure will distribute the paste evenly. Avoid spreading it by hand, unless you’re experienced.
5. Add copper thermal shims to VRAM (for high-performance GPUs)
For high-end graphics cards, VRAM can also heat up and affect overall performance. Adding a copper foil shim between the VRAM and the heatsink can improve heat dissipation.
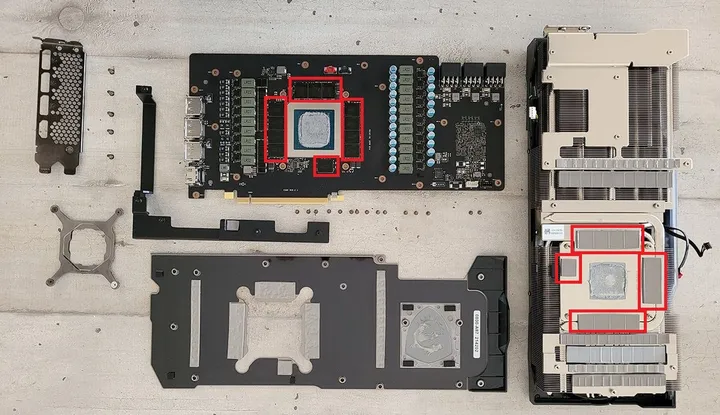
VRAM modules are arranged around the main GPU chip. Consult your graphics card schematic to locate these modules precisely.
Use isopropyl alcohol and a lint-free cloth to gently clean the surface of the VRAM modules and the corresponding area on the heat sink to remove any traces of old thermal material or dust.
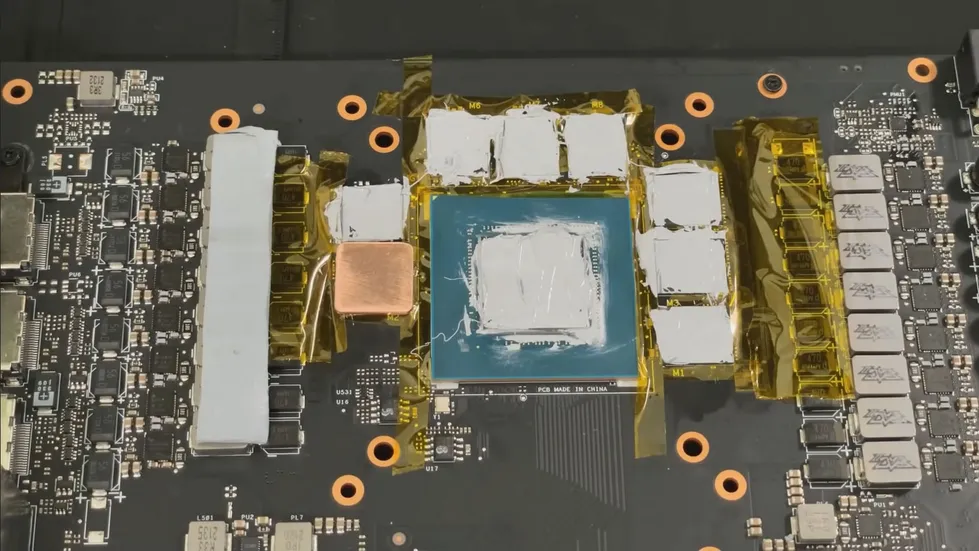
Apply a thin layer of thermal paste to the copper shim to improve thermal conductivity between the VRAM and the shim.
Carefully position each copper shim on the VRAM modules, ensuring precise alignment for maximum contact.
Make sure that the combined thickness of the copper shims and thermal paste does not prevent the heatsink from attaching properly to the GPU.
After installing the copper shims, replace the heat sink on the graphics card, reconnect the fan cables if necessary, and carefully tighten the fasteners.
GPU thermal paste should be replaced every 2 to 3 years, especially for gaming PCs or intensive use. Regular maintenance helps maintain optimum performance and extends the life of your graphics card.
However, replace the paste if you remove the cooler for any reason.
