When your computer’s storage is saturated, it becomes difficult to install new software, download files or even keep the system running smoothly. A frequent cause of this saturation is the accumulation of temporary files, created by Windows and its applications. Find out in this article how to delete these files safely and optimize your computer under Windows 11/10.
A practical guide to deleting temporary files in Windows
- What are temporary files?
- Delete temporary files stored in the Windows AppData/Temp folder
- CCleaner + CCEnhancer : Delete more junk files on Windows
- Cleaning system files on your Windows hard drive
- Why you shouldn’t clean your system every day?
What are temporary files?
Temporary files are files created by the operating system, software and web browsers to temporarily store data required for ongoing operations. These files can have a number of functions, such as speeding up access to certain information, temporarily saving work in progress or facilitating system updates. Here are the different types of temporary files:
- Cache files: used by web browsers and certain applications to store resources (images, scripts, etc.) to speed up page and program loading.
- Installation and update files: created when installing or updating Windows and software, but no longer needed once the operation is complete.
- Temporary system files: generated by Windows to store data during background tasks such as printing or virtual memory management.
- Crash and log files: record information on system or application errors and crashes, useful for diagnostics but useless in the long term.
- Temporary application files: produced by various software programs (video editing, office automation, etc.) to temporarily save modifications in progress.
Although they fulfil a useful function in the short term, these files don’t always disappear automatically and eventually accumulate. This gradual accumulation reduces available storage space and may prevent the installation of new software or the storage of personal files. This can affect overall computer performance when starting up or running demanding tasks.
In some cases, the presence of obsolete files can also cause conflicts or errors. Temporary files linked to older versions of software or updates can interfere with more recent versions, leading to malfunctions or instabilities. To avoid these problems, regular cleaning is recommended.
Delete temporary files stored in the Windows AppData/Temp folder
Press Windows + R to open the Run dialog box.
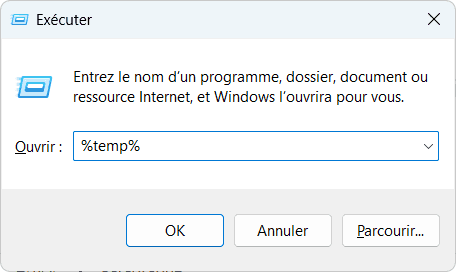
Type %temp% and press Enter.
The Explorer window opens on the folder C:UsersYourNameAppDataLocalTemp, which contains all the temporary files linked to your user session.
Once the folder is open, press Ctrl + A to select all.
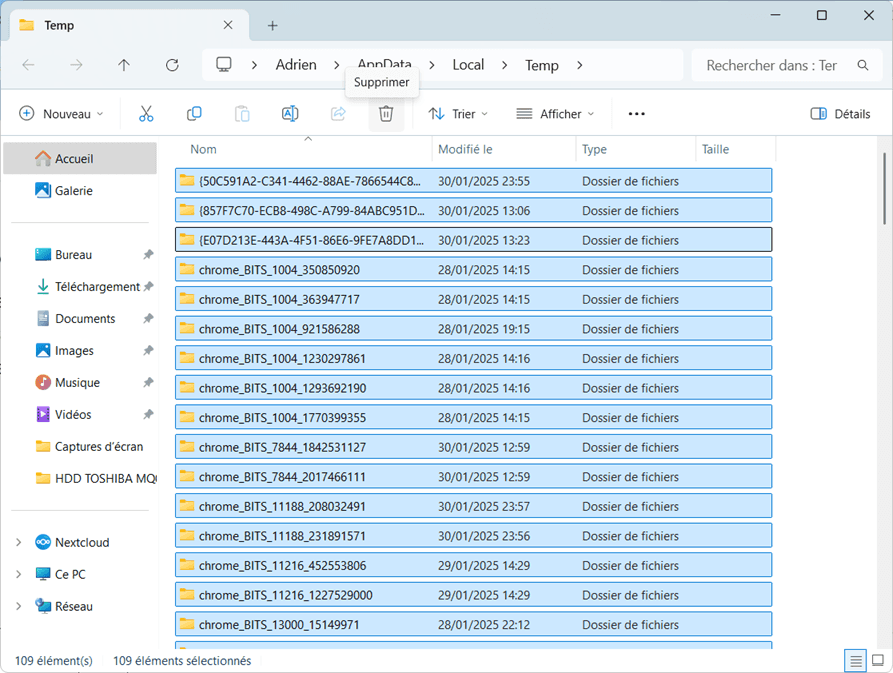
Then delete all files and folders.
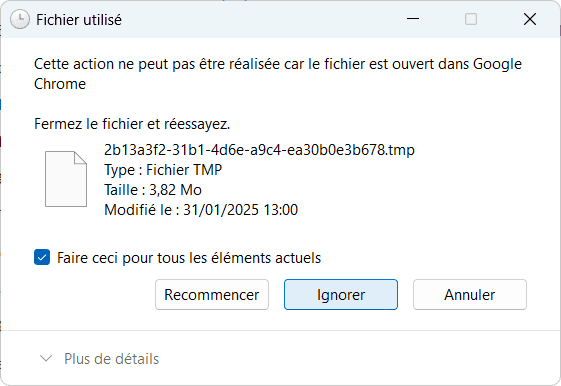
If a file is in use (as in the first shot), click on Ignore to move on to the next files.
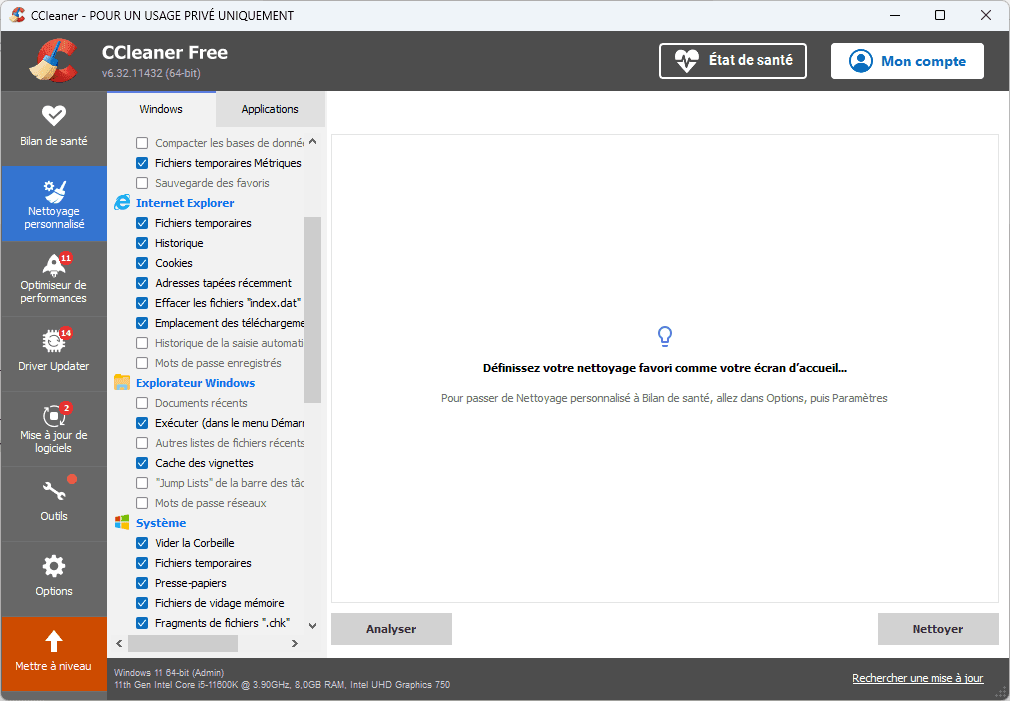
CCleaner + CCEnhancer : Delete more junk files on Windows
For effective cleaning, CCleaner is a must-have reference. However, its cleaning capabilities can be extended with CCEnhancer, a utility that considerably enriches the list of deletable files.
CCleaner installation by Piriform
CCleaner is a software utility designed to optimize computer performance by deleting unnecessary files and cleaning the Windows registry. It frees up disk space by eliminating temporary files, browser caches, cookies and duplicate files. It offers free features such as program uninstallation, startup application management and registry error correction to improve system stability and speed. Its intuitive interface makes it accessible to beginners and experienced users alike.
To get started, visit the official CCleaner website and download the latest free or professional version.
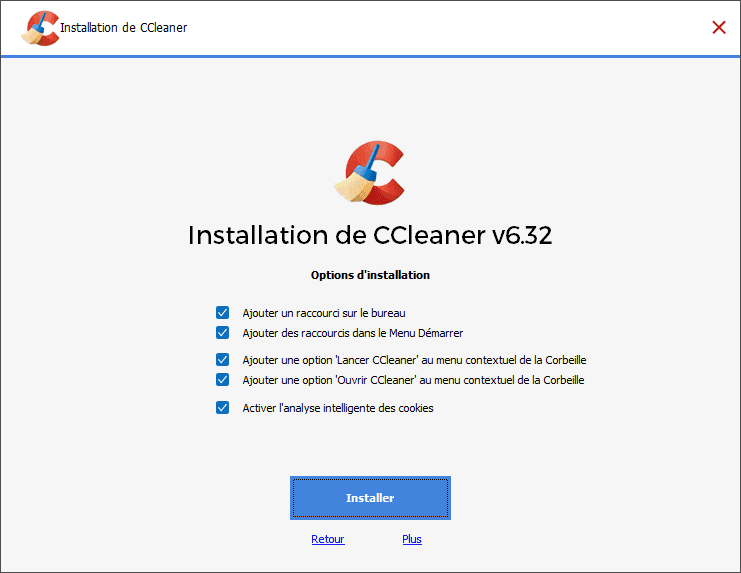
Install the software according to the instructions, then close it completely.
Download and configure CCEnhancer
CCEnhancer is a program that enhances CCleaner’s database by adding over 1,000 new cleaning rules from the Winapp2.ini community. Thanks to CCEnhancer, CCleaner can now remove residual files from software that the basic tool does not support, such as :
- Temporary files from office suites (Microsoft Office, LibreOffice).
- Multimedia application logs and caches (VLC, Spotify, Adobe).
- Unnecessary files from code and development editors (Visual Studio, Eclipse).
- Cached data from video games and launchers (Steam, Epic Games, Origin).
Start by downloading CCEnhancer from the official SingularLabs website.
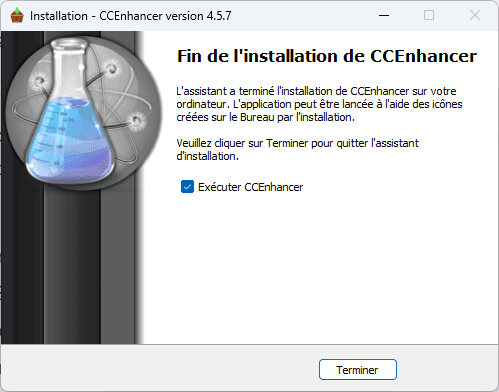
Run the program and click on Download latest update.
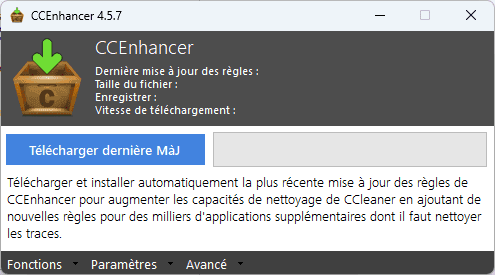
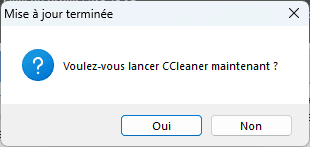
Once the download is complete, CCEnhancer will automatically add the new rules to CCleaner and ask you if you wish to open CCleaner.
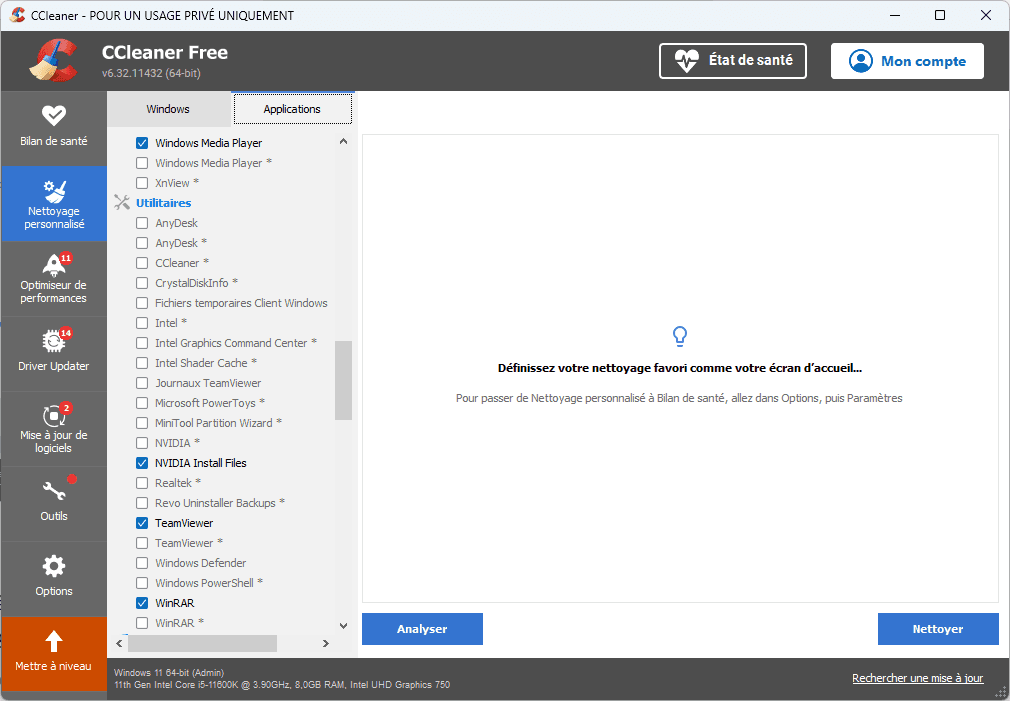
Launch CCleaner and go to Custom Cleaning.
Depending on your computer’s performance, it may take a long time to load, but this is normal, as CCleaner loads over 1,000 new cleaning rules.
After loading, you’ll notice that many new cleaning rules have been added to CCleaner.
There’s no need to run CCleaner every day. Cleaning too often doesn’t free up any more disk space, and may even slow down some software by deleting files useful for its proper operation.
Find out how to configure Storage Sense on Windows to free up disk space every day without risk.

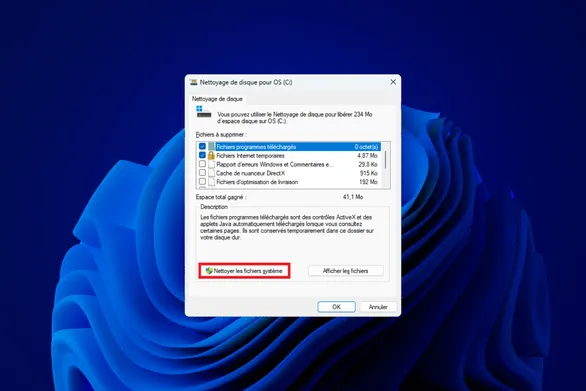
Cleaning system files on your Windows hard drive
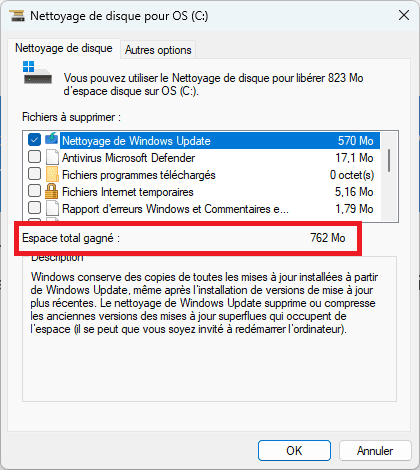
Press Windows + R on your keyboard to open the Run window.
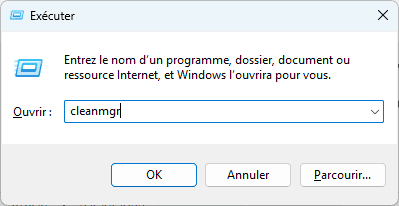
Type cleanmgr and click OK.
A window opens, asking you to select the disk to be cleaned (if you have more than one). Select C: (or another disk if you wish to clean it) and click OK.
Before selecting the files to be deleted, click on Clean system files.
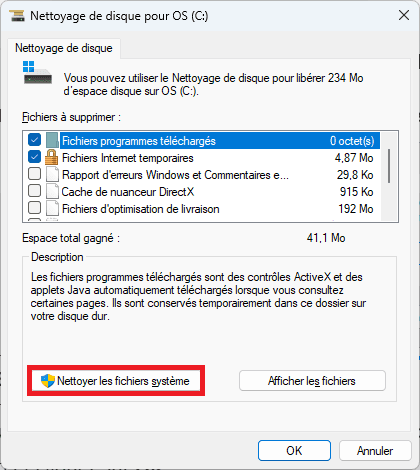
The tool will re-scan and display additional files for removal, such as :
- Temporary Internet files
- Downloaded program files
- DirectX update cache
- Windows error reports
- Delivery optimization files
- Windows Update files (often several GB in size)
- Windows upgrade files
- Temporary system files
💡 Tip for not slowing down your PC: Avoid ticking files that weigh less than 50 MB. Deleting them will free up almost no space, but could slightly affect system speed.
Click OK, then Delete files.
Windows will delete unnecessary files. This may take a few minutes, depending on the number of files to be deleted.
Why you shouldn’t clean your system every day?
Cleaning your computer is a good practice, but trying to do it every day is a common mistake. Many people think that frequent cleaning improves performance, but in reality it can make certain tasks slower and doesn’t free up that much space.
Windows and the software you use create temporary files to speed up their operation. These files enable applications to open faster, images to be displayed without delay and websites to load faster.
Let’s take a few simple examples:
Image thumbnails: Windows generates thumbnails to preview images in a folder.
➜ If you delete them every day, Windows will have to recreate them each time, which slows down their display and uses more resources.
Temporary software files: software such as Photoshop, Word or even some games save files to speed up their startup.
➜ Constantly deleting them makes these programs slower to open.
On top of that, temporary files often only take up a few megabytes. A daily clean-up usually deletes only 10 to 50 MB, which has no impact on your computer’s speed or storage space.
Disk cleaning is useful once a month, no more.
✔ If your disk is almost full.
✔ If any software or Windows starts to slow down.
✔ After an important update.
Computer maintenance is not about deleting everything that moves, but about leaving useful files in place so that Windows runs optimally, while deleting unnecessary files.
Did you find this article helpful?
Share it so others can benefit from it.
Learn more about the author
