
Windows 11 seduces with its modern design: transparency effects, fluid animations and neat transitions enhance the user experience. However, these visual elements consume system resources and can slow down the computer, particularly on older or less powerful machines. They can also slightly reduce laptop autonomy. In this guide, we’ll look at how to disable some or all of these effects, in order to prioritize performance and responsiveness.
In this article
Why disable visual effects?
While Windows 11’s visual effects bring a touch of modernity, they are not essential for everyday use. On an older PC or one equipped with modest components, they can even become a hindrance to fluidity. By deactivating these animations and transparencies, you free up processor and memory resources, resulting in a more responsive system.
Laptop users also have an interest in lightening the interface: fewer effects mean lower power consumption, and therefore longer battery life. Finally, beyond the technical aspect, some prefer a simpler, more straightforward interface, free of graphical tricks.
Disable transparency and animation effects in Windows 11 Settings
Windows 11 relies heavily on its modern appearance: transparency effects, fluid transitions, shadows and animations. While these elements enhance aesthetics, they also consume resources. On an older PC, or simply to improve responsiveness, it can be useful to deactivate them. Here are several methods, from the simplest to the most advanced.
- Enter Windows 11 Settings.
- In Accessibility, click on Visual effects.
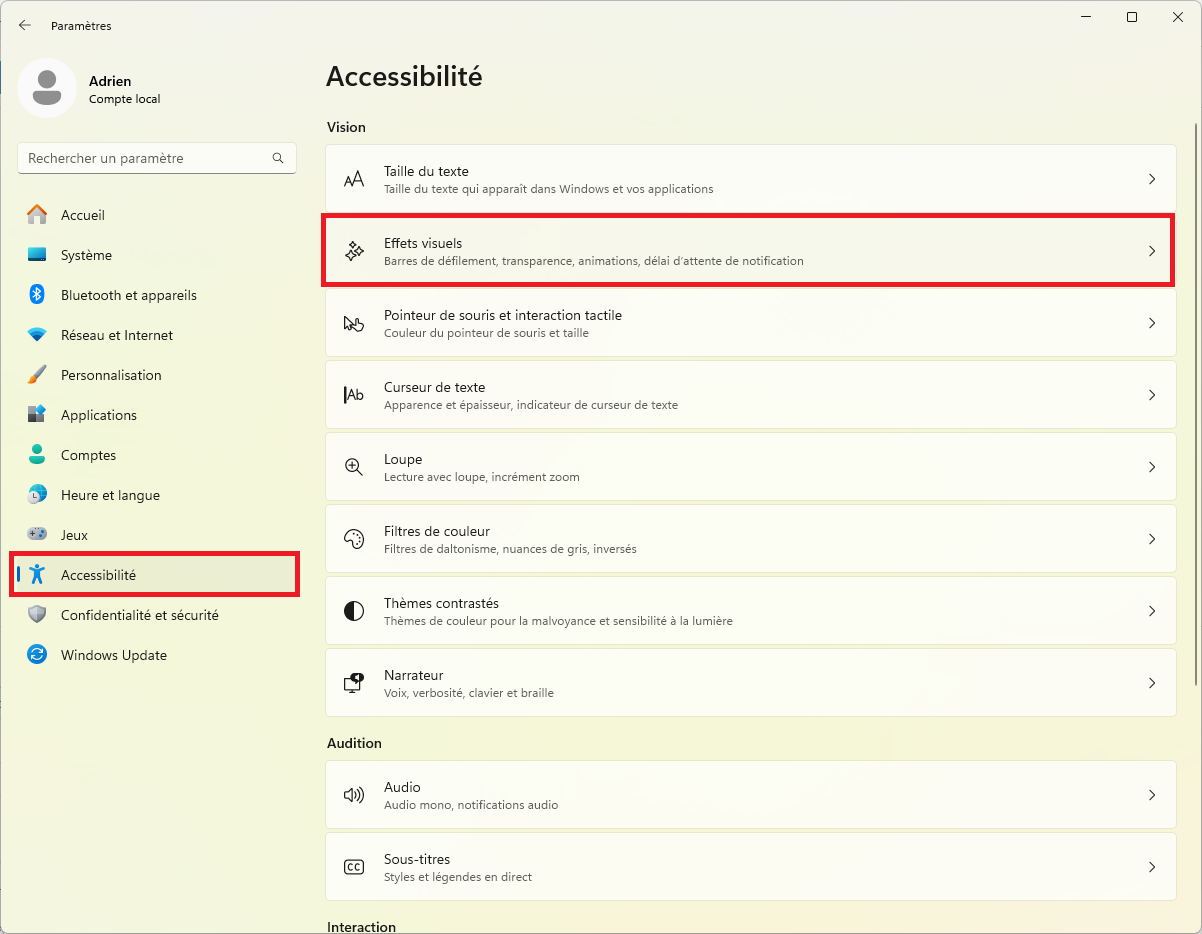
- Disable transparency effects and animation effects.
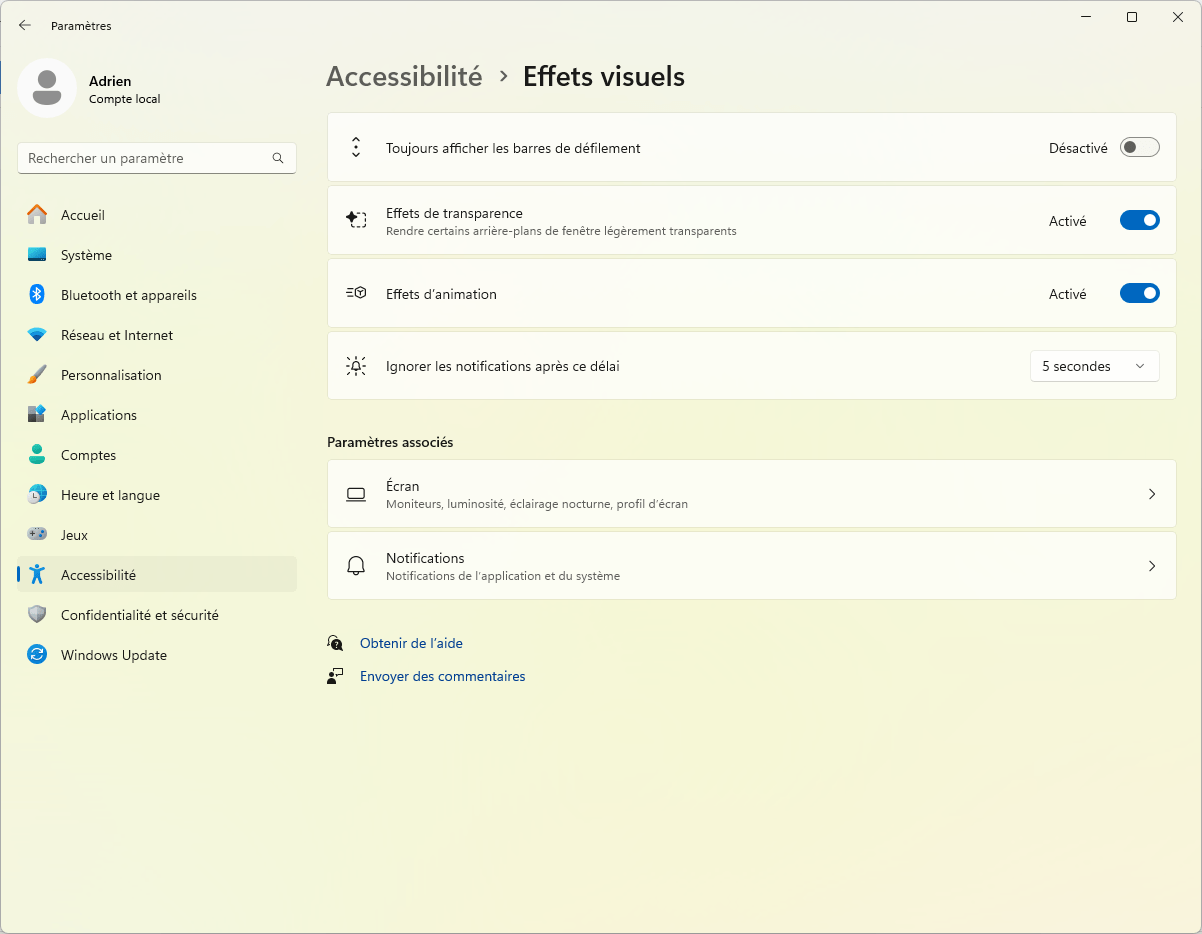
By deactivating these two options, Windows abandons superfluous graphic effects and gains in fluidity. The difference is particularly noticeable on PCs equipped with a mechanical hard disk or integrated graphics card, where every resource saved counts.
Disable other visual effects via Advanced Performance Options
In addition to animations and transparency, Windows 11 activates various visual effects by default, such as shadows, transitions and smoothing of graphic elements. These aesthetic details may seem trivial, but on a low-powered PC, they sometimes slow down the display and consume unnecessary resources. The good news is that you can adjust them one by one, keeping only those that really enhance the experience.
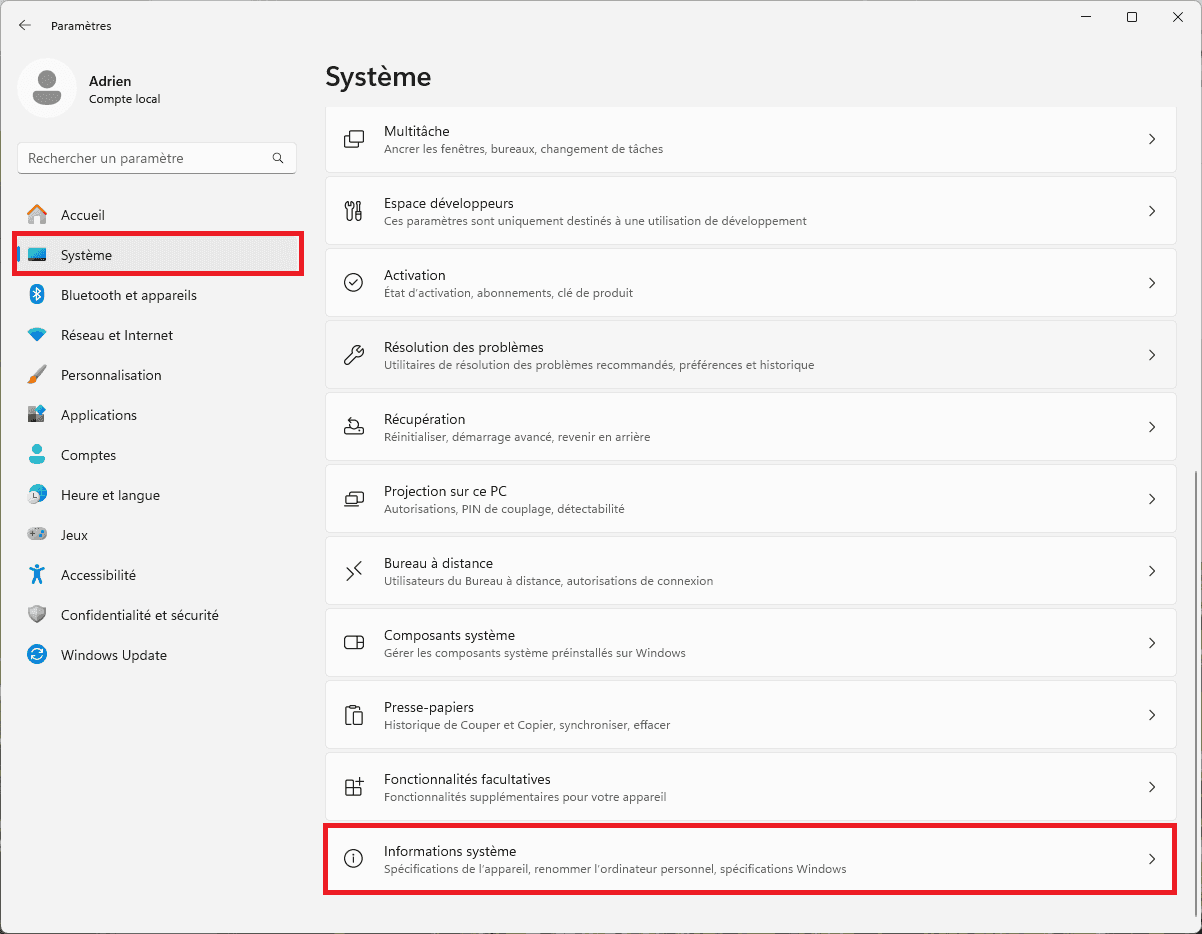
- Enter Windows 11 Settings.
- In System, click on System information.
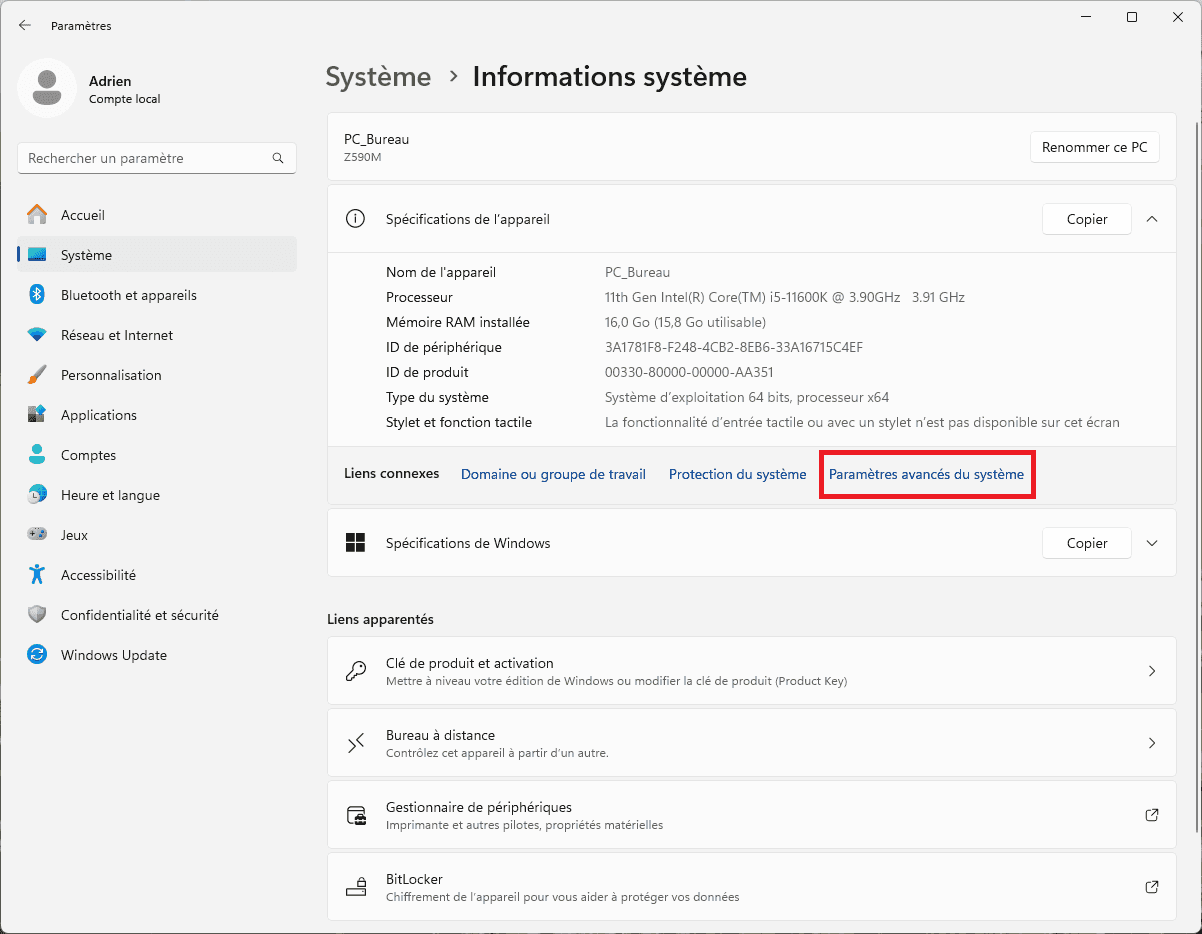
- Then click on Advanced system settings.
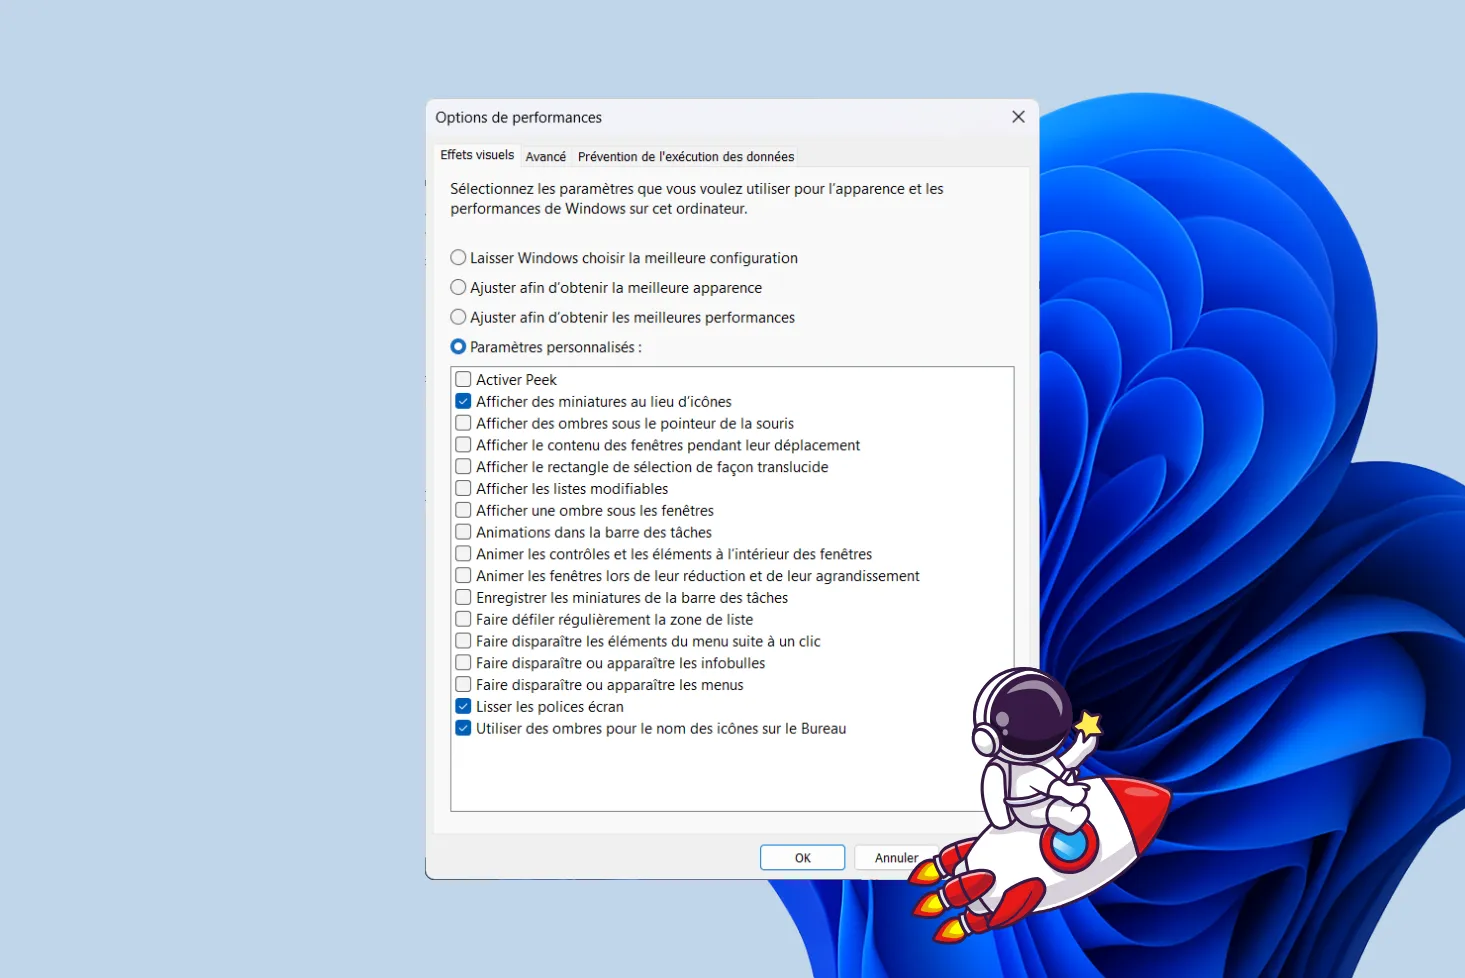
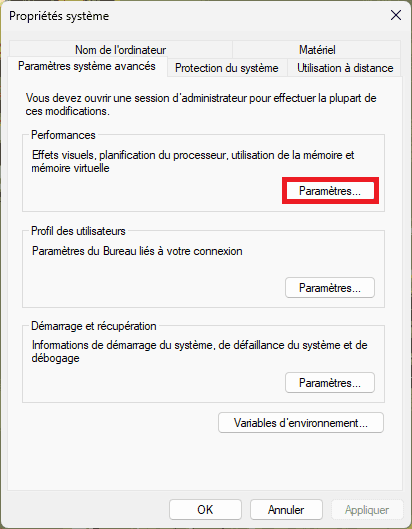
- Click on Settings in the Perfomances section.
- Check the Custom settings box, then activate only these options:
- Activate Peek: Shows a preview of a window’s contents when you move your mouse over it.
- Show thumbnails instead of icons: for easier viewing of file contents.
- Smooth screen fonts: Make fonts softer and easier to read.
- Use shadows for desktop icon names: Adds a shadow effect to desktop icon names.
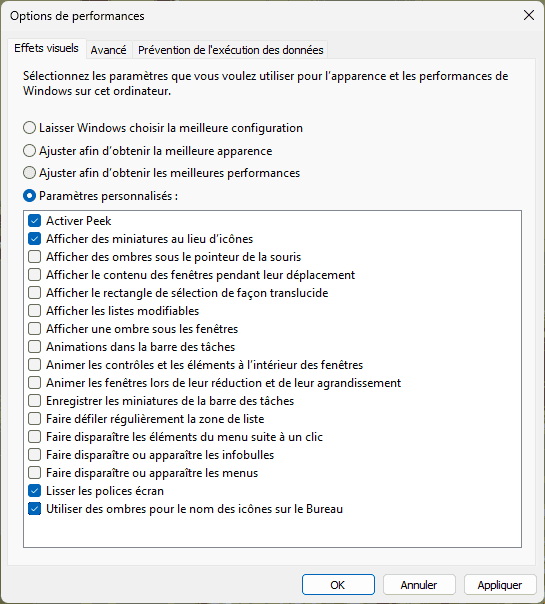
By deactivating the rest, you remove unnecessary effects while maintaining a readable and functional interface.
Optimize your PC by increasing the amount of virtual memory
Is your PC slow and you can’t afford to add RAM? Don’t worry, virtual memory can be your savior. By adjusting the amount of virtual memory, you can simulate additional RAM in a cost-effective way. Although this method is less efficient than adding RAM, it can considerably improve your computer’s performance without requiring costly investment.
Virtual memory works by using part of your hard disk as an extension of your RAM. When your system runs out of RAM, it uses this “virtual memory” to store temporary data. It’s as if your hard disk became an extension of your RAM, enabling your PC to handle more tasks simultaneously without slowing down.
Tip: Using an NVMe M.2 SSD for virtual memory offers considerable speed advantages over a traditional hard disk drive (HDD). SSDs are much faster. Data is read and written faster, further reducing latency and improving the fluidity of your system.