Windows 11 strongly encourages the use of a Microsoft account, supposedly offering a more integrated experience with its cloud services and applications. However, some users prefer a local account for reasons of privacy, security or simply to avoid dependency on an online service. Although this option is not highlighted, it is entirely possible to install Windows 11 without a Microsoft account. This approach allows you to maintain a more independent, uncluttered environment.
Install Windows 11 without a Microsoft account in 2026
- 1. Installing Windows 11 without a Microsoft account
- 2. Create a local account with Rufus (Unattended.xml)
- Local or Microsoft account: two very different uses
1. Installing Windows 11 without a Microsoft account
Since its latest versions, Windows 11 systematically requires the use of a Microsoft account during installation. This step hides the possibility of creating a local account. Thanks to an internal command reserved for the installation environment, it is still possible to bypass this requirement and configure Windows 11 without a Microsoft account and without an Internet connection. Here’s the complete procedure for installing Windows 11 without a Microsoft account.
Microsoft has also removed the historical OOBEBYPASSNRO command that enabled offline mode. The internal mechanism still exists, but it is now necessary to manually inject the registry key that activates this mode and disable the Internet connection.
- Start by booting your computer from your Windows 11 USB installation key.
- Select language, keyboard layout and time zone, then follow the first steps as for a conventional installation.
Follow the usual instructions to the screen asking you to connect to a Microsoft account.

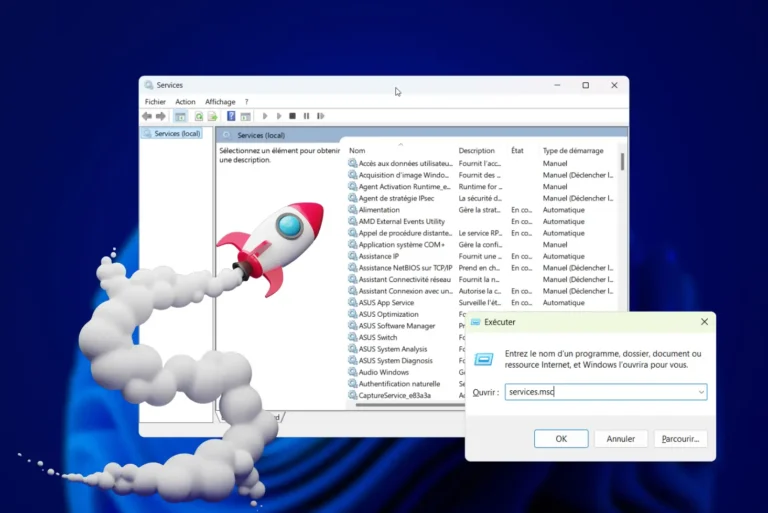
- On the screen requesting a Microsoft account, simultaneously press Shift + F10 (+ FN depending on your keyboard) to open the command prompt.
Microsoft has removed the OOBEBYPASSNRO command, but the parameter it activated has not disappeared. So we’re going to add it directly to the registry.
- To reactivate it, you need to inject this key into the Windows registry.
reg add HKLM\SOFTWARE\Microsoft\Windows\CurrentVersion\OOBE /v BypassNRO /t REG_DWORD /d 1 /f
shutdown /r /t 0
The PC will restart automatically and you will be returned to the installation screen to continue with the configuration.
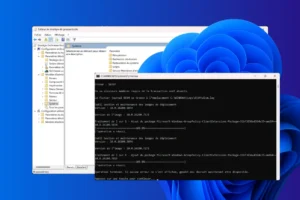
Once reboot is complete, open the command prompt again with Shift + F10
ipconfig /release
This command disconnects Windows from any network source (even if the Wi-Fi card attempts to reconnect automatically).
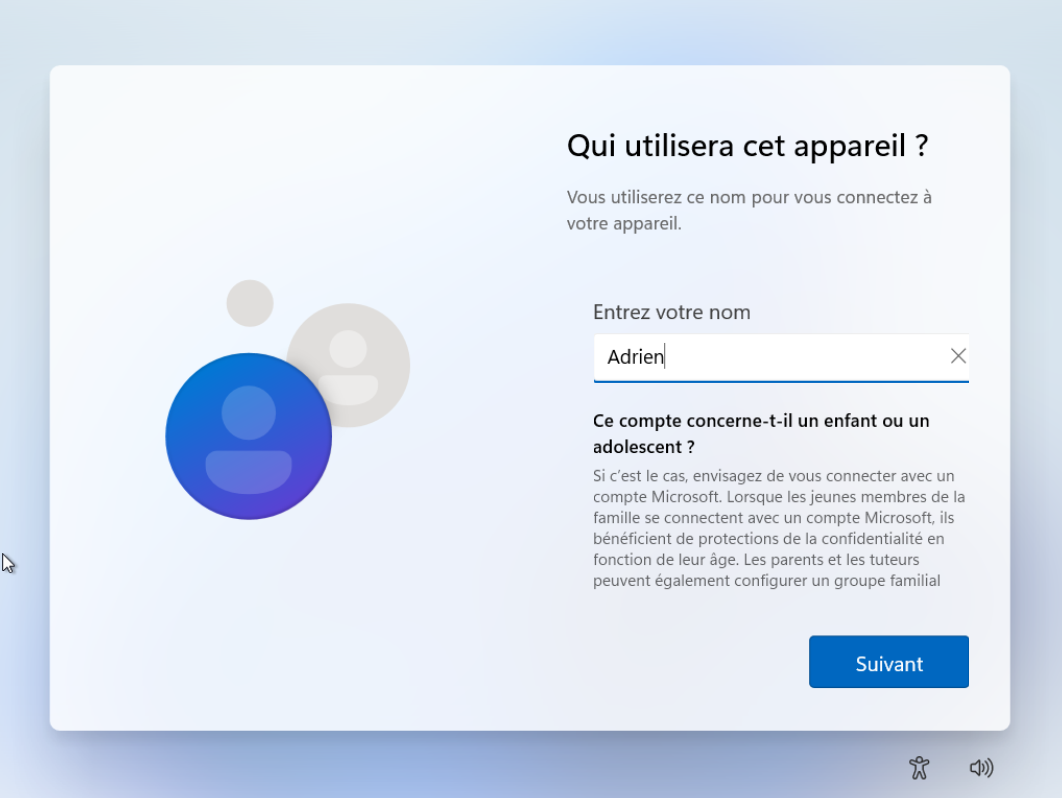
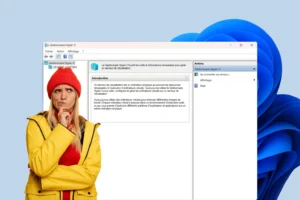
After closing the command prompt, the wizard returns to the previous screen. This time, Windows will prompt you directly to create a local account, without requiring a Microsoft account or Internet connection.
You can then continue with the installation as normal, as in older versions of Windows.
2. Create a local account with Rufus (Unattended.xml)
If you prefer to avoid any manipulation during installation, the simplest solution is to use Rufus, a free utility that creates a fully automated Windows 11 USB key. Rufus can inject an unattended.xml file into the installation image to create a local account without any intervention on your part.
- Go to the official website and download the latest version of Rufus.
- In Rufus, choose your Windows 11 ISO image.
- When you click on Start, Rufus displays a customization window
This window offers a number of advanced settings. It only appears in the presence of a Windows 11 ISO.
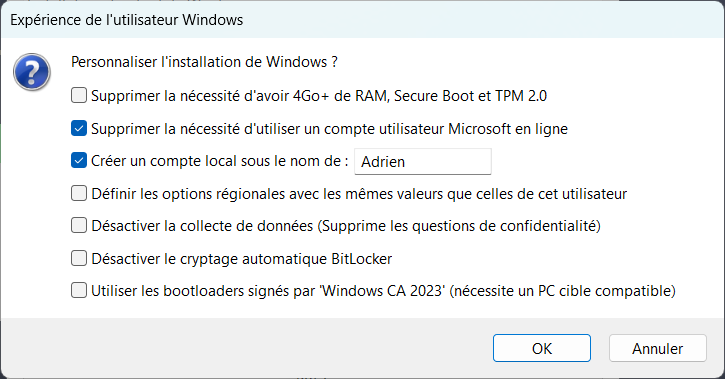
Among the available options, the two essential for bypassing the Microsoft account are :
- Eliminate the need for an online Microsoft user account
- Create a local account under the name : [Name of your choice]
These options create an autounattend.xml file which is added directly to the USB stick. Windows will automatically detect it on startup and apply the settings without any interaction on your part.
Local or Microsoft account: two very different uses
Windows 11 offers two ways of using the system. The first is based on a simple local account, limited to the machine and totally independent of the cloud. The second is based on a Microsoft account, designed to take advantage of the online ecosystem, synchronization and related services. As Microsoft continues its transition to a cloud-centric model, these two approaches are increasingly at odds, both in philosophy and user experience.
The local account favors simplicity and confidentiality. It operates completely independently, with no mandatory connection and no transmission of information to Microsoft. This is the most discreet and straightforward option, ideal for privacy-conscious users, for machines dedicated to isolated professional use or for offline environments.
| Criteria | Local account | Microsoft account |
|---|---|---|
| General operation | Strictly local use, no cloud | Connected profile linked to online services |
| Privacy | Very high because no data is synchronized | Lower, as data is transferred to the cloud |
| Windows installation | Possible without Internet connection | Requires active connection |
| Access to services | Functionality limited to local use | Full access to OneDrive and cloud applications |
| Synchronization between devices | No synchronization | Synchronized settings, themes and passwords |
The Microsoft Account transforms Windows use into a connected experience, capable of synchronizing settings, passwords, applications and files across multiple devices. It also opens up access to services such as OneDrive, the Microsoft Store, account recovery and enhanced security features such as two-factor authentication.
Did you find this article helpful?
Share it so others can benefit from it.
Learn more about the author