
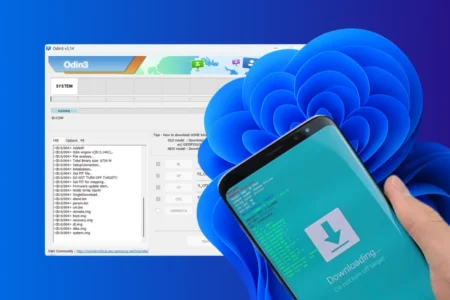
Your Samsung won’t start up, keeps looping on the logo, or won’t accept official updates. Customer services have told you it will take three weeks and that the device will need to be reset. The Android system just needs to be rewritten.
Odin forces a factory firmware reinstallation directly from your PC. This is the most drastic way to unbrick a device, remove a cumbersome carrier overlay or revert to a clean version of the system. Here’s how to manage the partition files and transfer the data to the phone without any errors.
In this article
- 1. Check the exact model of your Samsung
- 1. Find a ROM that is compatible with your Samsung
- 3. Install the Samsung Android USB Driver
- 4. Enable developer mode and allow OEM unlocking
- 5. Put the Samsung into Download mode
- 6. Launch Odin and flash the firmware
- 7. Relock the bootloader after flashing to restore security
1. Check the exact model of your Samsung
Before attempting to flash the firmware, the first step is to check your device’s model number. This check is essential, as each firmware version is designed specifically for a particular model. Even a slight difference in the model number can render the system incompatible and cause the phone to freeze.
To find out the exact model of your smartphone, open Settings, then go to About phone. You’ll find the ‘Model number’ there.
In our case, this is the Samsung Galaxy A20e, model number SM-A202F.
It is also necessary to identify the CSC code. This code corresponds to the region or network operator for which the firmware is intended.
Example: XEF corresponds to France without a carrier prefix.
The CSC affects the receipt of OTA updates, i.e. the automatic updates provided directly by Samsung. It also determines certain network settings, pre-installed apps and certain country-specific configurations.
1. Find a ROM that is compatible with your Samsung
The stock ROM is the official version of Android developed and distributed by Samsung. It is specifically designed to work with the hardware of the relevant model.
It offers optimum stability, benefits from official security patches and remains compatible with proprietary services such as Knox and OTA updates. It is also optimised for the device, in terms of processor, battery and modem management.
| Stock ROM | Custom ROM |
|---|---|
| Official Samsung version | Modified version of Android |
| Stable and secure | Customisable |
| Knox / OTA compatible | May void the warranty |
| Optimised for the device | Lighter and faster |
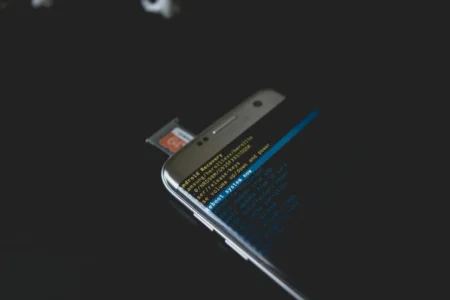
A Custom ROM is a modified version of Android developed by independent teams. It can offer a more streamlined interface, improved performance or the removal of pre-installed apps. Some versions are lighter and faster than the official version. However, installing a custom ROM requires unlocking the bootloader and may void the manufacturer’s warranty. It also renders certain security-related services, such as Knox and banking apps, inoperable.
 assistouest.fr
3. Install the Samsung Android USB Driver
Before launching Odin and connecting your phone in Download mode, you must install the correct USB drivers on your computer. Without these drivers, Windows will not recognise the device properly.
The programme you need to install is the Samsung Android USB Driver. This is the official driver that enables Windows to correctly recognise a Samsung smartphone in Recovery mode or Download mode.
Once the installation is complete, it is recommended that you restart the computer so that the drivers are properly recognised by the system.
4. Enable developer mode and allow OEM unlocking
Before carrying out certain advanced operations, such as installing a custom ROM or unlocking the bootloader, you will need to enable developer options on your Samsung device. These settings are hidden by default to prevent any accidental changes to the system.
Open Settings, then go to About phone.
Next, go to ‘About the software’.
Locate the ‘Version number’ line and tap it five times in a row. A message will then appear stating that Developer mode has been enabled. Depending on your device’s settings, you may be asked to enter your passcode.
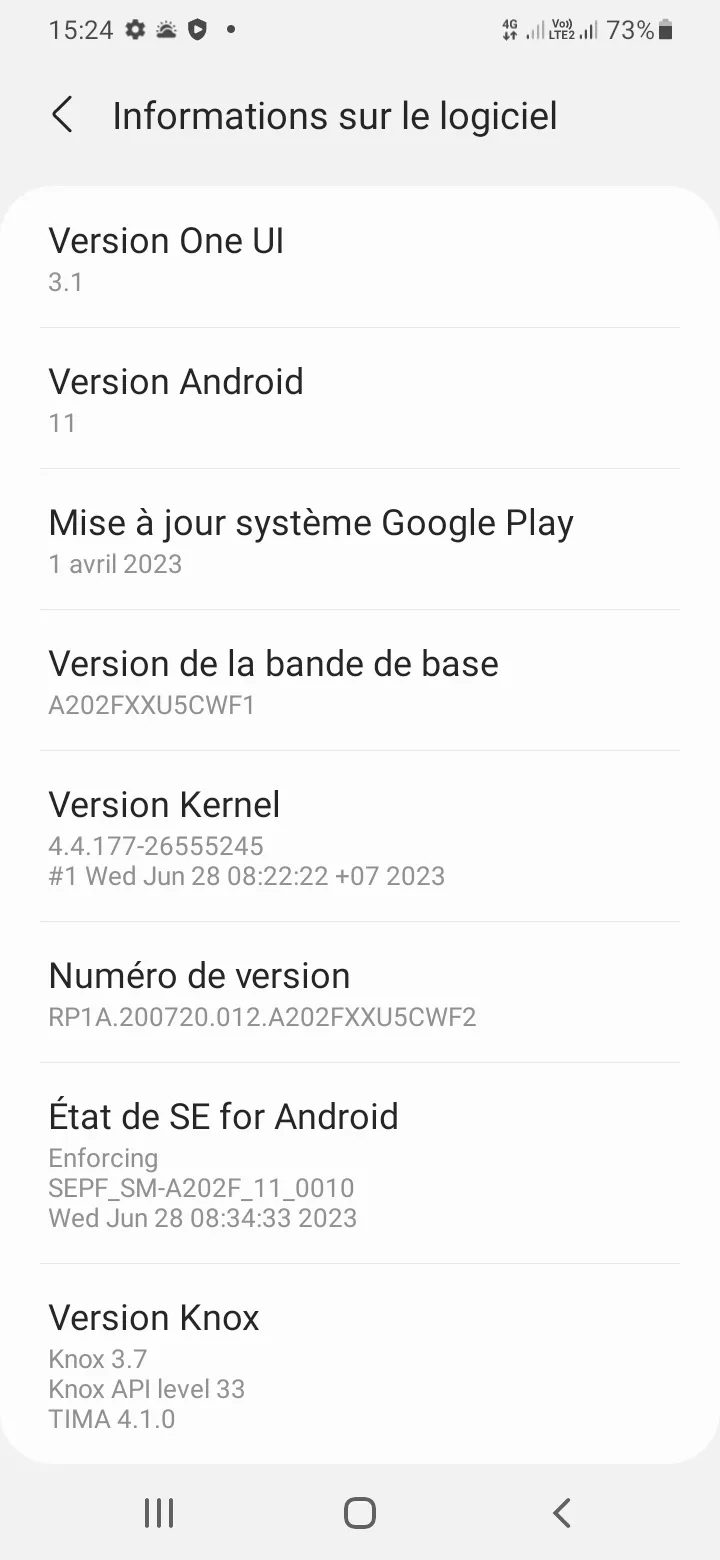
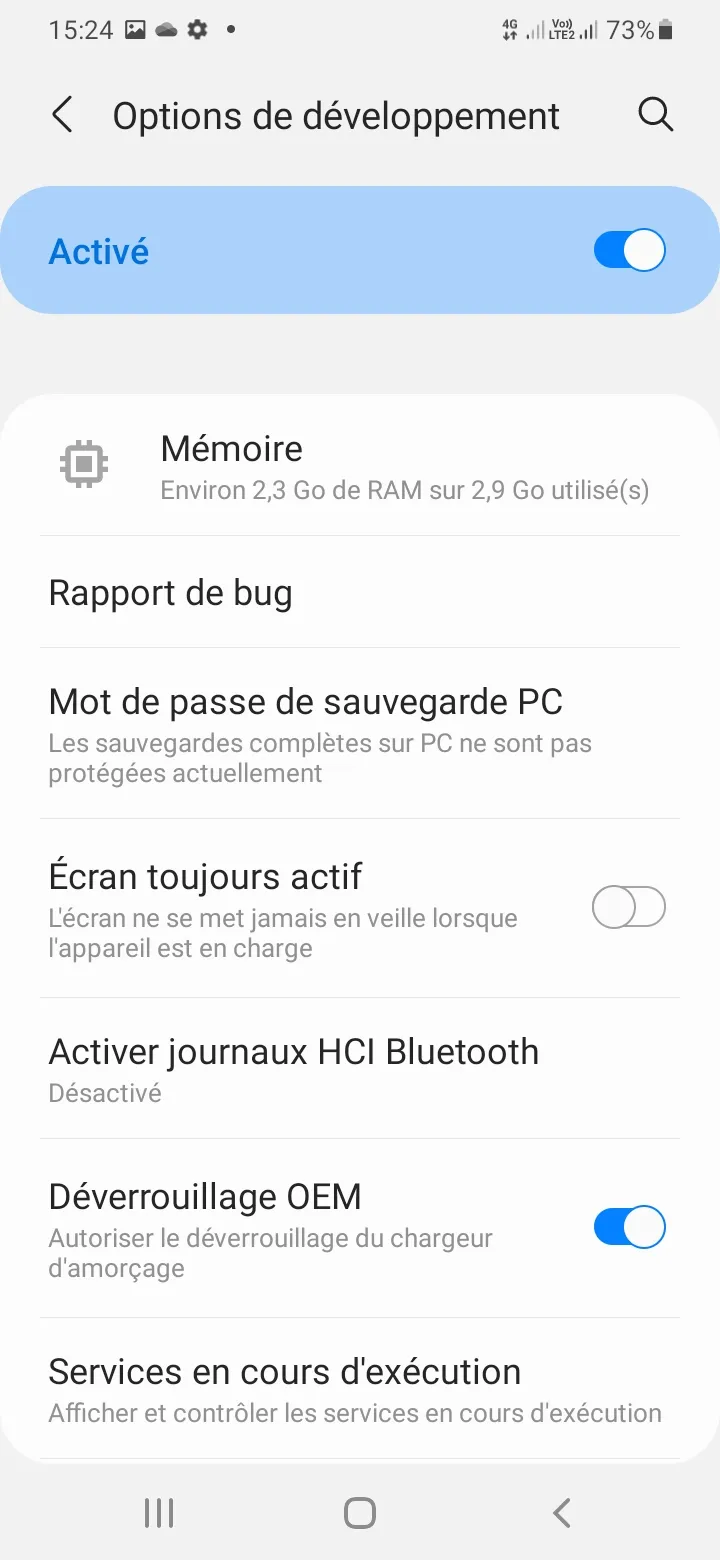
Once the operation has been confirmed, return to the main settings screen. A new section called ‘Developer Options’ will now appear in the menu.
Enable OEM unlocking
Go to Developer Options, then look for the OEM Unlock option.
Enable this option by confirming your choice when the warning message appears. This authorisation allows the system to unlock the bootloader, which is essential for certain advanced modifications.
Enabling OEM unlocking may affect certain security features.
5. Put the Samsung into Download mode
Download mode, or Odin mode, is essential for installing official firmware on a Samsung device. It allows the computer to communicate directly with the phone’s bootloader to transfer system files.
Start by switching the phone off completely. It must not be in standby mode, but must be switched off.
Next, press and hold the Volume Down and Volume Up buttons at the same time. Whilst keeping these buttons pressed, plug in the USB cable connected to your computer.
The screen then switches on automatically and displays a warning page specific to Download mode.
It is perfectly normal for a warning message to appear. Samsung is simply informing the user that making a change to the system may have consequences if it is carried out incorrectly.
To confirm that you have entered Download mode, press the Volume Up button. The phone will then switch to the download screen, which is usually accompanied by the message ‘Downloading’.
From this point onwards, the device is ready to be recognised by Odin and to receive the selected firmware. The COM ID box will then appear in colour in the software, confirming that the connection has been established and that the flashing process can be started safely.
6. Launch Odin and flash the firmware
Once the phone is in Download mode and the drivers have been installed correctly, you can download the Odin Flash Tool to install the firmware.
On your computer, right-click the Odin executable file and then select the option to run it as an administrator.
The Odin interface then opens, displaying several fields for selecting the various firmware files.
If everything is installed correctly, the COM ID box at the top of the Odin window will appear in blue. In the log at the bottom of the window, the message ‘Added’ will appear.
These two factors confirm that the device has been recognised correctly and that communication has been established.
If nothing appears on the screen, check the USB cable, the port you are using, or whether the drivers have been installed correctly.
Once you have extracted the firmware archive, you will find several files beginning with specific prefixes.
In Odin, load each file into its corresponding slot.
- The file beginning with BL must be placed in the BL button.
- The file beginning with ‘AP’ must be uploaded using the ‘AP’ button.
- The file beginning with CP must be inserted into the CP button.
- Finally, choose between CSC and HOME CSC, then load it using the CSC button.
The CSC file performs a full factory reset of the device. The HOME CSC file preserves user data.
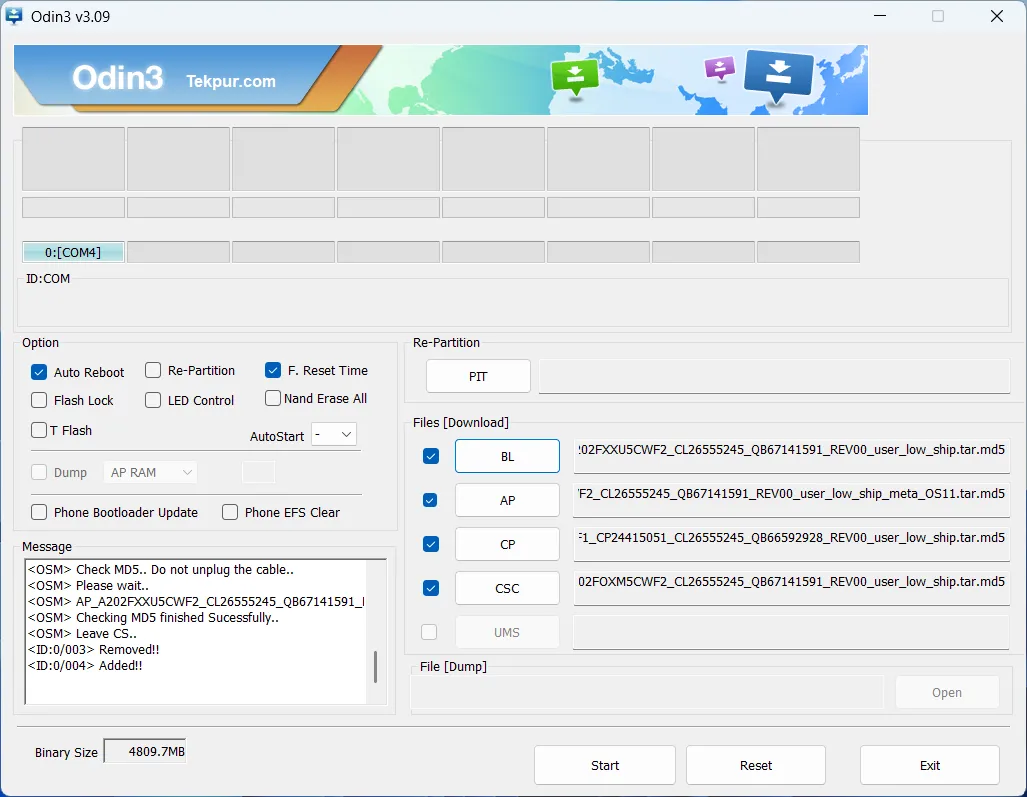
Before flashing the firmware, make sure that the Odin settings are configured correctly.
- The ‘Auto Reboot’ box must be ticked.
- The ‘F Reset Time’ box must be ticked.
- The ‘Re Partition’ box must not be ticked under any circumstances.
These settings ensure a standard flash without altering the partition table.
When everything is ready, click Start.
The process starts straight away. Do not unplug the cable or switch off the computer whilst the process is underway. The duration varies from a few minutes to around ten minutes, depending on the model and the size of the firmware.
At the end of the process, the message ‘PASS’ appears in green in Odin. The phone restarts automatically.
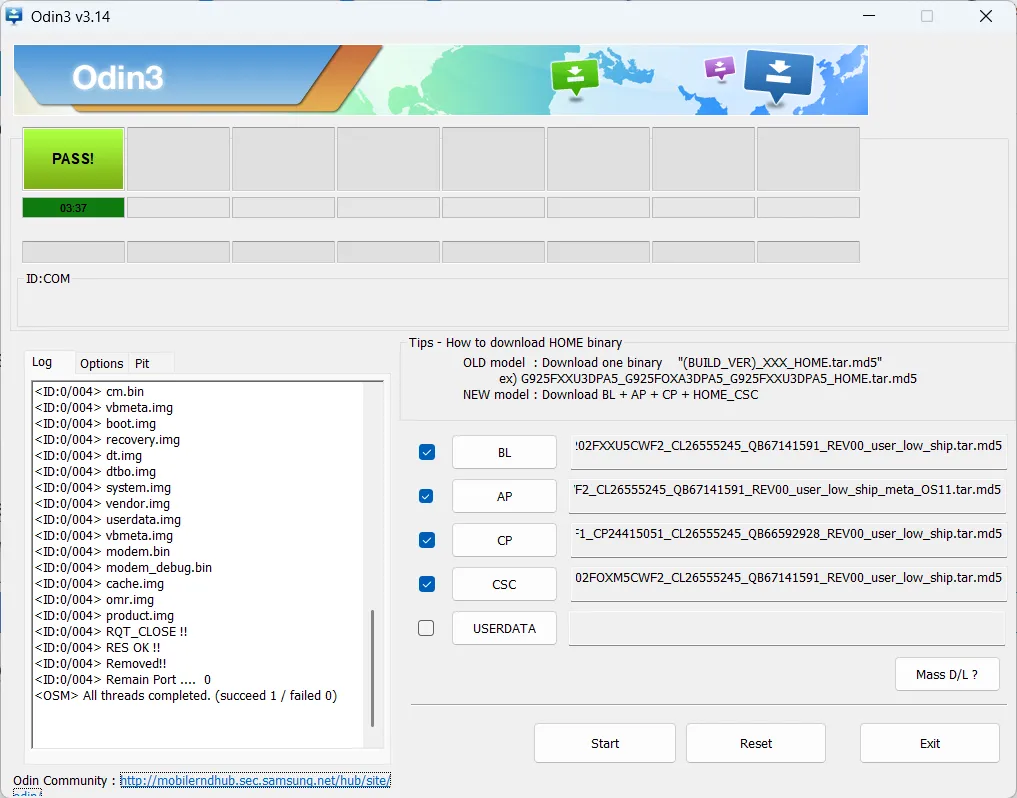
The first time you start up the device, it may take longer than usual. This is normal; the system is completing the installation of the new firmware.
Don’t let the algorithm decide for you
Add Assistouest to your preferred sources on Google so you can find our guides faster when you search for an IT solution.
7. Relock the bootloader after flashing to restore security
After flashing official firmware and reinstalling a clean version of the system, it may be advisable to relock the bootloader to restore the original level of security. An unlocked bootloader allows unsigned system images to be loaded, which poses a potential risk if the device falls into the wrong hands.
Re-locking reactivates the integrity checks at start-up. The phone then verifies that the installed system is indeed an official, signed version. This limits the possibility of unauthorised modifications and enhances data protection.
Before proceeding, it is essential that the device is running 100% official firmware, which corresponds exactly to the model and its CSC. If a custom ROM or modified recovery is still present, relocking the device will cause it to freeze on boot.
- Switch the phone off completely.
- Start up in Download mode.
On recent Samsung models, hold down the Volume Up and Volume Down buttons, then connect the USB cable to the computer. - Once you are on the Download mode warning screen, press and hold the Volume Up button.
It is by holding down the Volume Up button that you activate the bootloader lock option.
The phone will then display a message confirming the operation. Tap ‘Confirm’ to start the process. The device will usually perform a full reset to erase all user data.
After restarting, the bootloader is locked again and the system returns to a standard level of security, compatible with OTA updates and Samsung’s security measures.
The content will unlock automatically after verification.