
Your Mac has given up the ghost; the screen remains stubbornly black or displays a question mark, and the only working computer to hand is a Windows PC. Apple has made every provision for repairing its machines within its own ecosystem, but the task becomes considerably more complicated as soon as you switch to a different operating system.
Windows cannot natively read the macOS file system, and Apple’s installation files are not designed to be handled by Microsoft File Explorer. Successfully carrying out this recovery therefore requires circumventing these technical restrictions by forcing Windows to burn a system image that it does not recognise.
All you need is a 16 GB USB stick, the official macOS image and a third-party utility to create this bootable drive and reinstall macOS on your Mac. Here’s how to do it.
In this article
Download and install TransMac on Windows
The TransMac software is available directly from the official website of its publisher, Acute Systems. It is advisable to always download the latest version from this source to avoid modified or out-of-date copies.
Simply run the downloaded installation file, then follow the wizard’s instructions, leaving the default options as they are.
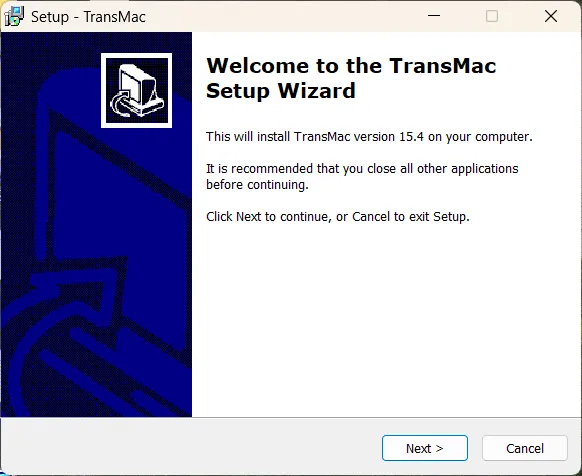
Once installed, TransMac appears in the Windows Start menu and can be run in administrator mode to ensure proper access to USB devices.
TransMac is a paid programme, but it offers a free 15-day trial. This provides all the features needed to create a bootable macOS USB stick, which is more than enough for one-off use.
Don’t let the algorithm decide for you
Add Assistouest to your preferred sources on Google so you can find our guides faster when you search for an IT solution.
Restore the macOS image to your USB stick
Once you have prepared the USB stick using TransMac, the next step is to copythe macOS installation image you have downloaded onto it. To do this, open TransMac in administrator mode, then locate your USB stick in the list of devices.
Right-click on the key name and select the ‘Restore with Disk Image’ option.
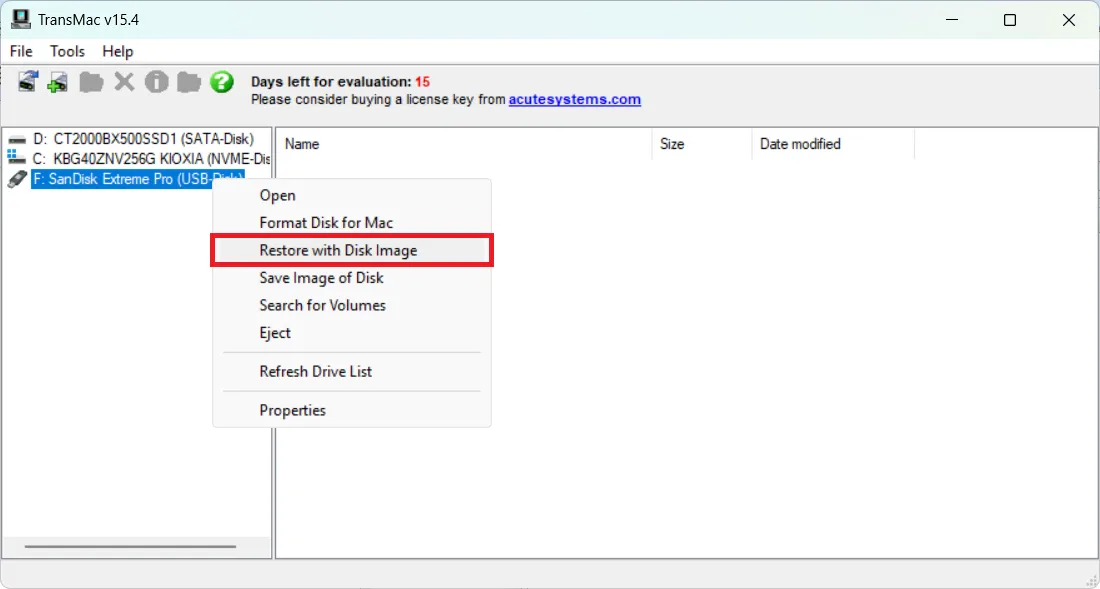
A window will then open, allowing you to select the macOS file (in DMG or ISO format) that you have downloaded. Once confirmed, TransMac will start copying the image to the USB stick.
The process may take several tens of minutes, depending on the speed of the USB stick and the size of the image. Once the process is complete, the USB stick is ready to be used to boot a Mac and start the macOS installation.
Booting a Mac from a bootable USB stick
Once the USB stick is ready, simply use it to start up the Mac. Plug it into a USB port on the Mac whilst it is switched off, then switch on the computer whilst holding down the Option (Alt) key. After a few seconds, a boot menu will appear on the screen showing the various drives that have been detected.
 assistouest.fr
Select the USB stick from the list of devices, then confirm. The Mac will then load the macOS installer directly from the USB stick. Once the recovery environment has launched, you can choose to install macOS, reinstall the existing system or access the disk utilities to prepare the internal storage.
Create a bootable macOS USB stick from Windows
Creating a bootable macOS USB stick from Windows is straightforward using TransMac. Simply follow these three steps: install the software, format the USB stick correctly, then restore the macOS installation image to it in DMG or ISO format.
Before starting the installation, please ensure that the chosen version of macOS is compatible with your Mac model. On older machines, some recent versions may not boot without a specific patch.
A bootable USB stick can also be used to repair macOS in the event of a crash, carry out a clean update, or test how a version works before migrating to it. It’s a simple but valuable tool for extending the life of your Mac.
An error occurred. Please try again in a moment.