
Windows 11 is a comprehensive operating system, but it is also bloated and packed with components that most users do not need. What if you could create your own version of Windows – a slimmed-down version, tailored to your hardware and already configured to your preferences? With NTLite, this is possible. This software allows you to modify an official Windows 11 ISO file even before installation: removing unnecessary components, adding drivers, disabling superfluous options, automating the installation, and more. A Windows system tailor-made for you.
In this article
What is NTLite?
NTLite is a specialised programme that allows you to modify and customise Windows ISO images (Windows 7, 8.1, 10 and 11). Unlike a standard installation, which imposes the settings and components chosen by Microsoft, NTLite allows you to create a bespoke system, tailored to your needs and hardware.
With this tool, you can remove unnecessary features, add your own drivers, incorporate the latest updates, automate the installation process and even apply performance or privacy optimisations whilst creating the ISO.
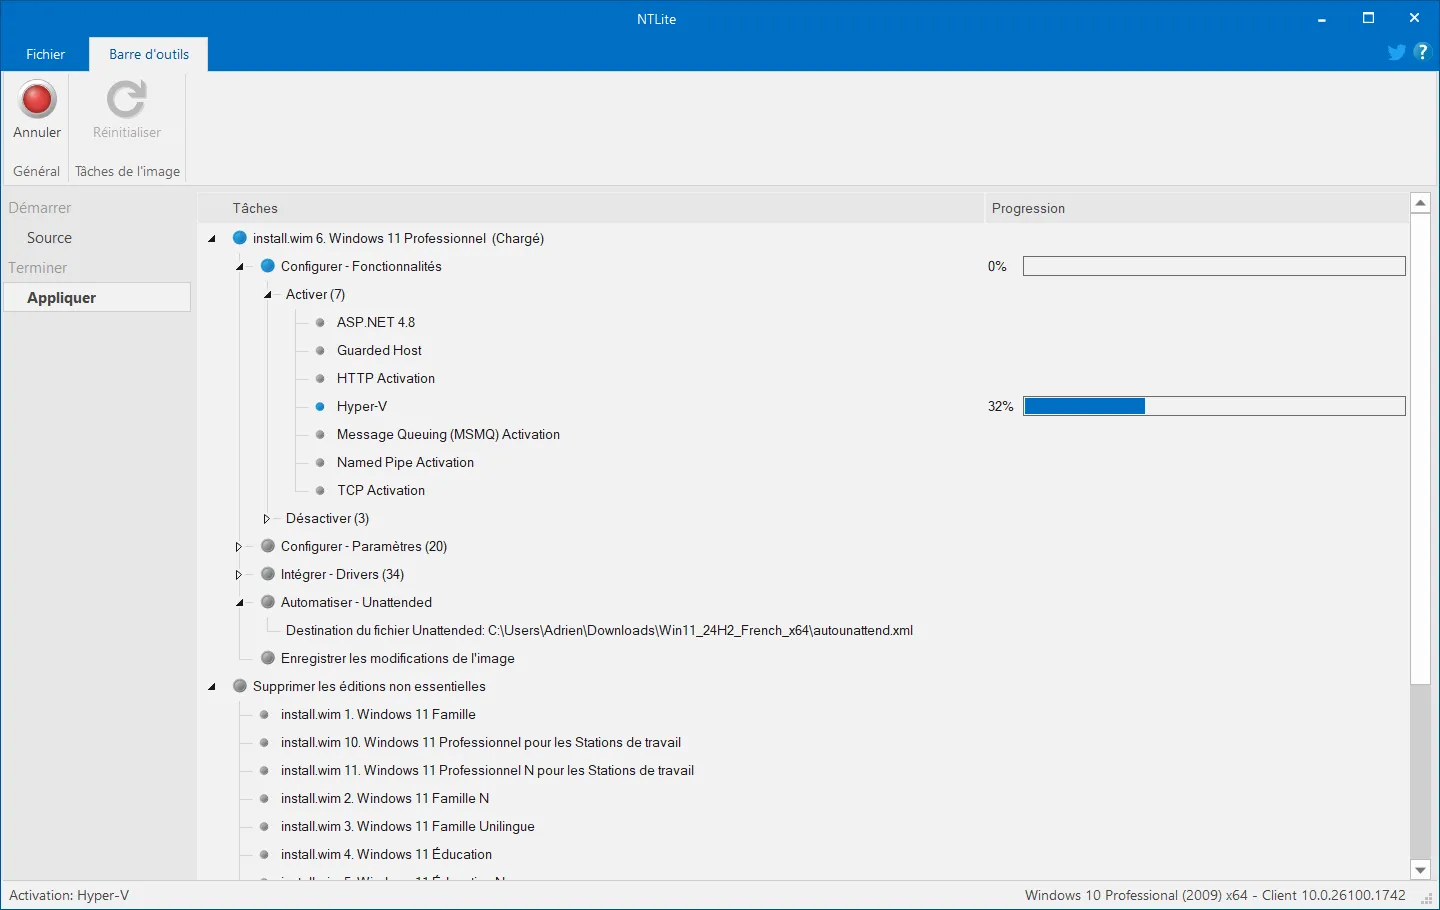
NTLite is particularly popular with technicians and system administrators, but it is also accessible to enthusiasts who want a lighter, faster version of Windows, stripped of unnecessary features. It is a comprehensive toolkit for transforming an official ISO into a customised, ready-to-use version of Windows.
Prepare your Windows ISO before customising it with NTLite
Before you can customise Windows 11, you need to gather the basic components. The first step is to download the official Windows 11 ISO file directly from the Microsoft website. This file contains the entire operating system as it is supplied by default.
Next, install NTLite on a work PC. This software will be your main tool for opening, modifying and rebuilding the Windows image.
Extract the contents of the downloaded ISO file into an easily accessible folder (for example, C:Win11_Custom). NTLite will look in this directory for the necessary files, such as install.wim, which contains all editions of Windows.
Once the Windows ISO has been prepared, open NTLite and add it to the programme. To do this, click ‘Add’ and then select ‘Image directory’ as shown in the image below.
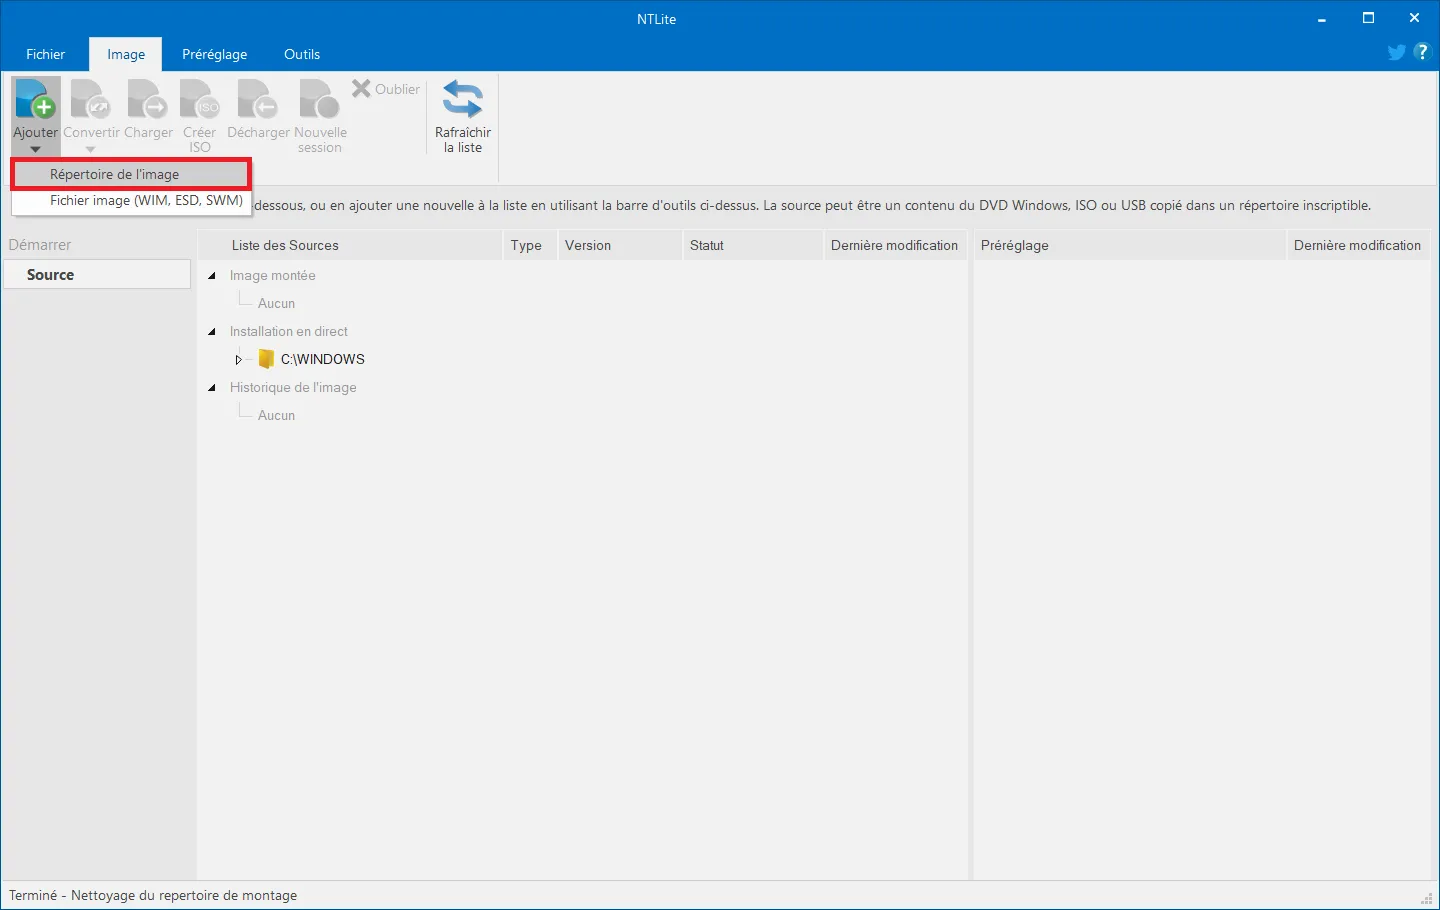
Next, select the folder where you extracted the official Windows 11 ISO file.
NTLite will then analyse the install.wim file and display all the available editions: Windows 11 Home, Home N, Education, Professional, etc. As shown in the screenshot, you can scroll through the list and choose the edition you wish to customise.
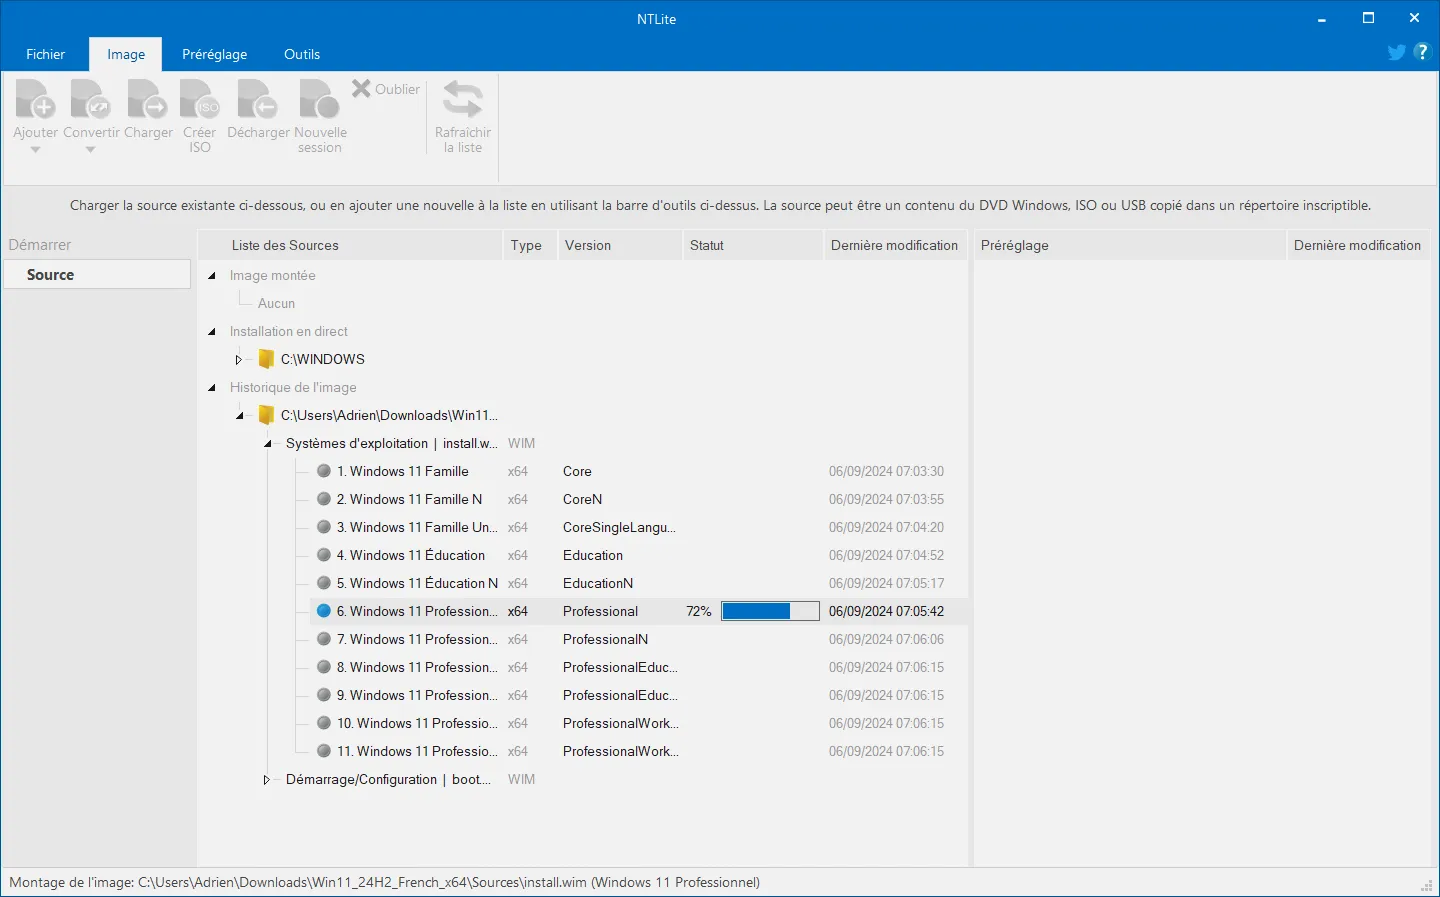
As soon as you click on an edition (for example, Windows 11 Professional), the extraction process begins. This step may take some time, as NTLite needs to unpack and prepare all the files required for modification. Please wait until the operation has finished before moving on to the next step.
The main tabs in NTLite and what you can do with them
The NTLite interface is organised into several tabs, each corresponding to a stage in the customisation of the Windows image. The aim here is not to go through each option in detail, but to understand what these sections are for and what you can change within them.
Remove (Components): Remove unnecessary Windows features
This tab allows you to streamline Windows by removing anything you don’t need. For example, you can remove pre-installed apps (Xbox, Cortana, etc.), obsolete hardware drivers, or even languages you’ll never use.
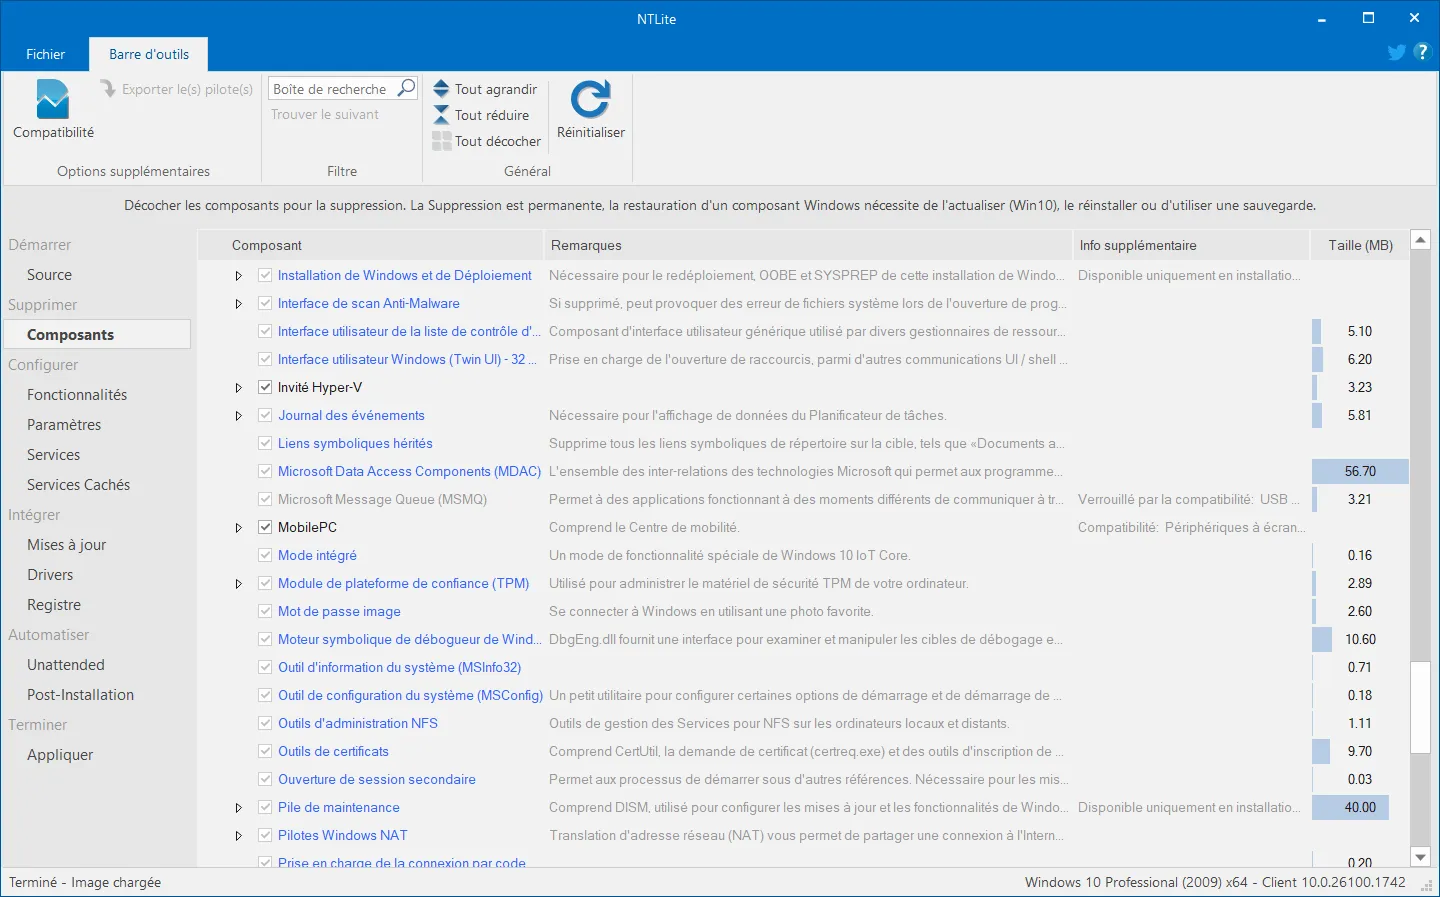
The aim is to reduce the size of the ISO file and make the system run faster. However, care must be taken not to remove essential components, as this could result in an unstable system.
Configure (Features, Settings, Services) before installing Windows
Here, you can customise Windows to suit your preferences right from the installation stage. This includes disabling telemetry, configuring privacy settings, as well as adjusting performance settings, managing virtual memory (swap) and disabling unnecessary automatic services.
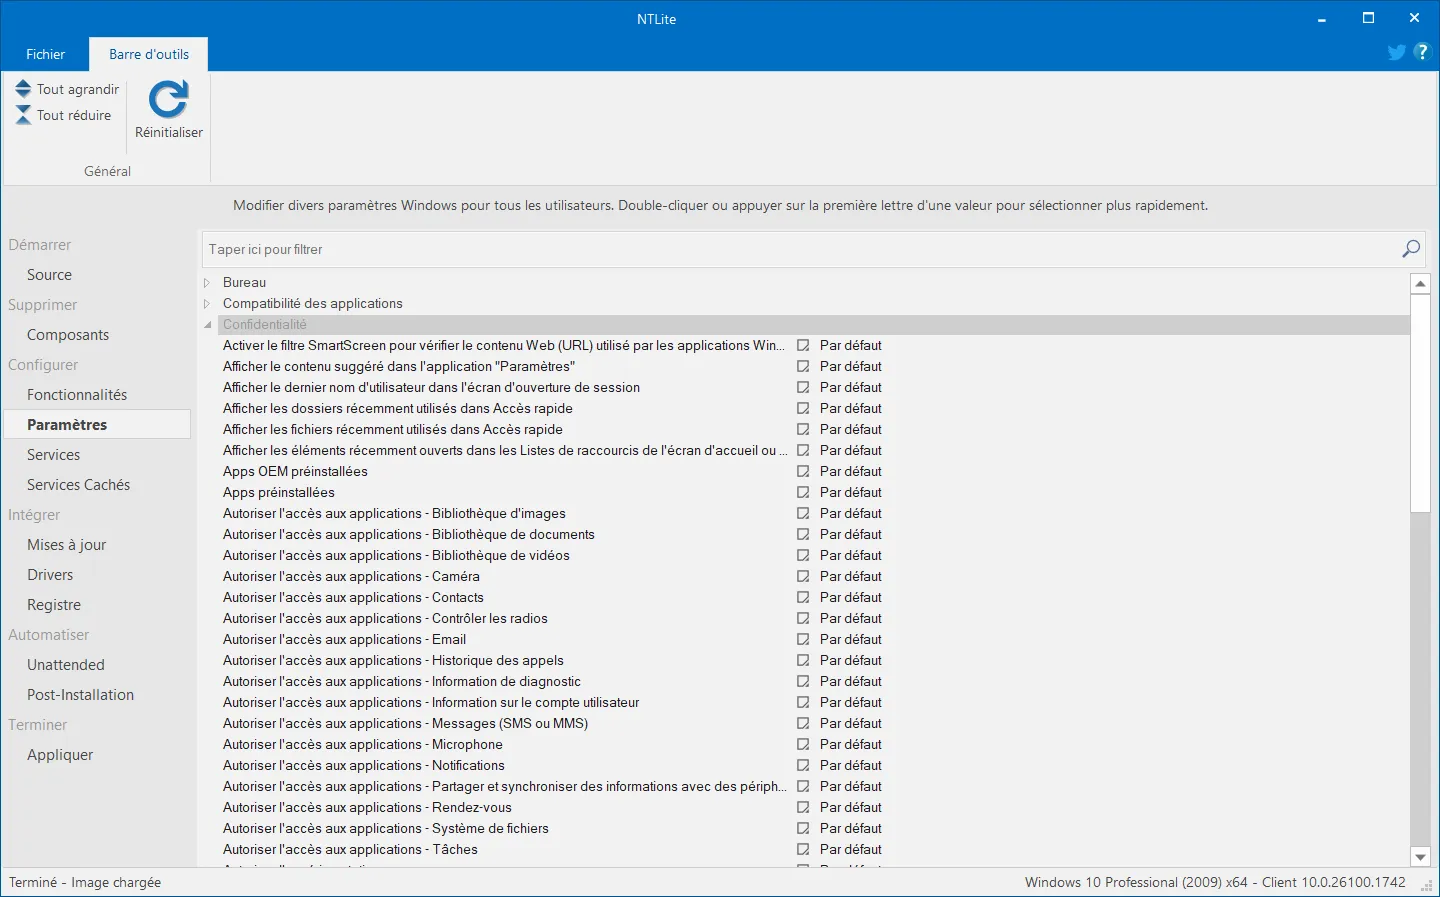
You can set up a version of Windows that’s optimised and already configured to your liking.
Integrate (updates, drivers, registry) directly into the Windows ISO
This tab is used to customise the ISO with your own additions. You can include the latest security updates, your hardware drivers (chipset, network card, GPU) to avoid problems after installation, or apply registry keys.
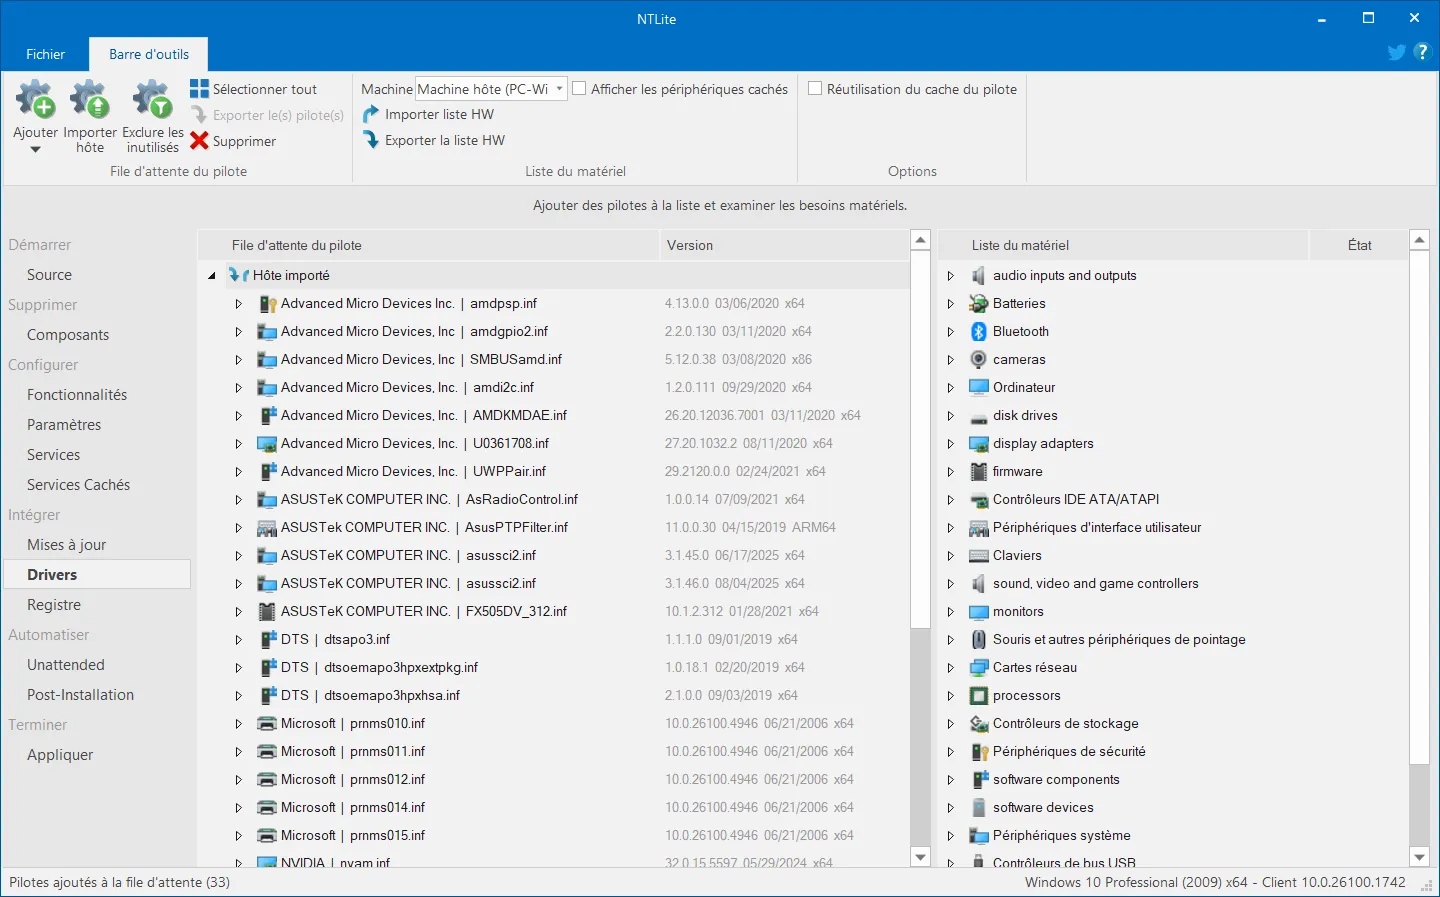
Once installed, Windows is ready to use straight away, without the need to download anything.
Automate (Unattended, Post-Installation) to simplify the installation of Windows
This section is ideal for saving time during installation. It allows you to enter the product key, computer name and time zone in advance, or to force the creation of a local account instead of a Microsoft account.
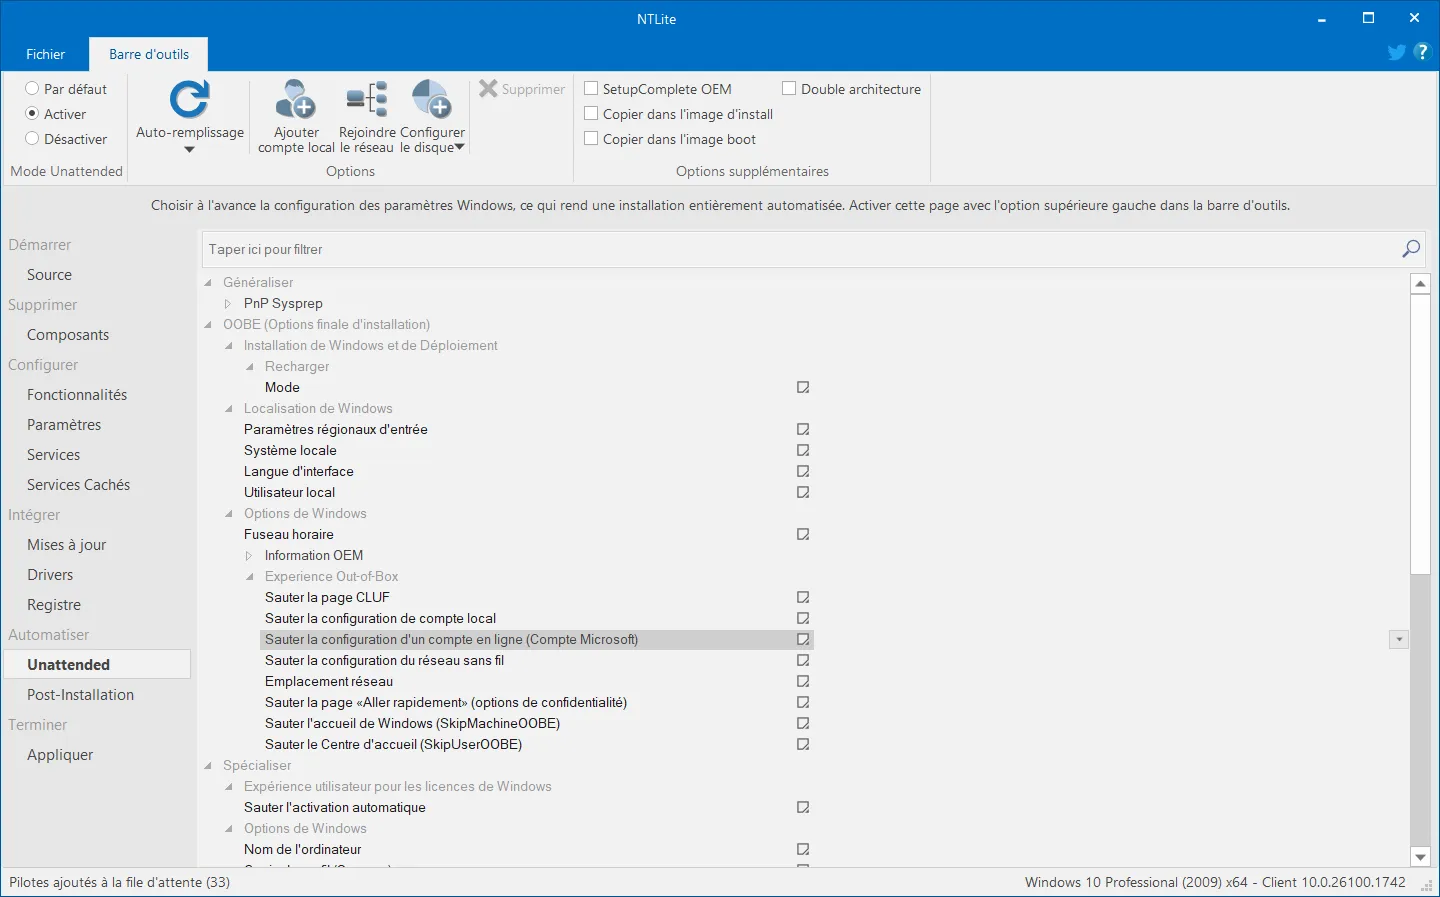
You can also add scripts or software to it that will run automatically once Windows has been installed.
Create and save your customised Windows 11 ISO using NTLite
Once you have applied all your changes (removing components, adding drivers, configuring settings), it is time to create your own installation image. In the ‘Apply’ tab, NTLite offers several saving options. You can choose the output format:
- WIM (modular): more flexible; allows the image to be reopened and edited at a later date.
- ESD (high compression, read-only): reduces the size of the ISO file; ideal if you want a smaller file, but less convenient to edit later.
Next, tick the ‘Create ISO’ option and specify where the file is to be saved. NTLite will then generate a bootable ISO, ready to be written to a USB stick or used directly in software such as Rufus or Ventoy USB.
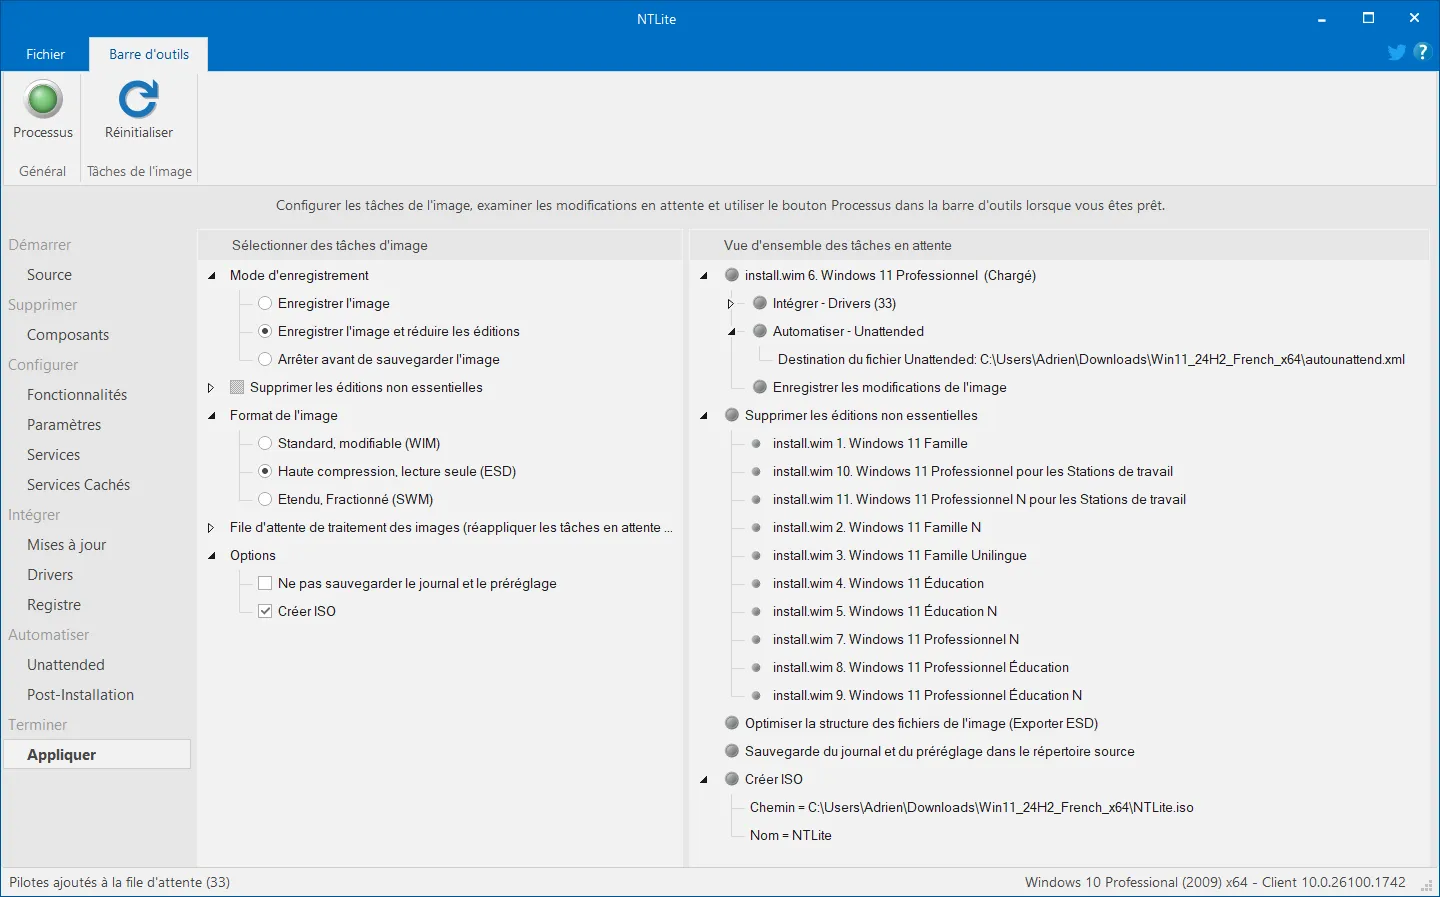
Before installing anything on your main PC, it is strongly recommended that you test the image in a virtual machine (VirtualBox, VMware or Hyper-V) to check that everything is working correctly and that you have not omitted any critical components. This will help you avoid any unpleasant surprises during the actual deployment.
NTLite: the solution for a faster Windows 11
With NTLite, it is possible to transform the official Windows 11 ISO into a fully customised operating system. By removing unnecessary components, integrating your drivers and configuring your preferences in advance, you get a tailor-made version of Windows that is faster and more user-friendly right from the first installation.
It is, however, advisable to keep an official, unmodified Windows ISO file as a backup, so that you always have a clean copy to hand should any problems arise.
NTLite isn’t limited to Windows 11; the tool can also be used to create custom Windows 10 ISOs and for future versions of the operating system. This means you can create a version of Windows that’s truly tailored to your needs, both now and in the future. Discover AtlasOS, the Windows optimization script too.
We allow some readers to view our articles for free with an ad blocker. However, their number is currently too high for us to keep this access available to everyone.
You can disable your ad blocker to continue reading immediately, subscribe to enjoy all our content without ads, or come back a little later when the pressure has eased.
Access will be restored automatically as soon as the situation allows.