Are you trying to install Windows 11, but no SSD appears on the storage selection screen? This can happen even when the SSD is working properly and is recognised by the BIOS.
On some Intel-based computers, Windows Setup does not include the driver needed to communicate with the storage controller. In other cases, the issue is related to the Intel VMD or RST setting in the BIOS.
In this article
Check whether the SSD is detected in the BIOS
Before looking for a driver, restart the computer and enter the BIOS or UEFI. The key varies by manufacturer and is usually F2, Delete, F10 or Esc. You can check the list of BIOS access keys for different computer brands.
Then look for a section called Storage, NVMe Configuration or Intel Rapid Storage Technology. Depending on the configuration, the SSD may appear in the Intel RST menu rather than in the usual list of NVMe devices.
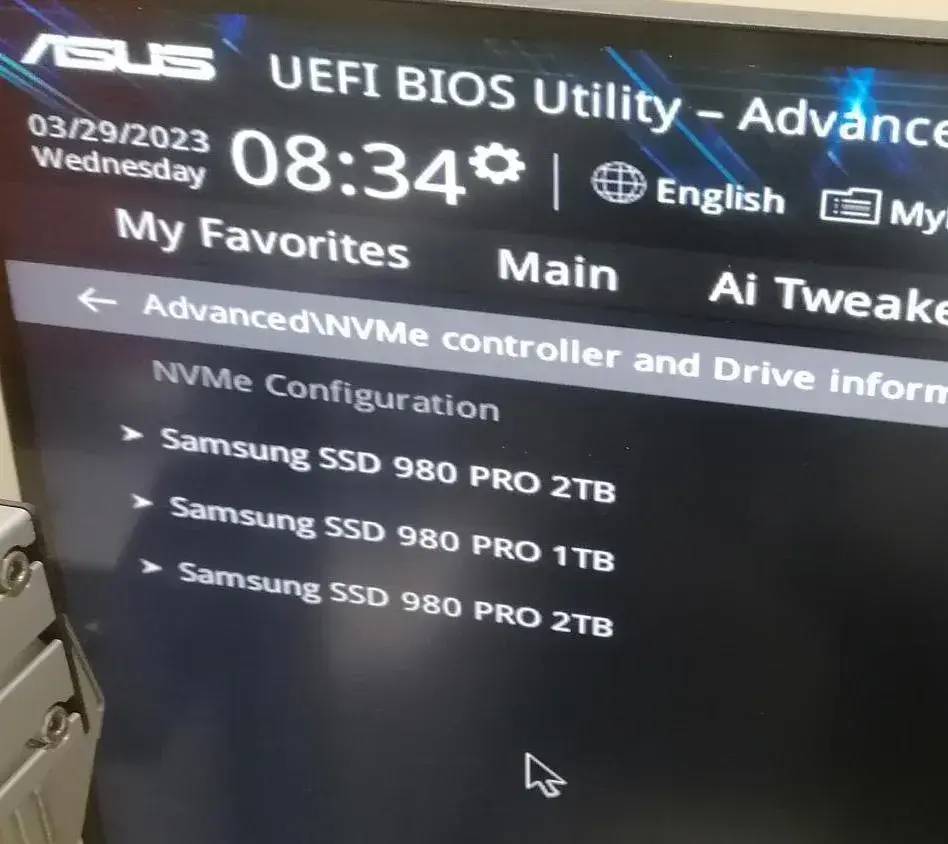
If the drive is detected in the BIOS but remains invisible during Windows Setup, the storage controller or its driver is probably the cause. If the BIOS cannot detect the SSD either, even though it worked before, the drive may have failed.
Load the Intel RST driver during Windows 11 setup
Intel Rapid Storage Technology (RST) manages some storage controllers, RAID configurations and Intel Volume Management Device (VMD) technology.
When VMD is enabled, the NVMe SSD is managed through this controller rather than directly by Windows. If Windows Setup does not have the right driver, it cannot access the drive.
To fix the issue, download the Intel Rapid Storage Technology (IRST) driver from your computer or motherboard manufacturer’s support page. Intel also provides RST drivers, but compatibility depends on the platform.
After downloading the driver:
- Extract the driver files to your Windows 11 installation USB drive or to a second USB drive.
- Start Windows Setup and go to the drive selection screen.
- Click Load driver, then Browse.
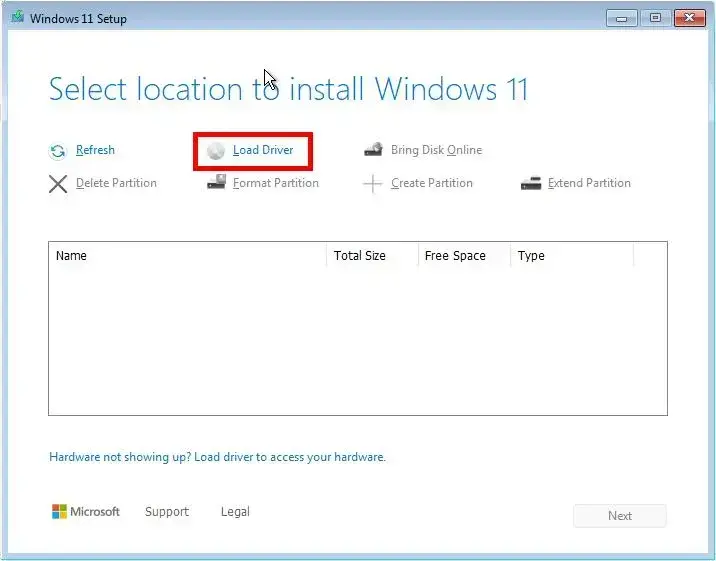
- Select the folder containing the extracted driver, named
VMD,RSTorf6vmdflpy-x64, depending on the version. - Choose the compatible Intel RST VMD controller shown by Windows Setup, then confirm.
Once the driver is loaded, the SSD should appear in the list of available drives.
If Intel only provides a SetupRST.exe installer, you can extract the drivers in PowerShell on a Windows computer. Run this command from the folder containing the file:
& "$env:USERPROFILE\Downloads\SetupRST.exe" -extractdrivers "$env:USERPROFILE\Downloads\SetupRST_extracted"Then copy the extracted folder to your USB drive. Windows Setup needs the driver files, not the SetupRST.exe installer.
Disable Intel VMD in the BIOS to make the SSD appear
On some Intel computers, the Enable VMD Controller option is enabled by default. Disabling it lets Windows Setup access the NVMe SSD directly, without the Intel VMD driver.
For example, on some ASUS computers the setting is under:
Advanced Mode → Advanced → VMD setup menu → Enable VMD Controller → Disabled
Save your changes, then restart Windows 11 Setup. If VMD caused the issue, the SSD should now appear.
On other computers, the setting may be called SATA Operation, RAID On or AHCI. These options are not the same as Intel VMD, and whether you should change them depends on your hardware configuration.
Warning if Windows is already installed on the SSD. Changing the storage mode can prevent Windows from starting and trigger the INACCESSIBLE_BOOT_DEVICE error. This method is for a fresh installation on a drive that contains no data you need to keep. If you want to preserve an existing installation, load the driver that matches the current configuration instead.
A note about older SSDs with Intel Optane Memory
Intel also sold storage solutions based on Optane Memory technology. The H10 and H20 models combined Intel Optane cache memory and a NAND SSD on a single M.2 module.
This is a storage acceleration system. Intel RST software could combine the two parts and present them to Windows as a single volume.
On these computers, changing the storage mode in the BIOS can make the volume inaccessible or unstable. It is therefore best to keep the Intel RST or Optane configuration and load the matching driver.
What to do if Windows 11 still cannot find an SSD
If the Intel RST driver does not work, check that it matches your computer model and storage controller generation. Different F6 driver versions are not always interchangeable.
You can also use DiskPart to check whether Windows detects the SSD.
Check whether DiskPart detects the SSD
At the Windows 11 installation screen, press Shift + F10 at the same time to open Command Prompt.
Type the following command, then press Enter:
diskpartDiskPart is a Windows utility for viewing and managing drives and partitions. Once it starts, the prompt displays DISKPART>.
Then type:
list diskThis command lists the drives currently detected by the Windows installation environment, along with their numbers, status and capacity.
Check whether your SSD is listed by comparing its capacity. Be careful not to confuse it with the USB drive used to install Windows 11.
If the SSD appears in DiskPart but is still unavailable in the installation interface, Windows can access the drive. The issue may then be caused by the partition layout or another error preventing installation.
To exit DiskPart, type:
exitYou can then close Command Prompt and return to Windows Setup.
Once the drive is detected, continue the Windows 11 installation from your USB drive, taking care to select the correct drive and partitions.
We allow some readers to view our articles for free with an ad blocker. However, their number is currently too high for us to keep this access available to everyone.
You can disable your ad blocker to continue reading immediately, subscribe to enjoy all our content without ads, or come back a little later when the pressure has eased.
Access will be restored automatically as soon as the situation allows.