

If you develop applications, manage servers or test scripts, constantly switching between a Linux virtual machine and your Windows environment slows down your workflow. The Windows Subsystem for Linux (WSL) solves this by integrating a Linux kernel directly into Windows 10 (version 2004 and later) and Windows 11. You can run Bash utilities, development environments such as Node.js or Python, and services such as MySQL or PostgreSQL without the overhead of traditional virtual machines. This guide explains the simplified installation process and the manual method for more specific configurations.
In this article
What is the Windows Subsystem for Linux (WSL)?
WSL (Windows Subsystem for Linux) is a compatibility layer developed by Microsoft that lets you run a complete Linux environment directly on Windows, without using a heavy, isolated conventional virtual machine.
It is not emulation. It is system integration that lets you use Linux tools, utilities and applications (Bash, Python, Node.js, Docker and more) with almost native hardware performance.
This broad compatibility makes it much easier to deploy your services, for example when you want to install Docker on Linux to manage your containers.
To understand WSL’s capabilities, it helps to look at how Windows handles virtualization. Historically, virtualization software such as VirtualBox or VMware created a complete virtual machine, simulated all the hardware (CPU, RAM and disk) and ran a guest operating system on top of it. This consumed a great deal of resources.
Windows uses Hyper-V, a type 1 hypervisor. Unlike a type 2 hypervisor, which runs inside an operating system, a type 1 hypervisor runs directly on the hardware. It creates a thin, secure layer that partitions physical resources.
With this architecture, the Linux kernel shares the same hardware as Windows through the hypervisor while remaining interoperable with it. You can access your Windows files from Linux under /mnt/c/, and Linux files from Windows under wsl.localhost.
1. Automatic installation from the command line
Microsoft has unified the installation process into a single command, making WSL accessible even to beginners. This method automatically enables the optional features, downloads the Linux kernel and installs Ubuntu.
- Open the Start menu, type
PowerShell, right-click the application and choose Run as administrator. - In the blue window that opens, enter the following command to start the automated installation:
wsl --install
This command enables the optional Windows Subsystem for Linux component, downloads the latest Linux kernel and installs Ubuntu as the default distribution.
At the time of writing, these are the available versions.
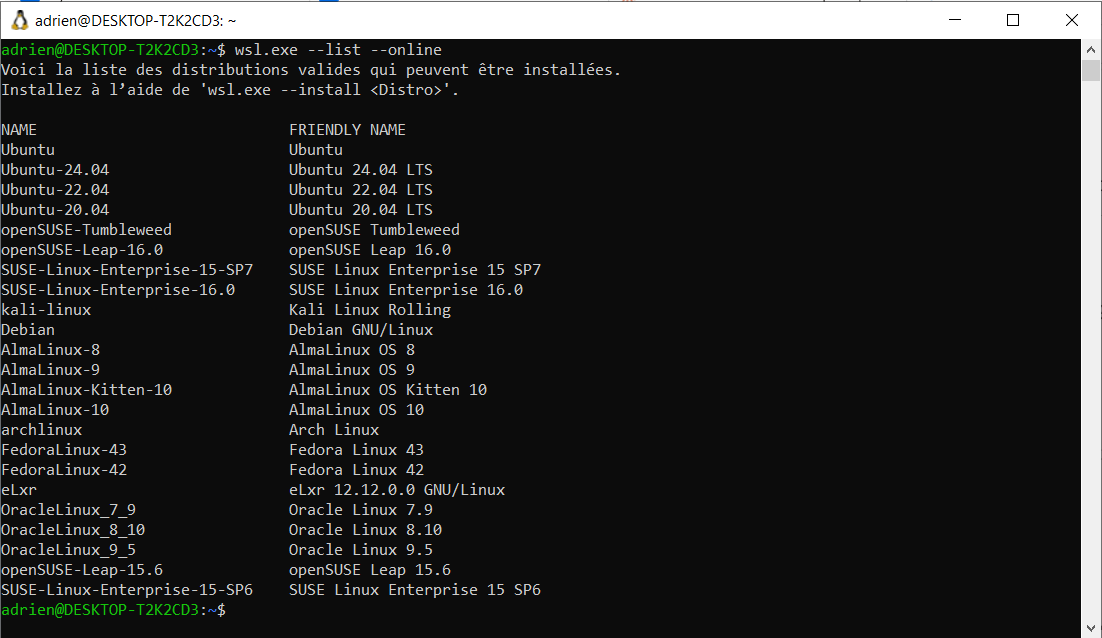
If you prefer another distribution, simply specify its name like this:
wsl --install -d Debian
- When the operation is complete, restart your computer. Windows must initialize the new system components at startup for WSL to work.
- After the restart, a console window opens automatically to finish the deployment. You will need to create a username and password for this Linux environment.
If the process appears stuck at 0.0%, you can force a direct web download by adding the specific argument: wsl --install --web-download -d Ubuntu.
A graphical interface for WSL settings
The Windows Subsystem for Linux now has a graphical configuration interface that makes it easy to adjust your environment’s performance without editing configuration files.
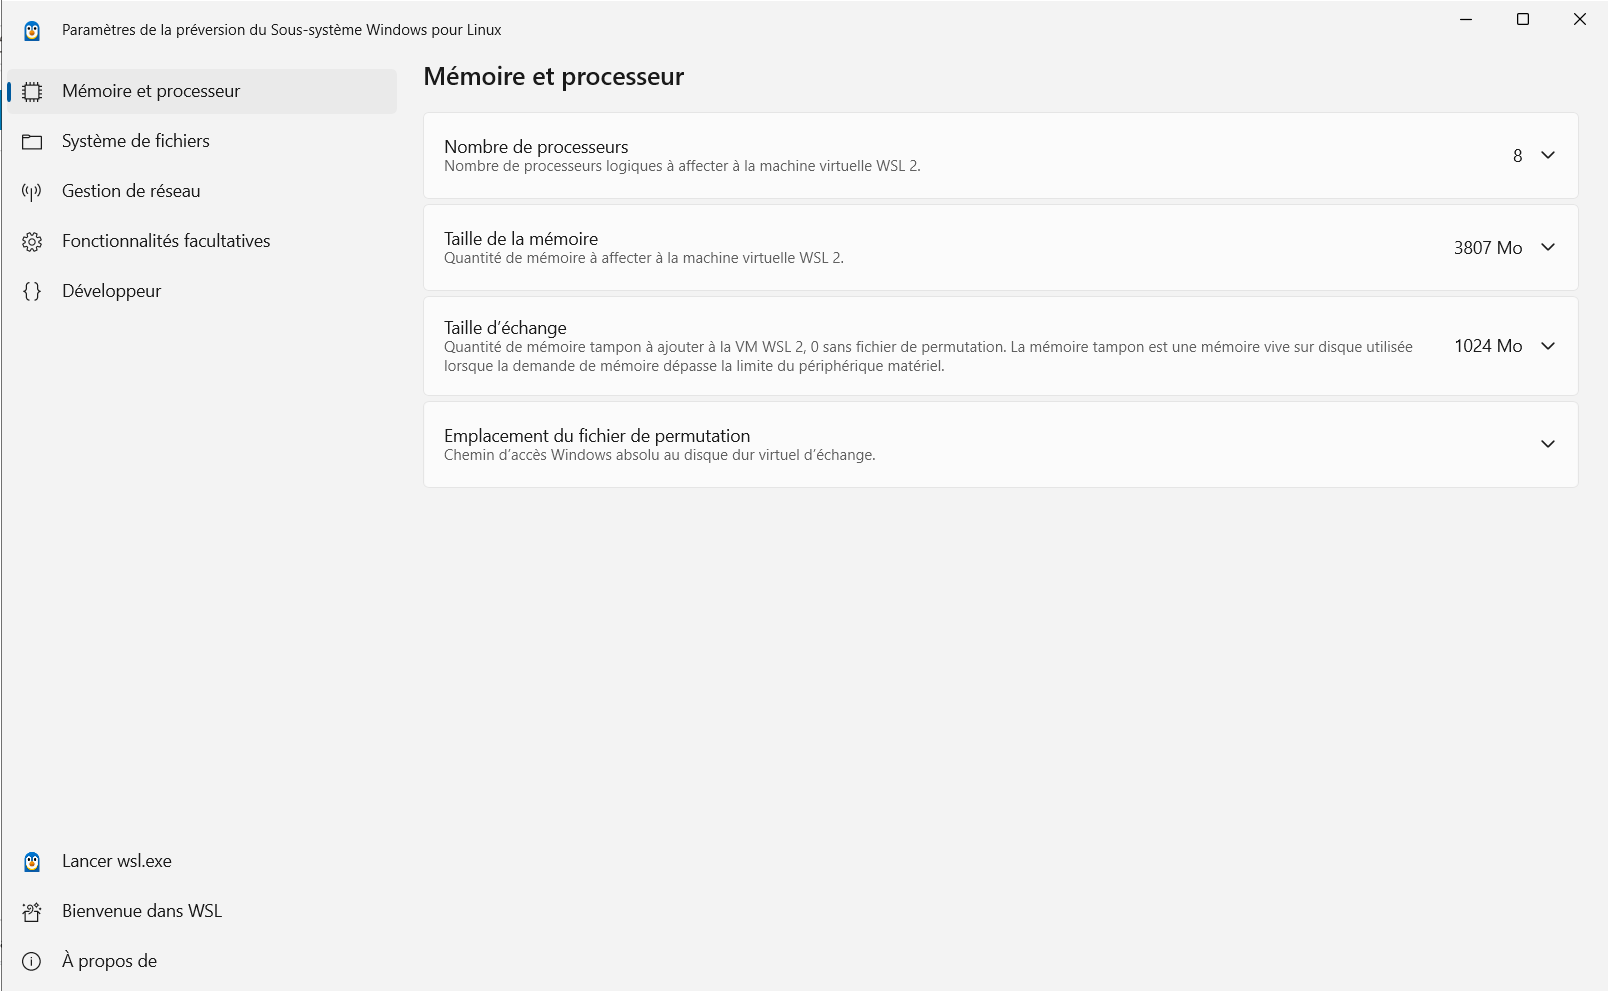
Access these settings by searching for “WSL Settings” in the Start menu. This interface lets you control:
- Hardware resources: Adjust the number of logical processors and the amount of RAM allocated to the WSL 2 virtual machine to optimize compilation.
- Swap management: Configure the swap size to prevent out-of-memory errors during demanding tasks.
- Networking and features: Easily manage networking mode and optional features without memorizing PowerShell commands.
This tool lets you adapt your Linux instance to Windows and to the needs of your development environment.
2. Manual installation for older versions
If you use a version of Windows 10 older than 2004, the single command will not be recognized. You must enable the features manually through the system control panel, enable the components with PowerShell and then install a distribution from the Microsoft Store.
2.1 Enable components through Windows Features
- Press Windows + R, type
optionalfeaturesand confirm to open the Windows Features window. - Find and check Windows Subsystem for Linux.
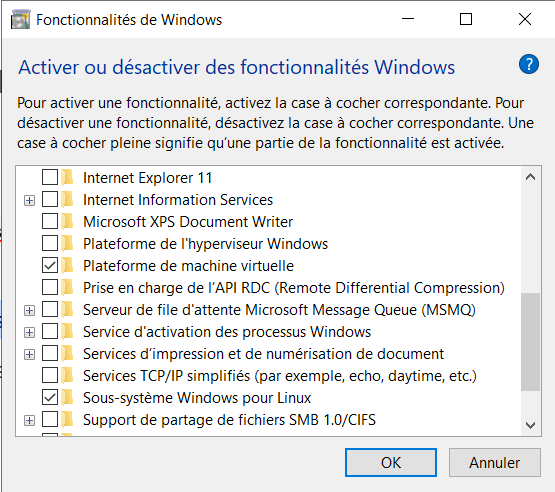
- If you plan to use WSL 2 (recommended for better performance), also check Virtual Machine Platform.
- Click OK, then Restart now.
2.2 Enable features through PowerShell and configure the kernel
For a manual installation, open PowerShell as administrator and run these two commands to enable the required features:
- Enable the subsystem:
dism.exe /online /enable-feature /featurename:Microsoft-Windows-Subsystem-Linux /all /norestart
- Enable the virtual machine platform (for WSL 2):
dism.exe /online /enable-feature /featurename:VirtualMachinePlatform /all /norestart
- Download and install the Linux kernel update package. This package is required for WSL 2 to communicate correctly with the hardware.
2.3 Choose and install a Linux distribution
Once the features are enabled, you are not limited to Ubuntu. The Microsoft Store lets you add a range of environments.
- Open the Microsoft Store from the taskbar.
- Search for Linux to display the available distributions, such as Debian, Kali Linux, openSUSE or Alpine.
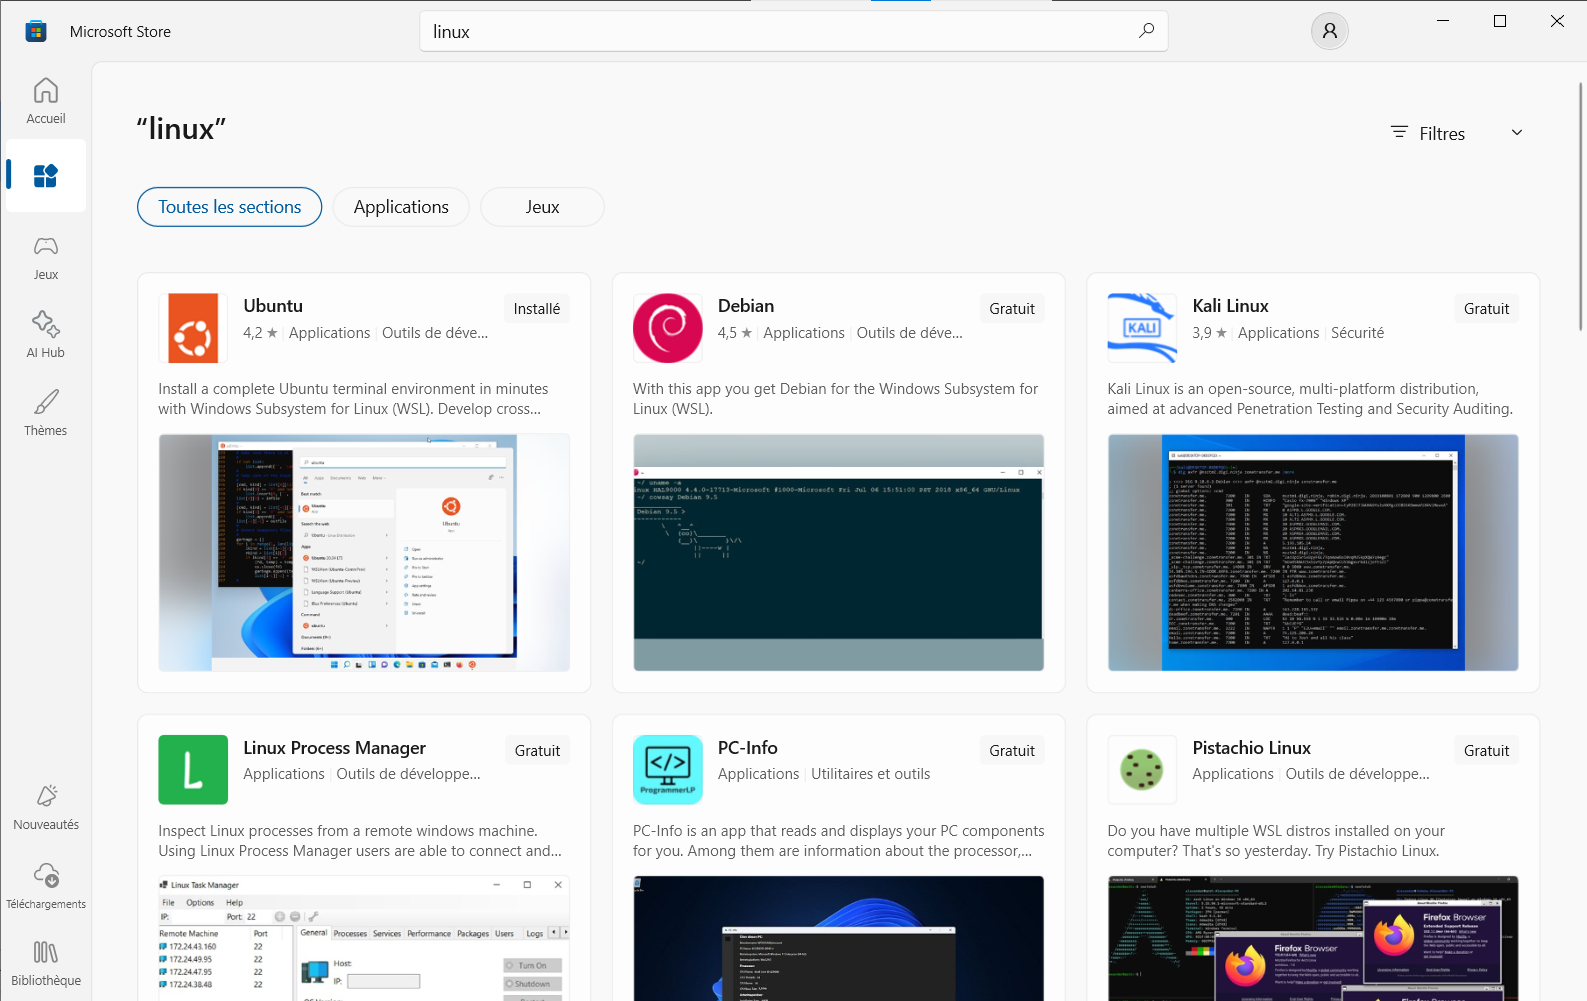
- Click Get or Install on the page for the chosen distribution.
- When the download is complete, launch the application from the Start menu. The system will extract the required files to your drive.
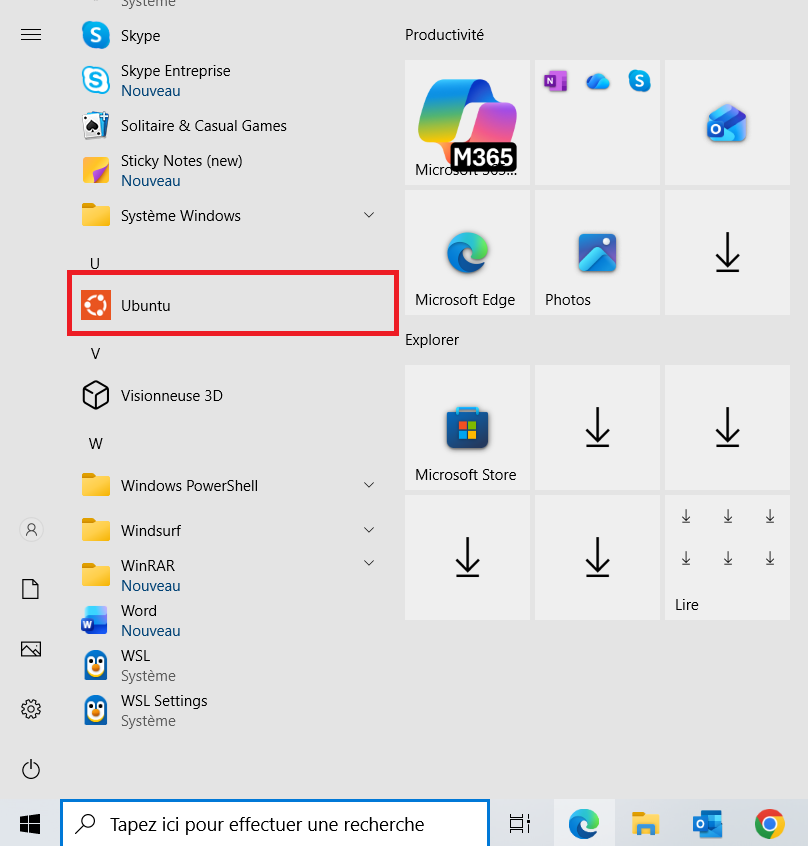
- Create your user credentials. These details belong to each Linux distribution and have no connection with your Windows sign-in password.
Manage and upgrade WSL from the command line
Once your environment is running, you will often want to evolve your setup. WSL’s strength is its flexibility. You can run several distributions side by side and switch between virtualization engine versions as needed.
To monitor your current configuration, wsl -l -v is your best ally. It provides a complete overview of installed distributions and their subsystem version. If an instance is still using the older WSL 1 architecture, you can convert it without data loss:
wsl --set-version <Name> 2
Automate and configure the default version
To ensure all future installations benefit from WSL 2 performance and compatibility, set it as the default now:
wsl --set-default-version 2
Explore and deploy new Linux distributions
You are not limited to a single distribution. View the available environments and deploy a new instance immediately:
wsl -l -o
wsl --install -d <Name>
Maintain and clean up your WSL environments
If you encounter a technical problem or simply want to free system resources, you can cleanly stop an unstable distribution without affecting your other running services:
wsl --terminate <Name>
Finally, if a distribution is no longer useful and you want to start over, unregister it. Warning: this permanently deletes all data stored inside that specific environment.
wsl --unregister <Name>
For a better experience, we strongly recommend installing Windows Terminal from the Microsoft Store. It lets you open tabs combining PowerShell, Command Prompt and your various Linux distributions in one customizable window. Before installing WSL, make sure you have a compatible version: here is how to check which version of Windows is installed on your machine.
After enabling WSL and restarting my PC, I see a black screen. What should I do?
We allow some readers to view our articles for free with an ad blocker. However, their number is currently too high for us to keep this access available to everyone.
You can disable your ad blocker to continue reading immediately, subscribe to enjoy all our content without ads, or come back a little later when the pressure has eased.
Access will be restored automatically as soon as the situation allows.