

Why depend on a hosting provider when you can host your WordPress site at home for free? Self-hosting is often seen as something reserved for experts, but it is now within reach of curious and motivated users. With a simple PC, a stable Internet connection and a few well-chosen tools, you can create a fast, secure WordPress site under your own supervision. This guide explains how to self-host your first WordPress site.
In this article
- WordPress self-hosting lets you manage your site without depending on a provider
- Install your Ubuntu server
- Install CyberPanel on Ubuntu
- What is CyberPanel?
- Connect your domain name to your server
- Create a site in CyberPanel
- Install WordPress through CyberPanel’s free interface
- Secure your WordPress site with Ubuntu
WordPress self-hosting lets you manage your site without depending on a provider
Self-hosting means installing and creating a WordPress website directly on your own server, without using a third-party host such as OVH or IONOS. It may seem technical, but it is an excellent way to regain full control over your site, data and infrastructure.
Unlike shared or cloud hosting, you do not depend on anyone for your site’s configuration, security or performance. You decide what runs on your machine, how it is optimised and what is enabled. No more host-imposed restrictions or premium options for unlocking basic features.
It is also an excellent learning opportunity. Understanding how a server works, what WordPress does behind the scenes, and how to manage security or domain names is a real advantage when developing your skills. Over time, the savings are real. Once your server is running, there is no monthly subscription to pay. Only the domain name needs to be renewed each year.
Hardware needed to self-host your WordPress site
Before hosting your own WordPress site, make sure you have suitable hardware. The good news is that a web server does not need to be a powerful machine. A simple energy-efficient desktop PC can do the job perfectly.
A computer dedicated to hosting
It is strongly recommended to use a computer dedicated exclusively to the server role. It should not also be used for browsing, work or gaming. This ensures system stability and permanent site availability while limiting crashes and interference.
Ideally, choose a small desktop PC with low power consumption, such as a mini PC or a basic system unit. Unlike a laptop, it can run 24 hours a day without overheating or wearing out prematurely.
Recommended minimum specifications
To ensure good performance, even with several WordPress plugins and regular visitors, here is a sensible basic configuration:
- 64-bit processor (almost all PCs made since 2010 have one)
- At least 8 GB of RAM (4 GB works, but can quickly become limiting)
- 250 GB SSD
If you are reusing an old PC, replace the hard drive if it is very old or slow.
A stable wired Internet connection
Hosting a site requires a reliable connection. Fibre optic Internet is ideal.
The server must be connected through Ethernet directly to the router or modem.
A static public IP address
For a site to be accessible worldwide, it must point to a static public IP address. This is an essential requirement:
Many ISPs, especially consumer fibre plans, do not assign a static IP by default. Check with support or consult your customer area. Some providers, such as Orange or Freebox, offer this option.
Without a static IP, you will not be able to self-host your WordPress site correctly.
A custom domain name
To let visitors access your site, you need to rent a domain name. This avoids using a complex and unprofessional IP address.
Here are a few important points:
- Choose a recognised registrar such as OVH, Gandi, Infomaniak, IONOS or Hostinger.
- Choose a common extension such as
.fror.com - The annual cost is usually between €5 and €15, depending on the extension.
- After buying it, link the domain to your public IP by configuring the DNS records, as we will see later.
Install your Ubuntu server
Once your dedicated machine is ready, install the operating system that will run your future WordPress site. We will use Ubuntu Server, a lightweight and fast version that is perfectly suited to web-server use.
Download Ubuntu Server
We recommend Ubuntu Server 22.04 LTS (Long Term Support). It receives security support for five years, which ensures stability and predictable updates.
❗ Do not download version 24.04. CyberPanel is not yet compatible with it. Using a newer version can cause installation errors or incompatibilities with essential services such as OpenLiteSpeed or MySQL.
Download the ISO image for version 22.04 LTS (64-bit).
Prepare a bootable USB drive
Once the ISO file has been downloaded, transfer it to a USB drive so you can install Ubuntu on your machine. Use a bootable-media creation tool:
- On Windows, use Rufus. It is free, fast and requires no installation.
- Universal alternative. Ventoy lets you boot several ISOs from a single drive.
Tip. Use a USB drive with at least 8 GB and back up its contents first because it will be formatted.
When the drive is ready, insert it into the PC planned for the server, restart it and enter the boot menu using F12, F2, DEL or ESC, depending on the manufacturer. Start the installation from the USB drive.
Update your system after installation
Before going further, start by updating Ubuntu. This ensures that you have the latest security fixes and a clean system before installing CyberPanel.
Connect to your server either directly with a screen and keyboard or through SSH, then run this command:
sudo apt update && sudo apt upgrade -y
This process may take a few minutes depending on the number of packages to update. To automate it, you can then enable automatic updates on Ubuntu.
Install CyberPanel on Ubuntu
Now that your Ubuntu server is ready and up to date, install the tool that will make your WordPress site easy to manage. CyberPanel is an open-source web control panel that greatly simplifies web-server management, even without advanced system-administration knowledge.
What is CyberPanel?
CyberPanel is a lightweight and free alternative to solutions such as cPanel or Plesk. It is based on the OpenLiteSpeed web server, known for its speed, low resource consumption and WordPress performance. CyberPanel provides a modern browser interface that beginners can use too.
It includes everything you need to host a website:
- Domain-name management (DNS)
- MySQL database creation
- Automatic installation of Let’s Encrypt SSL certificates
- PHP version selection and management
- Mail management (optional)
- Built-in firewall, configurable from the interface
- OWASP CRS protection, with web-security rules that can be enabled in a few clicks
CyberPanel turns your server into a ready-to-use hosting platform that can host WordPress without hassle.
Automatic CyberPanel installation on Ubuntu
CyberPanel provides an all-in-one installation script designed to simplify setup on compatible Linux systems.
Connect to your Ubuntu server over SSH, if you have not already done so, and run this command:
sh <(curl https://cyberpanel.net/install.sh || wget -O - https://cyberpanel.net/install.sh)
This script automatically downloads the required files, installs OpenLiteSpeed, MariaDB, PHP and Postfix when enabled, and configures CyberPanel.
Steps during the CyberPanel self-hosting installation
Once the script starts, simply follow the instructions on screen. These are the main steps:
- Choose OpenLiteSpeed. When the installer asks which web server to use, select OpenLiteSpeed because it is free, WordPress-compatible and lightweight.
- Keep the default options. For a first installation, it is recommended to accept the proposed options without changing them.
- Administrator password. A random password will be generated automatically at the end.
- Wait for the installation to finish. This can take between 15 and 30 minutes depending on your machine. At the end, the script displays the important information and the CyberPanel access address.
By default, the interface is available in a browser at the following address:
https://VOTRE-IP:8090
⚠️ Your browser may display a certificate warning. This is normal at first. Click “Advanced” and then “Continue”.
First access to CyberPanel
Open your browser and go to https://your-ip:8090.
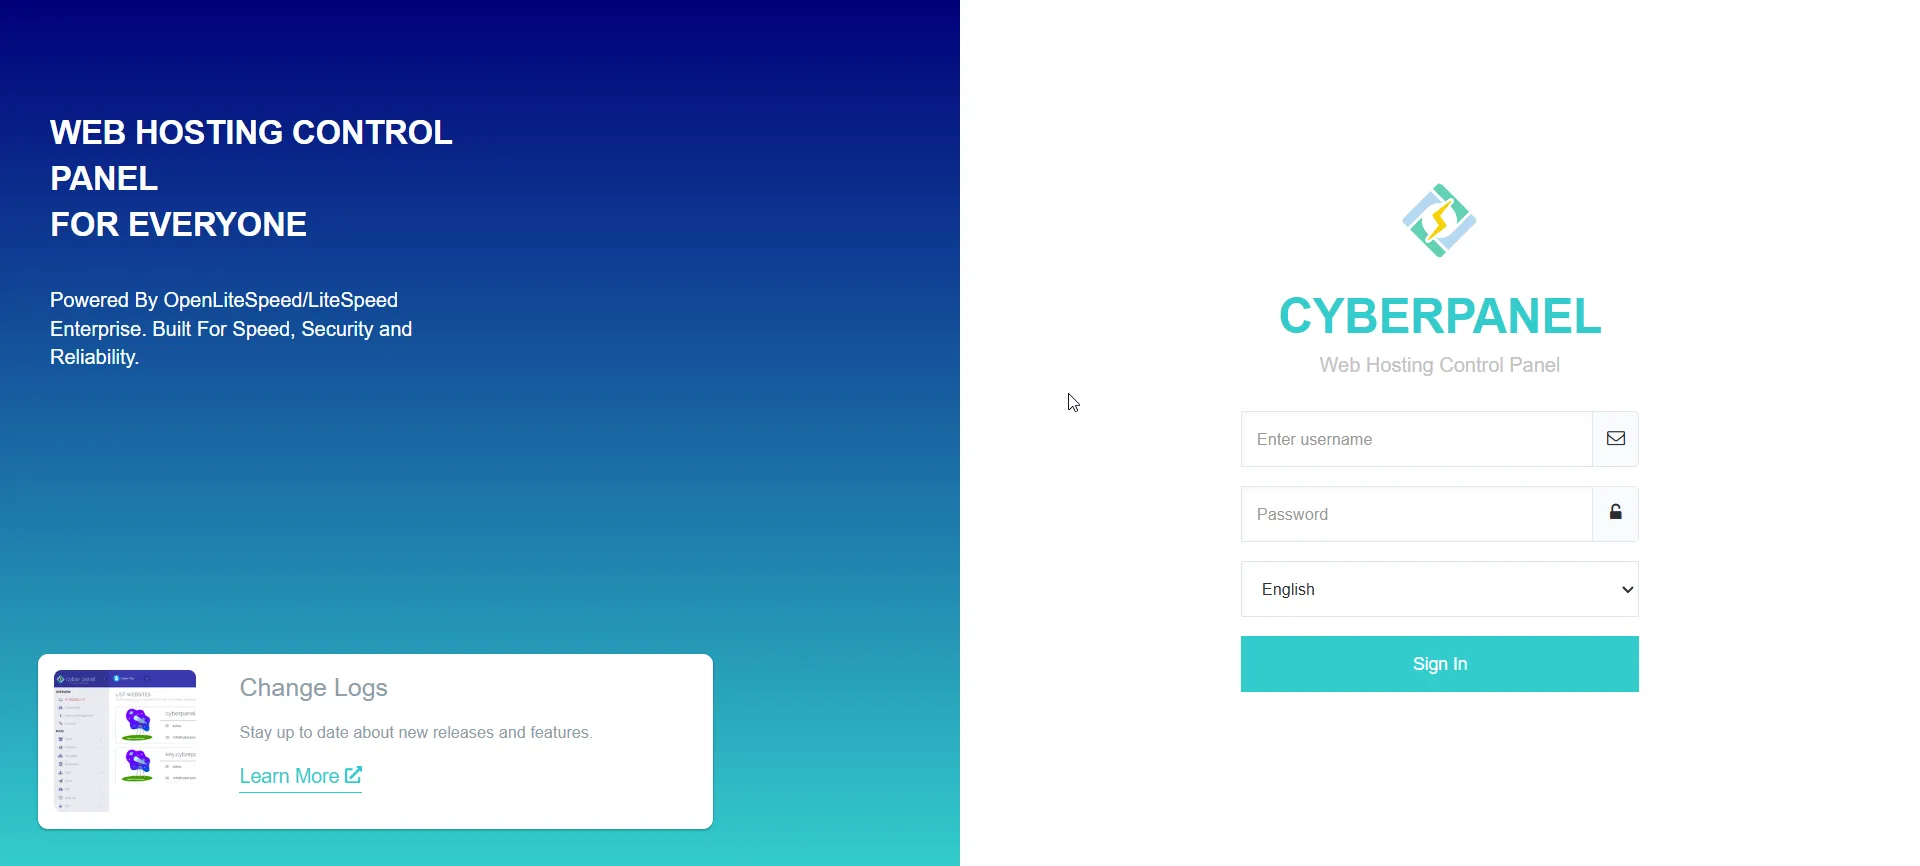
Use the following credentials to sign in:
- Username: admin
- Password: the one you chose during installation, or the automatically generated password if none was requested
Once logged in, change your password immediately from the interface for security reasons. You can do this through Users > Modify User > admin.
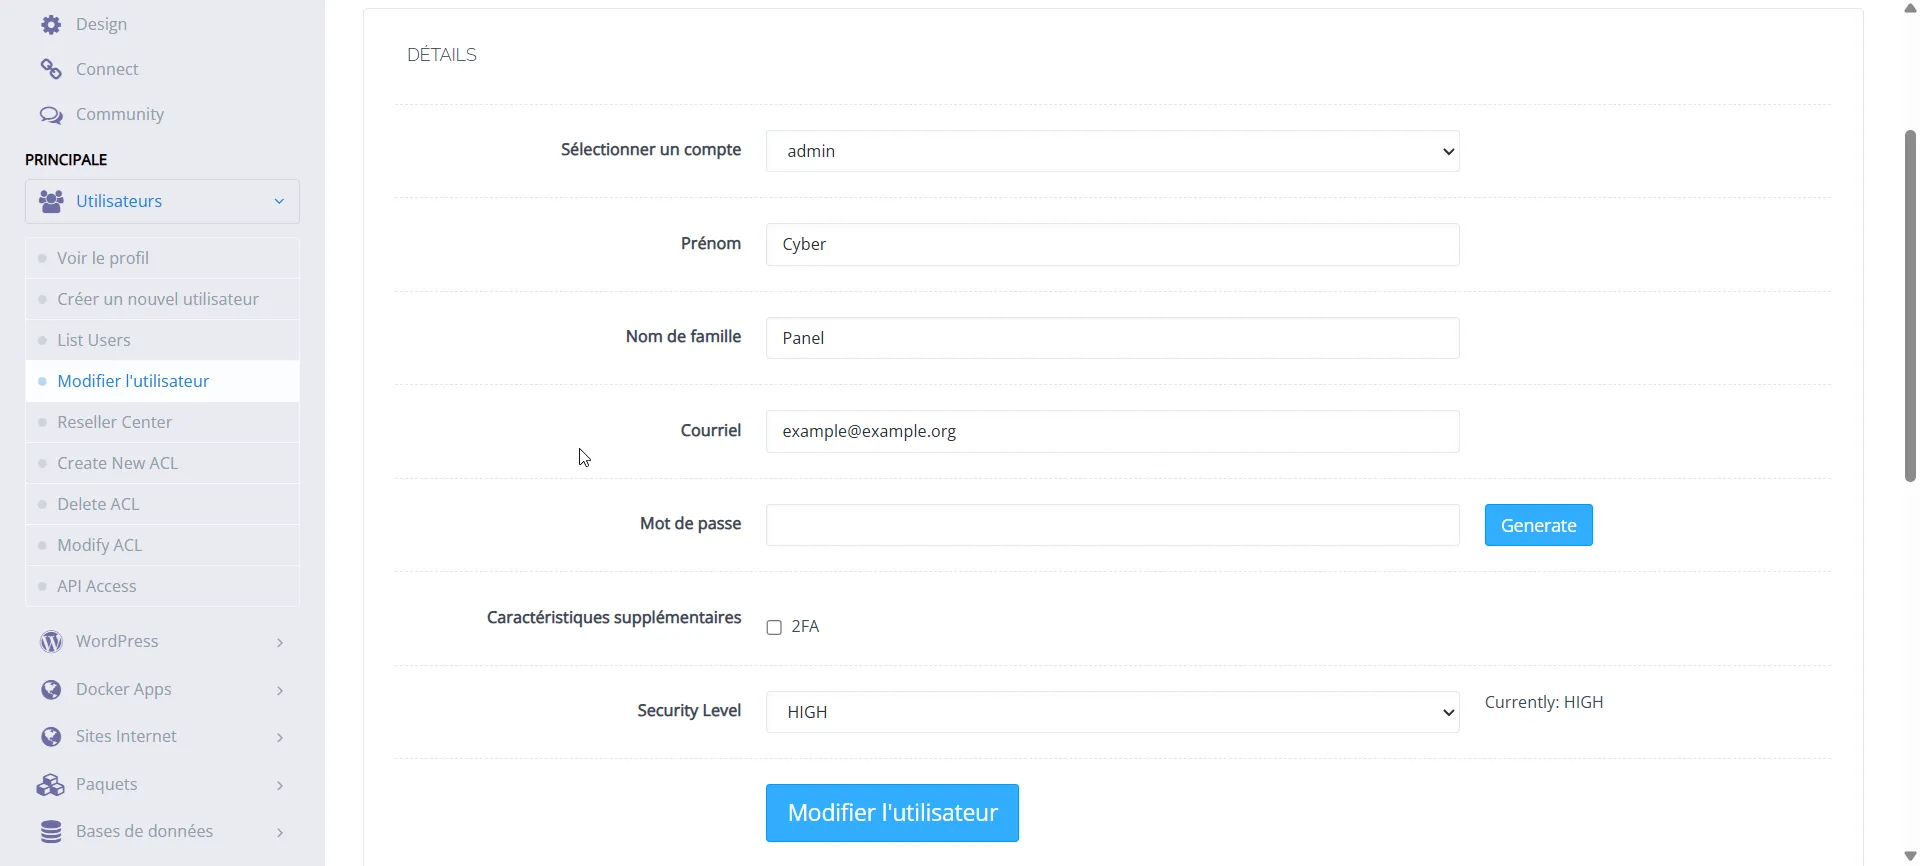
You can also enable 2FA for additional security on your hosting panel.
Then take a moment to explore the interface:
- The dashboard shows the server’s overall status.
- The menus on the left let you manage sites, databases, SSL certificates, the firewall, DNS, FTP and more.
Even as a beginner, you will find that the logic is similar to a conventional host, but with full control over what happens in the background.
Connect your domain name to your server
Now that your Ubuntu server with CyberPanel is ready to host your site, one important step remains. You must connect your domain name to your server. This lets visitors reach your site by entering yoursite.com instead of a long IP address. Here is how to do it.
Find your server’s public IP
Your domain name must point to your Internet modem’s public IP address and therefore to your server if it is correctly connected to it.
To find your public IP from your Ubuntu server terminal, type the following command:
curl ifconfig.me
This returns an address such as 81.245.xxx.xxx. This is the address to use in your domain DNS settings.
Create a DNS record in your registrar dashboard
Once you have your public IP, open your registrar dashboard. This is the site where you bought your domain, such as OVH, Gandi, IONOS or Infomaniak.
Add an A record
Create an A-type DNS record that associates your main domain with your server’s IP.
- Name: @. This symbol represents the root domain, for example yoursite.com.
- Value: your public IP, for example 81.245.123.45.
- TTL: keep the default value, often 3600 seconds.
(Optional) Add a CNAME record for www
You can also redirect the www.yoursite.com subdomain to the main domain:
- Name: www
- Type: CNAME
- Value: @ or yoursite.com
This lets visitors access the site with or without the “www” prefix.
⏳ DNS changes can take between five minutes and several hours to propagate, depending on the TTL.
Port forwarding on your Internet modem
Your Internet modem or router must know that connections to web ports should be forwarded to your Ubuntu server.
These are the ports to forward:
| Port | Protocole | Usage |
|---|---|---|
| 80 | TCP | HTTP (accès web classique) |
| 443 | TCP | HTTPS (accès sécurisé avec SSL) |
You will find these settings under NAT, port forwarding or port transfer in your modem interface. Menu names vary by ISP.
⚠️ If you forget this step, your site will not be accessible from outside even if everything is configured correctly on the server.
Create a site in CyberPanel
First, create a “website” in CyberPanel. This is a configuration ready to host WordPress, with the right folders, PHP, database and other settings.
- Sign in to CyberPanel at https://your-ip:8090
- In the left menu, click Websites > Create Website.
- Fill in the form as follows. Select Package: Default.
- Select Owner: admin by default.
- Domain Name: your domain name, for example yoursite.com.
- Email: your email address.
- PHP: select PHP 8.1 or 8.2, which are compatible with WordPress.
- SSL: tick the option to automatically enable the HTTPS certificate from Let’s Encrypt.
- Click Create Website.
After a few seconds, your site will be created. CyberPanel automatically generates all files and folders required for it to work, along with the PHP environment.
Install WordPress through CyberPanel’s free interface
CyberPanel can install WordPress automatically without a paid module. Use the correct section, the Manage tab of an existing site, rather than the “WordPress” item in the side menu, which may redirect to limited or paid features depending on the version.
Open the site manager in CyberPanel
From the left menu, click Websites > List Websites.
Find the site you just created, for example yoursite.com.
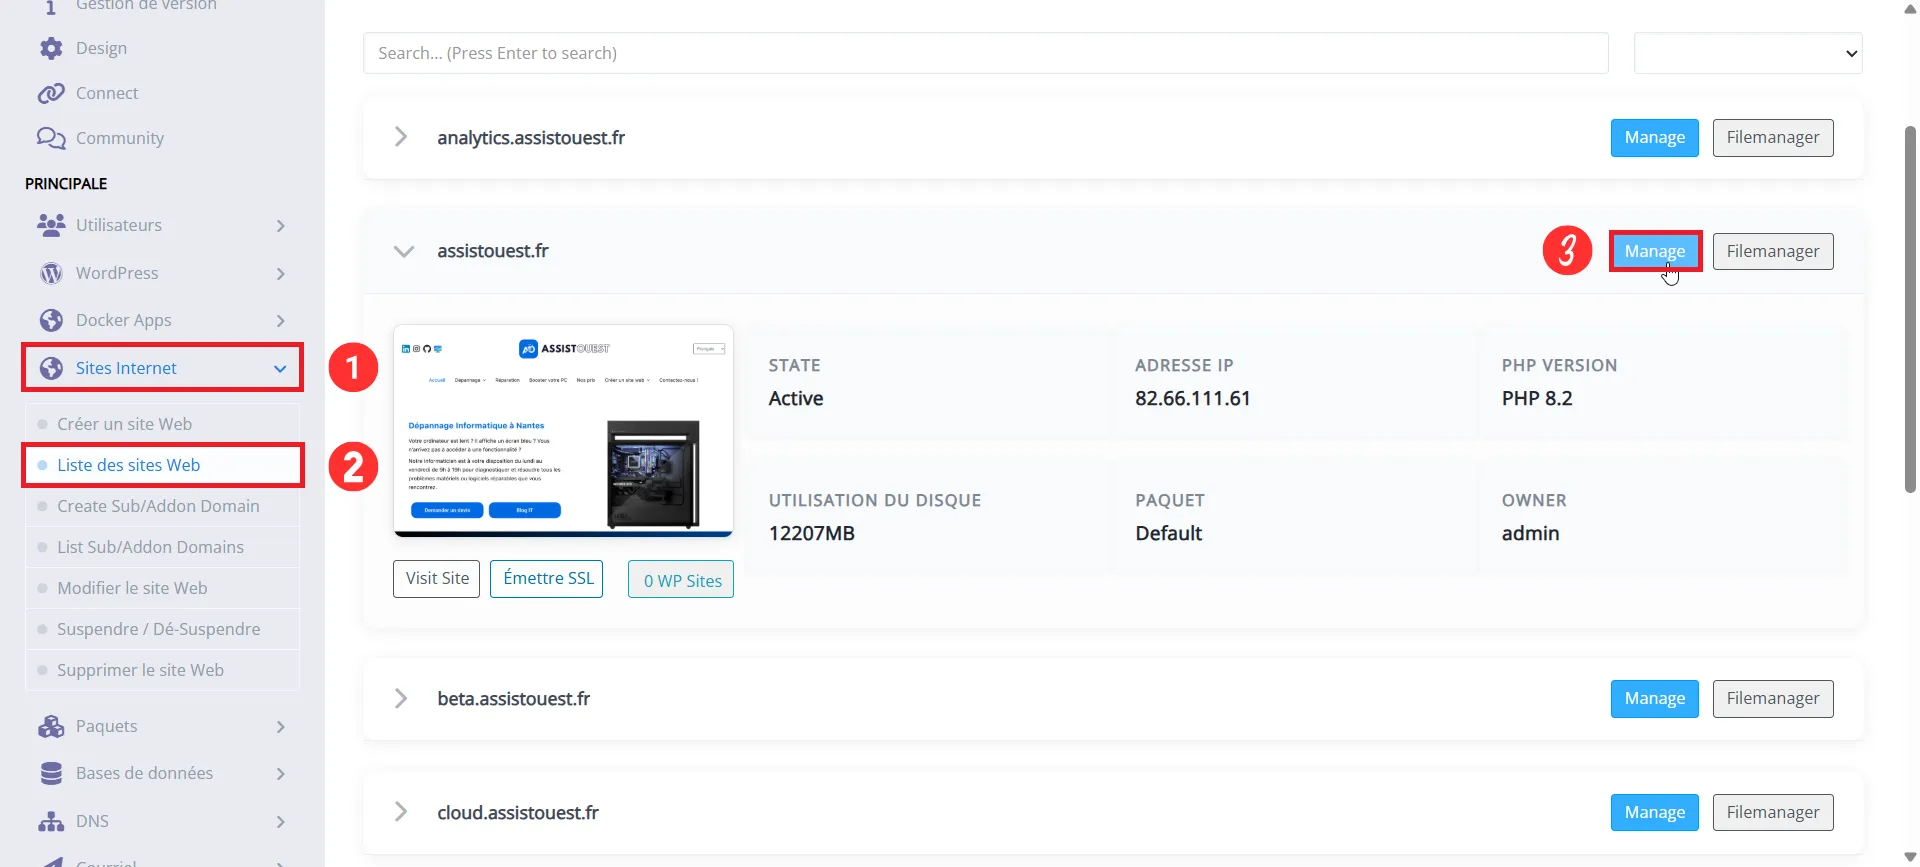
Click the Manage button on the right.
Scroll down until you find WP + LSCache.
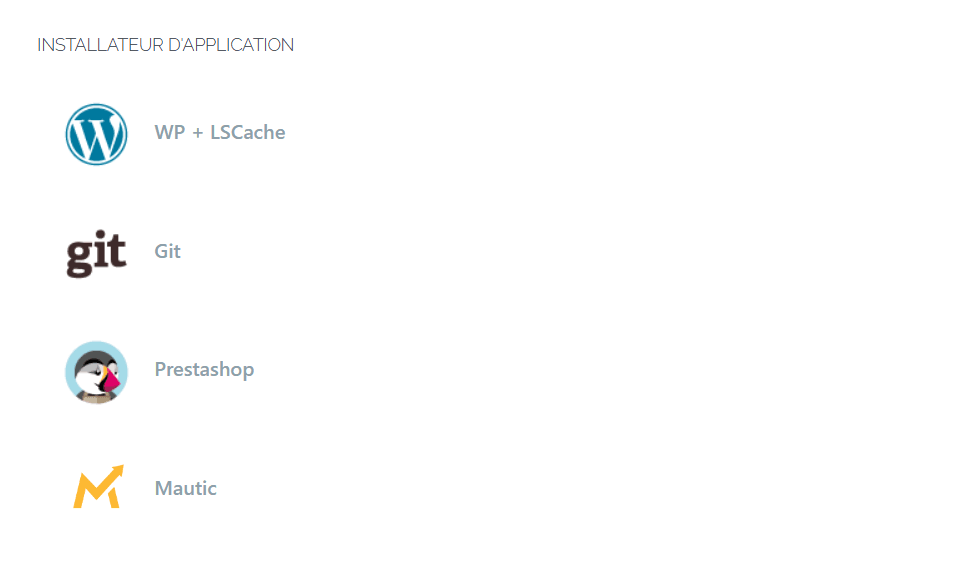
Fill in the form that installs WordPress with LSCache for free and in one click.
Complete the WordPress installation form
- Blog title: your site name. You can change it later.
- Login user: the WordPress administrator username.
- Password: choose a secure password.
- Email: the administrator account email address.
- Path: leave it empty for a root installation at yoursite.com. Enter a name if you want to install it in a subdirectory such as blog.
Then click Install Now.
4. Access your WordPress site
Once installation is complete, your site is immediately active. You can access:
Administration: https://yoursite.com/wp-admin
Site: https://yoursite.com
Secure your WordPress site with Ubuntu
Now that WordPress is installed, you need to secure it. A server exposed to the Internet is constantly targeted by bots, intrusion attempts and automated attacks. Fortunately, CyberPanel includes several basic protections, and you can strengthen security with CrowdSec, a tool specialised in malicious behaviour. Our guide explains how to install and configure CrowdSec for CyberPanel and OpenLiteSpeed.
 assistouest.fr
CyberPanel directly includes several essential security mechanisms to protect a WordPress site from the moment it is created.
Enable SSL (HTTPS)
When creating the site, if you selected the SSL option, a free Let’s Encrypt certificate is generated automatically. It lets your site use secure HTTPS instead of HTTP. If this did not happen or you want to generate it again:
- Go to Websites > List Websites.
- Click Manage for your domain.
- Click the Issue SSL button.
This enables SSL encryption within a few seconds.
Enable OWASP CRS rules
CyberPanel makes it easy to enable the OWASP ModSecurity Core Rules, a set of powerful security rules that automatically block suspicious behaviour such as injection attempts and unauthorised access to wp-login.php.
Here is how to enable them:
- Left menu: Security > ModSecurity Rule Packages.
- You will see the OWASP ModSecurity Core Rules package.
- Make sure it is set to “On”.
- If needed, click Configure to adjust advanced settings.
⚠️ Warning. These rules are strict. They may block WordPress features such as page builders, forms or some plugins.
Install CrowdSec as an additional layer
To strengthen security further, we strongly recommend installing CrowdSec, a collaborative protection system against malicious behaviour such as brute force, scans and targeted attacks.
CrowdSec analyses your server logs in real time and automatically blocks suspicious IPs. It is particularly useful for WordPress because it includes dedicated defence scenarios for wp-login, xmlrpc and other endpoints.
By combining SSL, a firewall, OWASP and CrowdSec, you obtain a level of security rarely achieved on conventional hosting. All of this works without requiring a WordPress plugin.
We allow some readers to view our articles for free with an ad blocker. However, their number is currently too high for us to keep this access available to everyone.
You can disable your ad blocker to continue reading immediately, subscribe to enjoy all our content without ads, or come back a little later when the pressure has eased.
Access will be restored automatically as soon as the situation allows.