

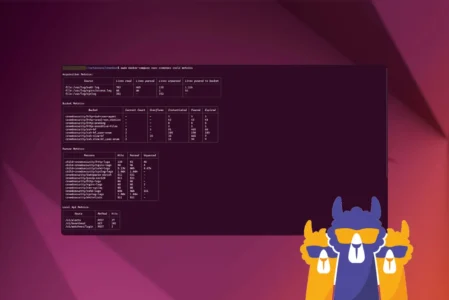
The era of passive firewalls is over. With CrowdSec, defence becomes collective. Every protected server enriches a global network of malicious IPs shared in real time among all participants. If you use Ubuntu with Apache, Nginx or LiteSpeed, this guide shows you how to install it, configure logs, enable protections specific to your stack and deploy it securely.
In this article
Install and configure CrowdSec on your Ubuntu server
CrowdSec is a modern, collaborative intrusion detection system designed to protect Linux servers against brute-force attacks, scans, injections and much more. Running as an agent, it analyses system logs in real time and feeds a shared database of malicious IP addresses. Here are the steps to install CrowdSec properly on an Ubuntu server.
Add the official CrowdSec APT repository
Start by installing the official CrowdSec APT repository with the automated script:
curl -s https://install.crowdsec.net | sudo sh
This script configures the secure CrowdSec repository and installs the dependencies required for the installation.
Install the CrowdSec engine
Once the repository is ready, start by updating the Ubuntu package list and then install the main engine:
sudo apt update
sudo apt install crowdsec -y
This package installs the behavioural analysis engine, the default configuration files and the command-line tool.
Enable and start the CrowdSec service
To start CrowdSec immediately and make sure it starts again after every reboot, use:
sudo systemctl enable --now crowdsec
Specific configuration for OpenLiteSpeed
By default, CrowdSec automatically supports Apache and Nginx server logs through built-in detection of standard paths. OpenLiteSpeed, LiteSpeed Enterprise and LiteSpeed hosting panels such as CyberPanel, however, require manual configuration so that CrowdSec can monitor log files correctly.
Install the CrowdSec LiteSpeed collection
Start by installing the official CrowdSec collection for OpenLiteSpeed. It includes a parser adapted to the LiteSpeed log format and compatible detection scenarios:
sudo cscli collections install crowdsecurity/litespeed
Manually add LiteSpeed logs to the acquisition configuration
Unlike Apache and Nginx, OpenLiteSpeed log paths are not standardised and vary by installation. CrowdSec therefore does not detect them automatically.
Start by editing the CrowdSec acquisition file
sudo nano /etc/crowdsec/acquis.yaml
These blocks allow CrowdSec to monitor both OpenLiteSpeed system logs and the logs of vhosts managed by CyberPanel.
Add the following blocks at the end of the file
For Open LiteSpeed or LiteSpeed Enterprise:
#Generated acquisition file - custom (service: OpenLiteSpeed) / files : /usr/local/lsws/logs/*.log & /usr/local/lsws/admin/logs/*.log
filenames:
  - /usr/local/lsws/logs/*.log
  - /usr/local/lsws/admin/logs/*.log
labels:
  type: litespeed
---
For CyberPanel:
#Generated acquisition file - custom (service: CyberPanel) / files : /home/*/logs/*.log, *.error_log, *.access_log
filenames:
  - /home/*/logs/*.log
  - /home/*/logs/*.error_log
  - /home/*/logs/*.access_log
labels:
  type: litespeed
---
Once the changes have been saved, reload CrowdSec so that it picks up the new files:
sudo systemctl reload crowdsec
You can check that the logs are being processed with:
sudo cscli metrics
In the “Parser Metrics” section, you should see the crowdsecurity/litespeed-logs or child-crowdsecurity/litespeed-logs parser.

Install the CrowdSec firewall bouncer
The firewall bouncer is the component that applies CrowdSec decisions directly at network level. It blocks IP addresses deemed malicious in real time.
Depending on your Linux kernel version, Ubuntu may use:
- iptables: traditional system, still common on Ubuntu 20.04/22.04.
- nftables: a more modern system, native to recent kernels.
To check which one you are using:
sudo iptables -V
If the version displays nf_tables, you are using nftables.
Next, install the matching bouncer for iptables:
sudo apt install crowdsec-firewall-bouncer-iptables -y
For nftables:
sudo apt install crowdsec-firewall-bouncer-nftables -y
Once the bouncer is installed, enable its service:
sudo systemctl enable --now crowdsec-firewall-bouncer
Generate the bouncer API key
CrowdSec uses API keys to secure communication between the detection engine and its bouncers. Create a key dedicated to the firewall bouncer:
sudo cscli bouncers add crowdsec-firewall
The system will provide a unique key (copy it carefully). It will be stored in:/etc/crowdsec/bouncers/crowdsec-firewall-bouncer.yaml
Enable the recommended scenarios for WordPress
To protect sensitive areas such as wp-login.php or xmlrpc.php, CrowdSec provides dedicated scenarios:
sudo cscli collections install crowdsecurity/wordpress
sudo cscli scenarios install crowdsecurity/http-bf-wordpress_bf
sudo cscli scenarios install crowdsecurity/http-bf-wordpress_bf_xmlrpc
You should also install the modsecurity scenario if you use a ModSecurity WAF with OpenLiteSpeed:
cscli scenarios install crowdsecurity/modsecurity
Here is a selection of scenarios for blocking common attacks (brute force, scans, malicious crawlers, injections and more):
sudo cscli scenarios install crowdsecurity/ssh-bf
sudo cscli scenarios install crowdsecurity/http-probing
sudo cscli scenarios install crowdsecurity/http-sqli-probing
sudo cscli scenarios install crowdsecurity/http-xss-probing
sudo cscli scenarios install crowdsecurity/http-path-traversal-probing
sudo cscli scenarios install crowdsecurity/http-bad-user-agent
sudo cscli scenarios install crowdsecurity/http-sensitive-files
sudo cscli scenarios install crowdsecurity/http-crawl-non_statics
After each scenario addition or change, restart CrowdSec cleanly:
sudo systemctl reload crowdsec
You can then check that they are enabled with:
sudo cscli scenarios list
Connect to CrowdSec Central (online portal)
Once your server is protected by CrowdSec, you can centralise security-incident monitoring through the CrowdSec Console web portal. This online dashboard lets you view detected attacks, decisions made by your bouncers and the health of your agents in real time.
Start by creating an account at https://app.crowdsec.net
Once registered, sign in to the dashboard to generate an enrolment key.
Link the local agent to your account
On the Ubuntu server where CrowdSec is installed, run the following command and replace <provided-key> with the generated enrolment key:

A confirmation will appear in the terminal. Then return to app.crowdsec.net to approve the new agent pairing. This links the local CrowdSec agent to your personal dashboard.
Once the link is complete, your server will appear in the Console interface. You will then have access to:
- A detailed history of detected attacks
- The decisions applied (bans, alerts…)
- Statistics on banned IPs or IPs shared in the community database

CrowdSec Console becomes a true network security control centre, even when you manage several machines.
Check that the bouncer is connected to CrowdSec
Once your bouncer is installed (firewall, proxy and so on), check that the connection between the CrowdSec engine and the bouncer works correctly. This ensures that decisions (bans, challenges and so on) are transmitted and applied properly.
Run the following command:
sudo cscli bouncers list
Expected output:
NAME                 IP          VALID  LAST API PULL
crowdsec-firewall    127.0.0.1   ✔️     2s ago
With a properly connected bouncer, your server applies CrowdSec security decisions in real time, whether they come from the local system or the community network.
Best practices and additional security
For lasting and responsive protection, a CrowdSec installation should not be left unchanged. Here are some long-term best practices to secure your WordPress server and keep your defence system working properly.
Keep the CrowdSec hub up to date
Detection scenarios evolve regularly to follow new threats. To stay up to date, run the following command periodically:
sudo cscli hub update && \
sudo cscli scenarios upgrade --all && \
sudo cscli parsers upgrade --all && \
sudo cscli postoverflows upgrade --all && \
sudo cscli collections upgrade --all && \
sudo systemctl reload crowdsec
This retrieves the latest definitions for scenarios, parsers, enrichments and collections, then reloads CrowdSec cleanly.
Add trusted IPs to the whitelist
If some IP addresses must be completely exempt from blocking (internal servers, load balancers, a personal static IP and so on), add them manually to:
nano /etc/crowdsec/whitelists.yaml
This file can filter by address, subnet or User-Agent and prevents false positives for trusted sources.
Do not modify the original .yaml files
CrowdSec updates its files automatically during upgrades. To preserve your customisations, never modify files such as crowdsec-firewall-bouncer.yaml directly. Use .local variants instead, for example:
/etc/crowdsec/bouncers/crowdsec-firewall-bouncer.yaml.local
This lets you override selected options without breaking future updates.
Monitor logs regularly
Remember to check:
/var/log/crowdsec.log
/var/log/crowdsec-firewall-bouncer.log
And the output of:
sudo cscli metrics
This will help you quickly spot parsing errors or ineffective scenarios.
We allow some readers to view our articles for free with an ad blocker. However, their number is currently too high for us to keep this access available to everyone.
You can disable your ad blocker to continue reading immediately, subscribe to enjoy all our content without ads, or come back a little later when the pressure has eased.
Access will be restored automatically as soon as the situation allows.