
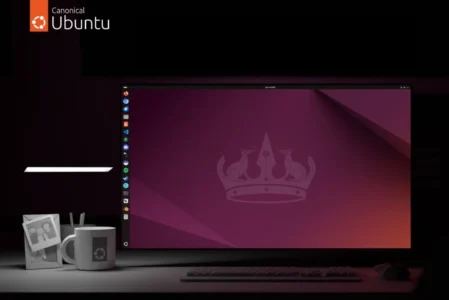
Windows 10 is reaching the end of its support, leaving many users with a choice: move to Windows 11 on incompatible hardware or find a Linux distribution to replace Windows. Ubuntu is a free, easy-to-use distribution that can extend a PC’s life while providing a modern and secure environment. This guide explains how to install Ubuntu instead of Windows 10 step by step.
If you do not want to handle the formatting alone, our workshop installs Linux on old PCs in Nantes and can back up your data.
In this article
Why replace Windows 10 with Ubuntu?
Windows 10 will stop receiving security updates. Continuing to use it increases exposure to vulnerabilities, while Ubuntu provides a free, modern alternative with long-term support through its LTS releases. It is also lighter than Windows and offers free applications for browsing, work, media playback and even gaming.
Prepare your PC before installing Ubuntu LTS
Before starting, check that the computer meets the requirements and back up important data to a USB drive, external disk or cloud service. The installation may erase Windows and your files. Download the latest Ubuntu LTS release from the official website.
Recommended Ubuntu requirements
| Requirement | Minimum | Recommended |
|---|---|---|
| Processor | 2 cores at 2 GHz | 4 cores or more |
| RAM | 4 GB | 8 GB or more |
| Storage | 25 GB free | 50 GB or more, preferably SSD |
| Graphics | 1024 × 768 display | Supported 3D acceleration |
| Internet | Recommended | |
Create the installation USB drive
Transfer the Ubuntu ISO image to a USB drive of at least 8 GB with Rufus on Windows. Select the ISO, use the GPT partition scheme with UEFI as the target system, then click Start. The drive will be erased during the process.
Boot from the USB drive
Restart the PC and open the Boot Menu with the key shown by the manufacturer (F2, F12, Esc or another key). If necessary, disable Secure Boot in the firmware settings. Select the USB drive and choose Try or Install Ubuntu.
Install Ubuntu step by step
1. Choose the language
Select the language for the menus, interface and applications. You can add more languages later in the settings.
2. Configure accessibility
Ubuntu offers options for vision, hearing, typing and pointing. If you do not need them, continue; they can be changed later.
3. Select the keyboard layout
Choose the layout that matches your keyboard and use the test area to check letters, numbers and punctuation.
4. Connect to the Internet
Internet access lets Ubuntu download updates and drivers during installation. You can continue offline, although some components will need to be added after the restart.
5. Try or install Ubuntu
The live mode lets you test Wi-Fi, sound, the display and the graphics card. To replace Windows permanently, select Install Ubuntu.
6. Choose the installation type
Interactive installation guides most users through each step. Automated installation is intended for advanced deployments.
7. Choose the software
The default installation is minimal; the full installation adds LibreOffice, media players and other useful tools. For a first installation, the full option is usually the most convenient.
8. Enable additional software
Enable third-party graphics and Wi-Fi drivers as well as multimedia codecs to improve hardware compatibility.
9. Choose the partitioning method
Warning: “Erase disk and install Ubuntu” deletes Windows and all data. Back up your files before continuing. If you want to keep Windows, use dual boot and manual partitioning.
10. Create your user account
Enter your name, computer name, username and a strong password. Keep the option requiring a password at login enabled.
11. Select your time zone
Select your city or time zone so Ubuntu can set the date, time, currency and other formats automatically.
12. Review before installation
Check the disk, partitioning, software and drivers selected. From this point onwards, changes to the disk are irreversible.
13. Wait for the installation to finish
Ubuntu copies files, creates partitions and installs the system. The process usually takes 10 to 20 minutes. Remove the USB drive when prompted and click Restart Now.
First steps after installing Ubuntu
The Ubuntu desktop includes a dock for applications, a file manager, an App Center and a terminal. It feels familiar to people coming from Windows and can be customized with themes, icons and a different dock layout.
Don’t let the algorithm decide for you
Add Assistouest to your preferred sources on Google so you can find our guides faster when you search for an IT solution.
From Windows 10 to Ubuntu: what to remember
Replacing Windows 10 with Ubuntu is straightforward if you follow the right order: back up your files, create the USB drive, install Ubuntu and configure the system. Ubuntu is a free, secure and durable alternative for many old PCs or computers that are incompatible with Windows 11. If it does not meet your needs, you can also try Linux Mint, Fedora, Arch Linux or Debian.
An error occurred. Please try again in a moment.