Are you installing an AIO cooler and unsure whether to use the CPU_FAN or AIO_PUMP header on your motherboard? Both can power cooling hardware, but they use different speed settings.
On some motherboards, AIO_PUMP runs at full speed by default, while CPU_FAN automatically adjusts fan speed to the CPU temperature. That is why an AIO cooler can become especially noisy when it is connected to the wrong header.
Some models use a single cable to control both the pump and radiator fans, while others let you control them separately.
In this article
What is the difference between CPU_FAN, CPU_OPT and AIO_PUMP?
An AIO cooler uses a pump to circulate coolant and fans to move heat away from the radiator. These parts do different jobs, so their speeds should be controlled accordingly.
Radiator fans speed up as the processor gets hotter. The pump, on the other hand, needs to keep coolant flowing and can run at a steady speed. That is why motherboard makers provide several headers for cooling hardware.
| Header | Purpose | Speed control |
|---|---|---|
CPU_FAN | CPU cooler fan or radiator fans | Based on CPU temperature |
CPU_OPT | Second CPU cooler fan | Often synchronized with CPU_FAN |
AIO_PUMP | AIO cooler pump | Set to full speed by default on some motherboards |
The CPU_OPT header is for a second fan on a dual-fan CPU cooler. It lets the motherboard control both fans without a splitter cable. On many motherboards, it shares the same fan curve as CPU_FAN.
The AIO_PUMP header is intended for an AIO pump. It can use a separate setting from the radiator fans when the pump needs to run at a constant speed.
For example, on the ASUS ROG Strix B650-A Gaming WiFi, CPU_FAN and CPU_OPT are controlled by Q-Fan, while AIO_PUMP is set to full speed by default.
To use these controls independently, your AIO cooler must have separate cables for the pump and the fans.
Where should you connect an AIO cooler with a single PWM cable?
Some AIO coolers use one PWM cable to control both the pump and the radiator fans. In this setup, the motherboard sends the same speed signal to the whole cooling system.
Connect this cable to CPU_FAN to use speed control based on CPU temperature. When the processor gets hotter, the PWM signal increases and the AIO components speed up. As the temperature falls, their speed drops according to the fan curve set in the BIOS.
If your motherboard runs AIO_PUMP at full speed by default, the single cable will receive a constant maximum-speed signal. The fans will then run at full speed even when the processor is under light load.
Where should you connect an AIO cooler with multiple cables?
If your AIO cooler has two separate cables, connect the radiator fans to CPU_FAN and the pump to AIO_PUMP.
The fans will then follow the processor temperature, while the pump keeps its own setting. You can increase fan speed as the CPU heats up without changing the pump speed.
Some models even have three separate controls, such as the ARCTIC Liquid Freezer III with its second cable harness. The pump, radiator fans and VRM fan each have their own PWM connection.
Some AIO pumps are powered directly by the PC’s power supply through a SATA connector and a dedicated controller. On these models, the small cable connected to the motherboard only reports the pump’s rotation speed. The controller or the manufacturer’s software handles speed control.
Why is your AIO cooler so noisy on AIO_PUMP?
I ran into this issue while working on a computer whose cooling system was extremely noisy. The AIO fans were speeding up unnecessarily while it was connected to the motherboard’s AIO header. After moving the cable to CPU_FAN, speed control became much more appropriate and the noise stopped.
This difference comes down to the settings applied to each header. When a single PWM cable controls both the fans and pump, an AIO_PUMP header set to 100% sends a maximum-speed signal to the whole cooling system.
With CPU_FAN, the fans use the processor’s fan curve directly. Their speed increases as the temperature rises and decreases when less cooling is needed.
On motherboards that support it, you can also configure AIO_PUMP to follow a temperature curve. Connecting to CPU_FAN is convenient because a CPU cooling curve is already set up by default.
After correcting the connection, you can monitor CPU temperature and fan speed with software such as HWiNFO64 or HWMonitor. This lets you check that the fans respond correctly as the CPU temperature rises.
Does the BIOS show a CPU FAN Error with an AIO cooler?
Many motherboards check the speed of the fan connected to the CPU header to make sure cooling is present during startup.
If your pump is connected to AIO_PUMP and the fans are connected to a separate controller, no fan-speed signal reaches CPU_FAN. The BIOS may then display CPU FAN Error even though the AIO cooler is working correctly.
To fix this, use the tachometer cable supplied with your AIO cooler or connect the radiator fans to CPU_FAN. This lets the motherboard receive a speed signal and complete its startup check.
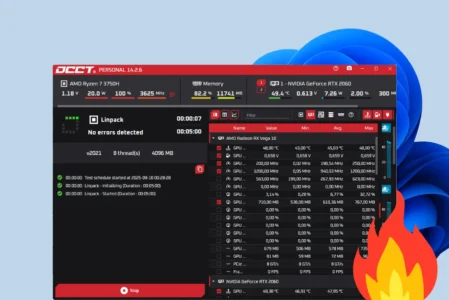
After correcting the connections, you can also run a CPU stress test with OCCT to check temperatures under load. This helps confirm that the AIO cooler removes heat properly and that the fans speed up when the processor is under pressure.
We allow some readers to view our articles for free with an ad blocker. However, their number is currently too high for us to keep this access available to everyone.
You can disable your ad blocker to continue reading immediately, subscribe to enjoy all our content without ads, or come back a little later when the pressure has eased.
Access will be restored automatically as soon as the situation allows.