

Hardware virtualization technologies, such as Intel’s VT-x and AMD’s AMD-V, are essential for running virtual machines with optimum performance. They enable virtualization software such as VirtualBox, VMware or Hyper-V to directly access processor resources for faster instruction execution. These features are not always enabled by default and require BIOS/UEFI intervention. This guide explains how to check and enable hardware virtualization on your PC, so you can take full advantage of virtualized environments.
In this article
Check whether virtualization is enabled on your PC
Before accessing the BIOS/UEFI, it’s best to check whether virtualization is already enabled. Under Windows, follow these steps:
- Open Task Manager andaccess the Performance tab.
- Select Processor and check whether the Virtualization line indicates Enabled or Disabled.
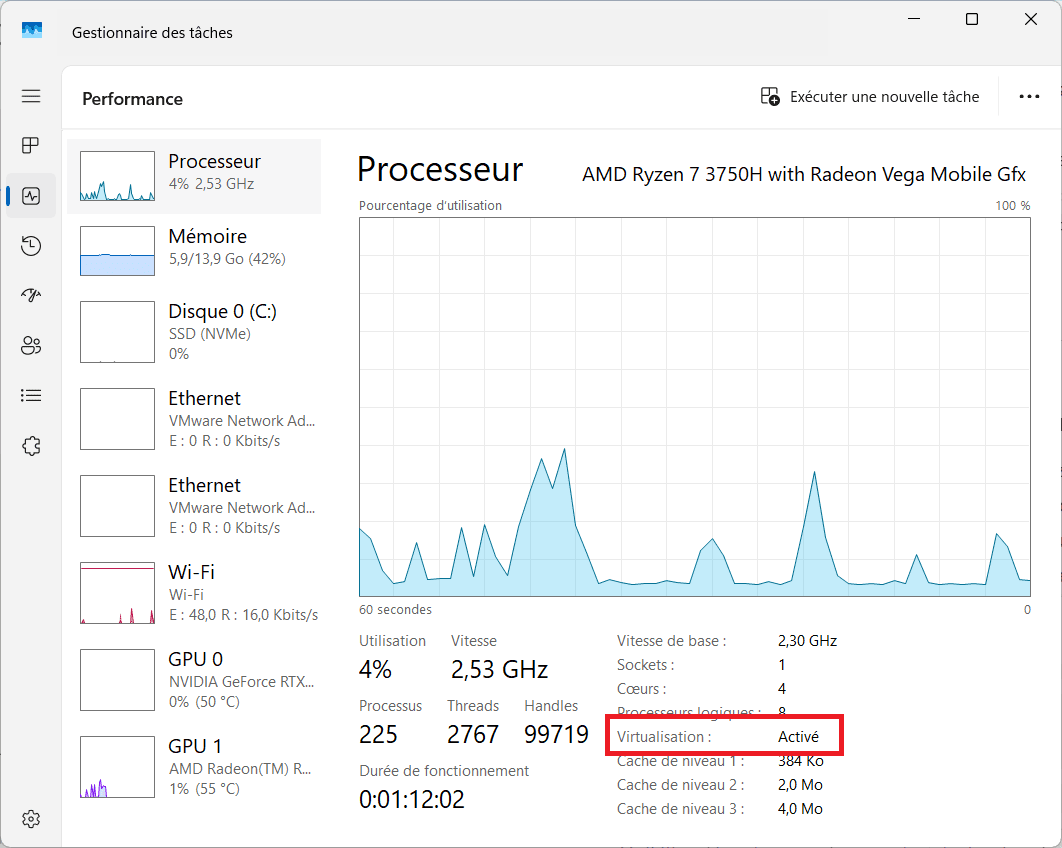
If virtualization is disabled, it must be enabled in the BIOS/UEFI.
Enable VT-x or AMD-V hardware virtualization in BIOS/UEFI
- Restart your PC.
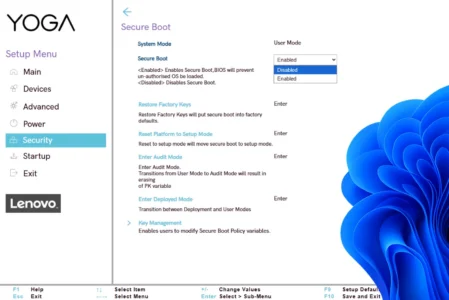
- Access BIOS/UEFI by pressing the key corresponding to your motherboard at boot-up(Suppr, F2, F10, or Esc depending on the model).
Discover the list of BIOS / UEFI access keys by manufacturer.
- Once in BIOS/UEFI, navigate to the Advanced or CPU Configuration tab.
- Search for Intel (VMX) Virtualization Technology or AMD SVM Mode (depending on your processor) and enable this option (Enabled).
- Save your changes and restart your PC.
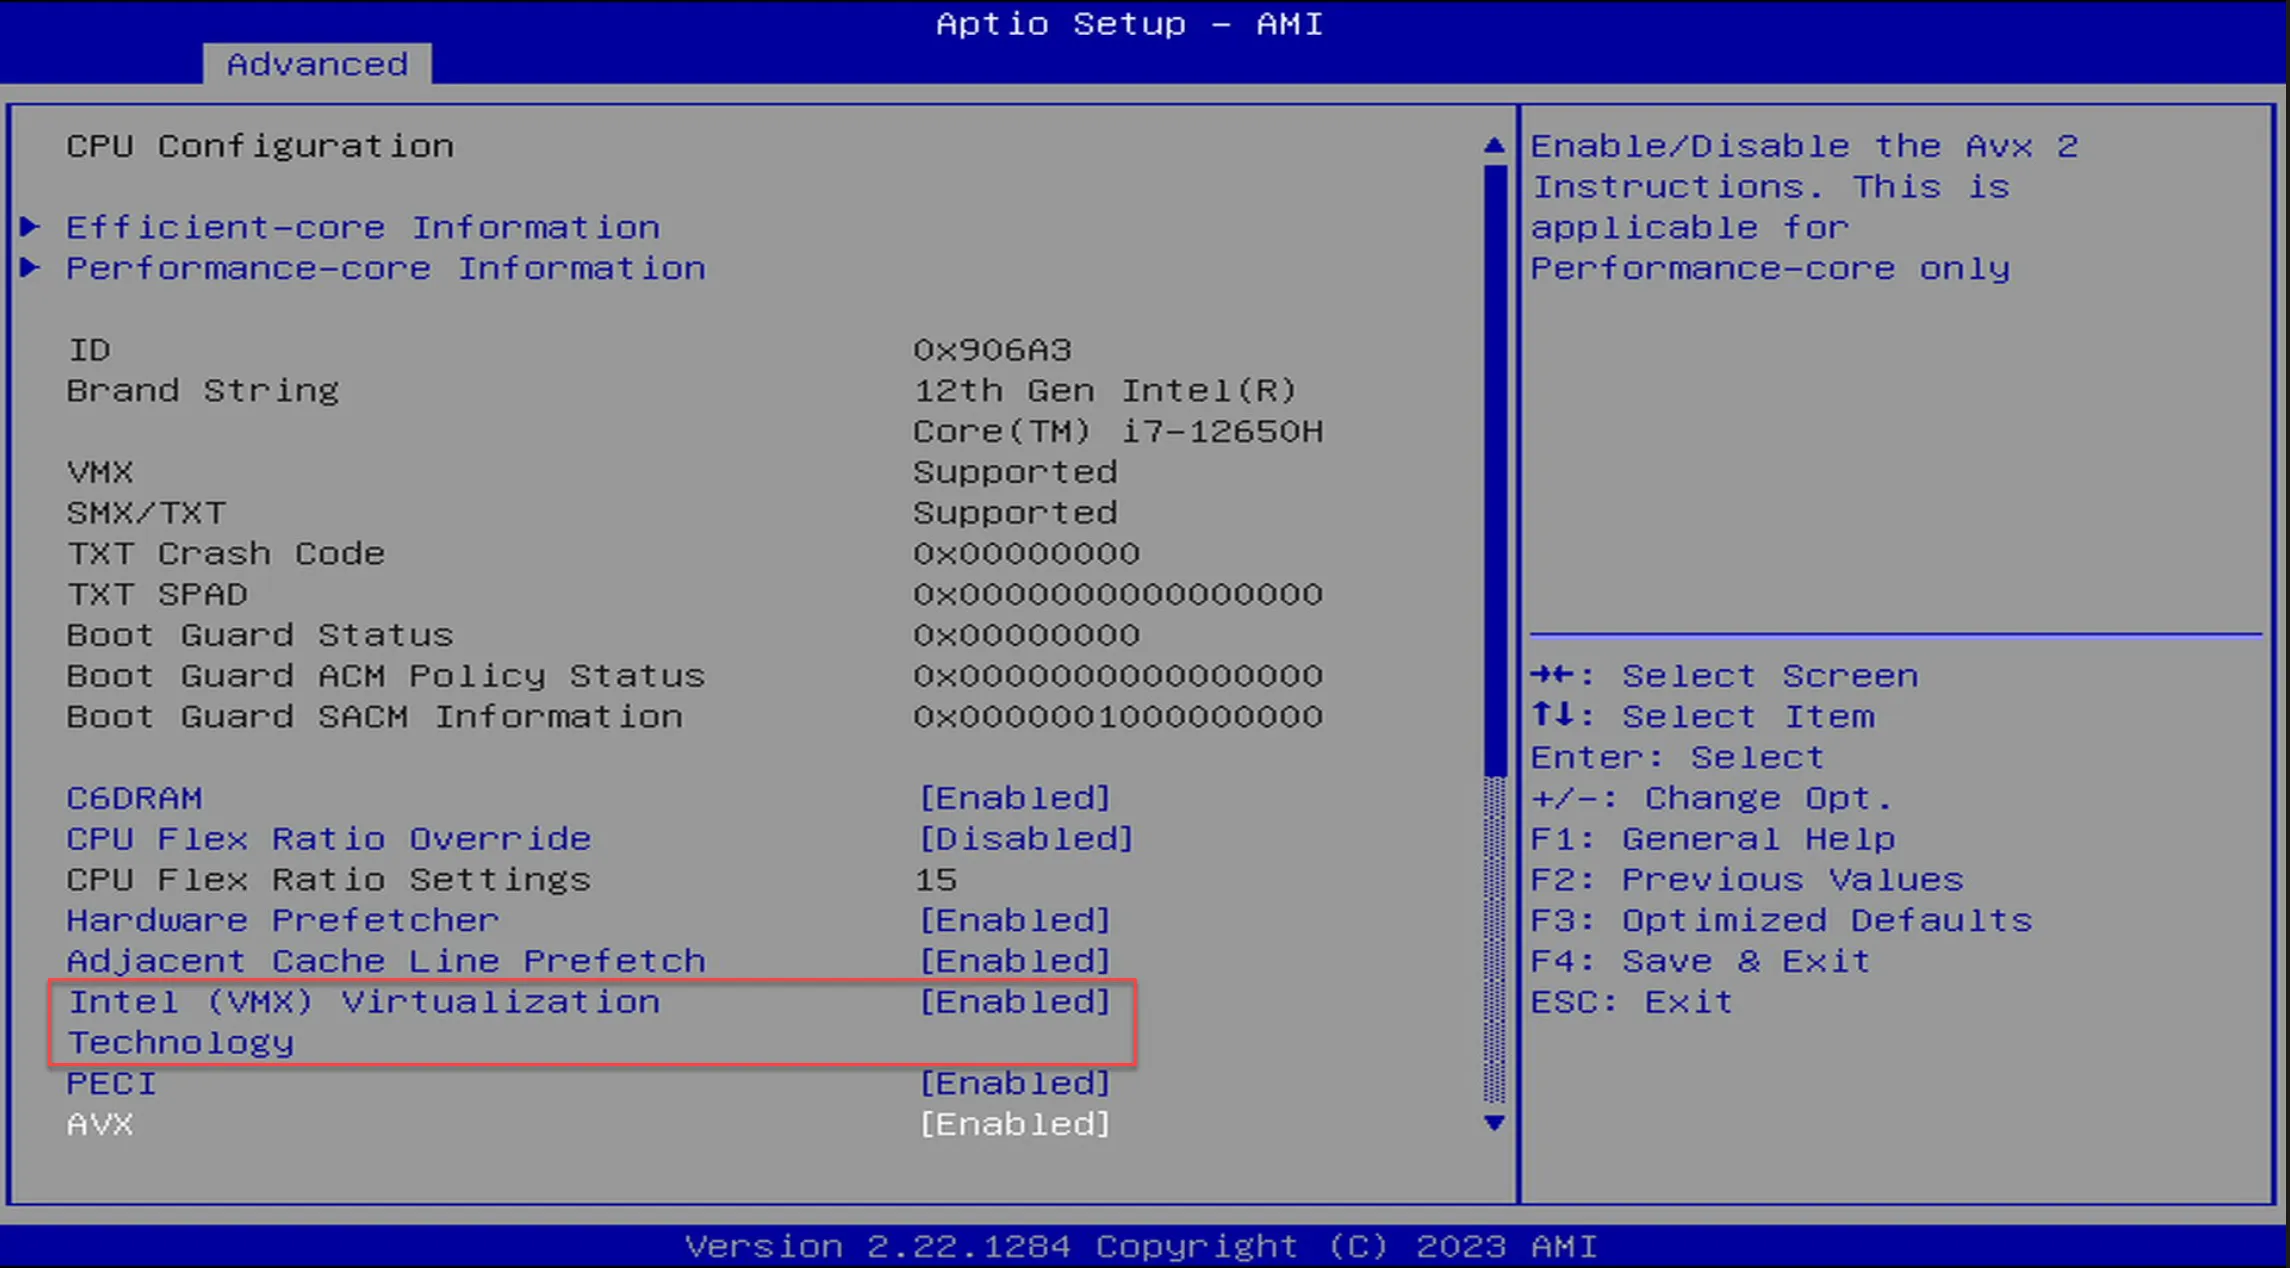
Once you’ve followed these steps, you can check again in the Task Manager that virtualization has been enabled.
Activate Hyper-V and the Virtual Machine Platform under Windows
Hyper-V is a virtualization technology integrated into Windows that lets you create and manage virtual machines. To use it, you need to activate certain functions. Here are the detailed steps for activating Hyper-V and the Virtual Machine Platform under Windows 10 and 11.
Find out how to install Hyper-V on a Windows Home Edition.
- Open the Control Panel.
- Go to Programs > Enable or disable Windows features.
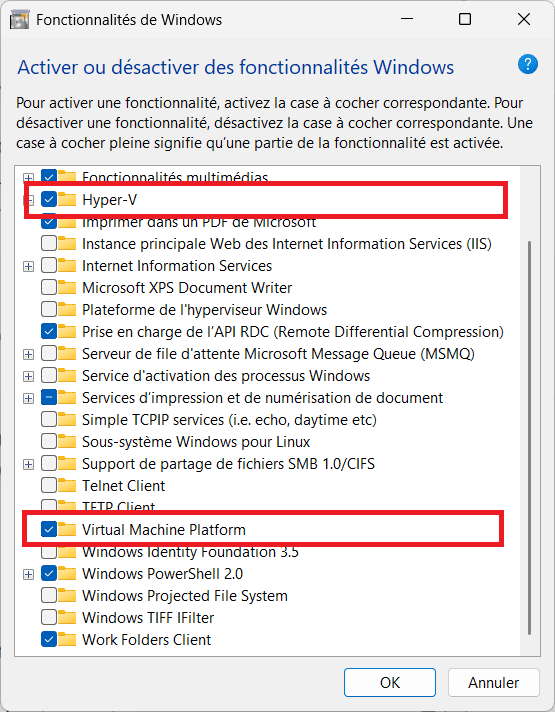
- Click OK, then restart your PC.
We allow some readers to view our articles for free with an ad blocker. However, their number is currently too high for us to keep this access available to everyone.
You can disable your ad blocker to continue reading immediately, subscribe to enjoy all our content without ads, or come back a little later when the pressure has eased.
Access will be restored automatically as soon as the situation allows.